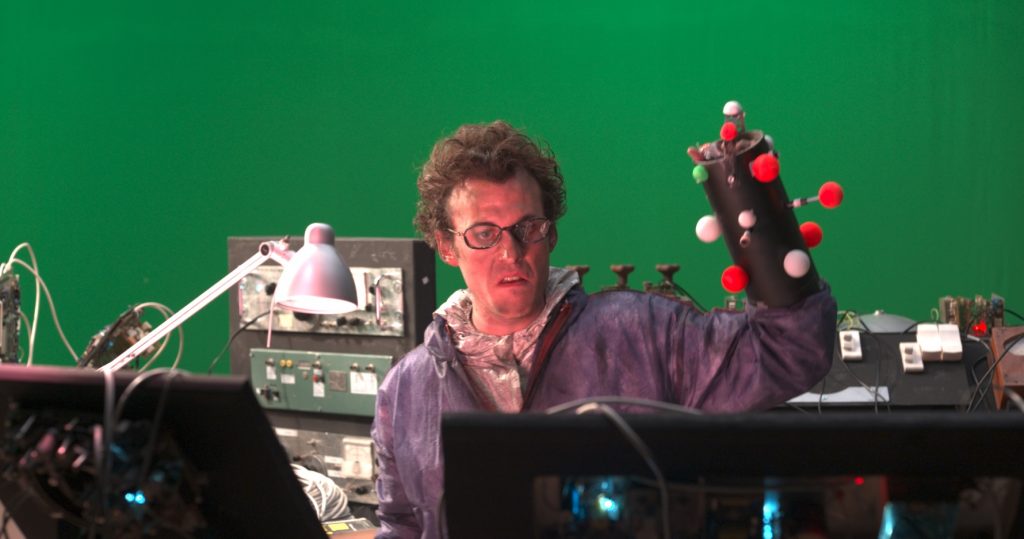
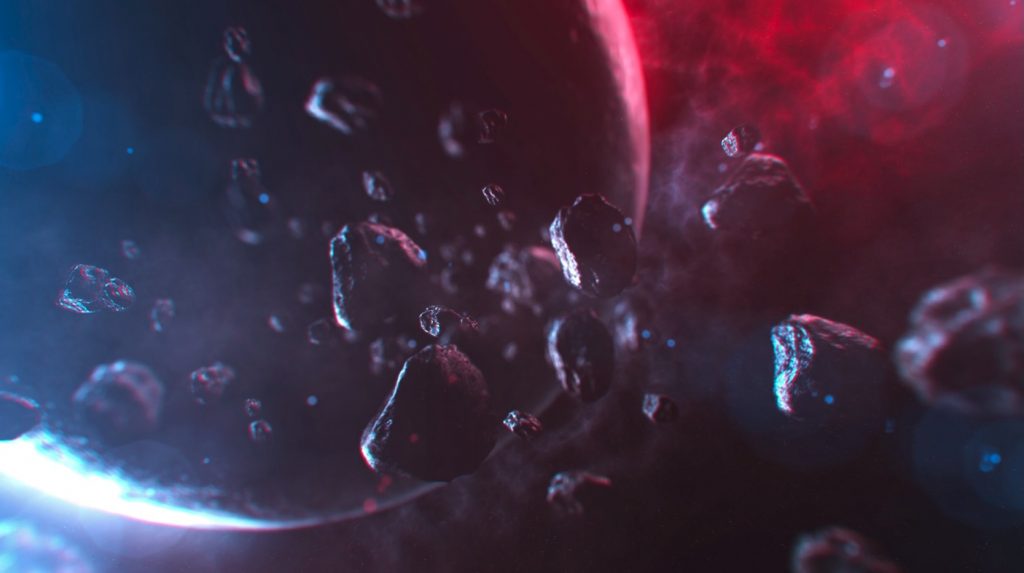
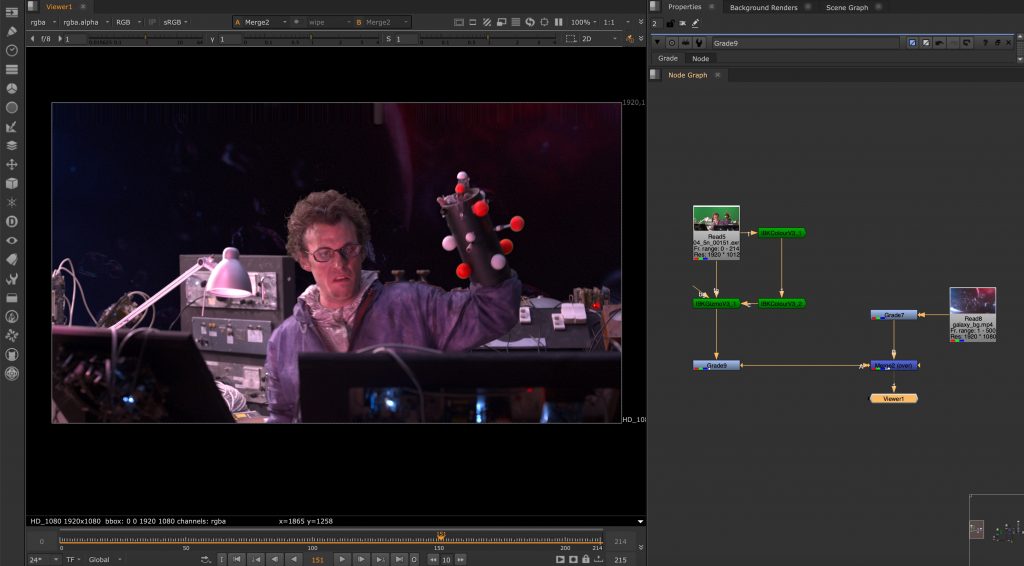
For our homework in Nuke, we worked on a green screen compositing exercise. The task involved removing the green screen background from footage of a person filmed in a lab environment and replacing it with a different background.
During the process, we experimented with different keying techniques, including IBK and other keyers, to achieve a cleaner separation between the subject and the background. This helped us understand how important lighting, color balance, and edge details are when creating a believable composite.
The exercise showed how compositing is not just about removing a background, but also about blending elements together so the final image feels natural and visually consistent.
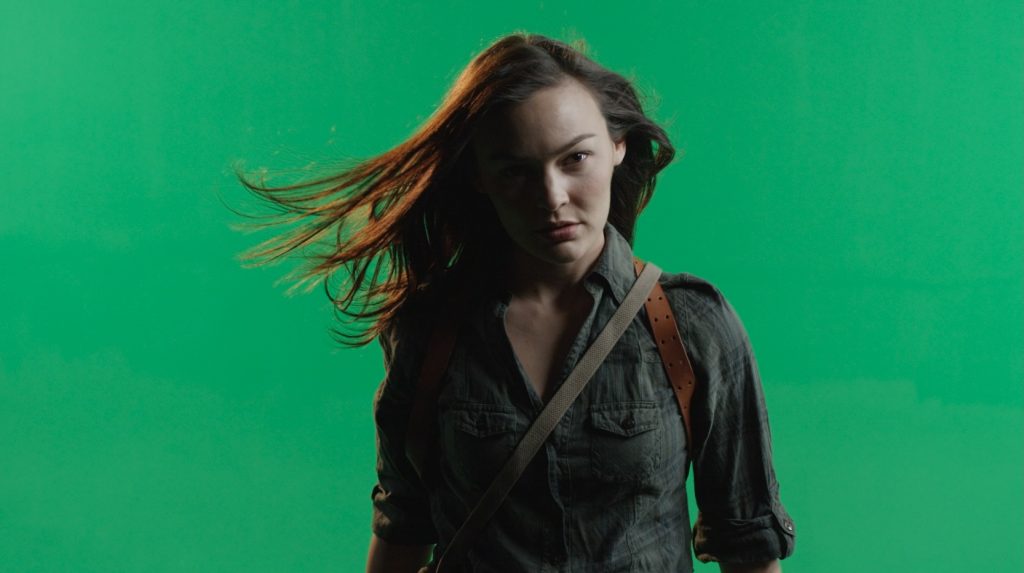
Green screen removal task 2:
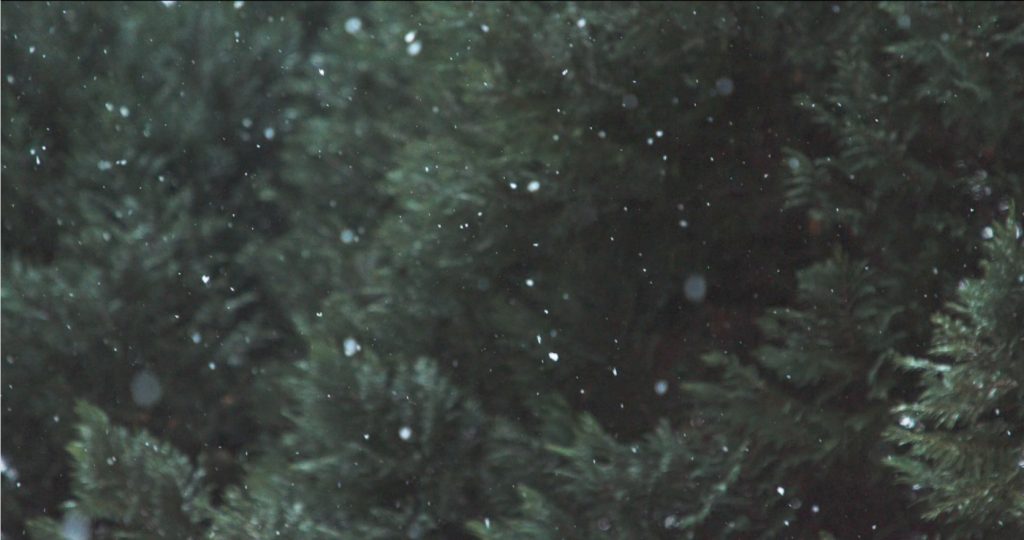
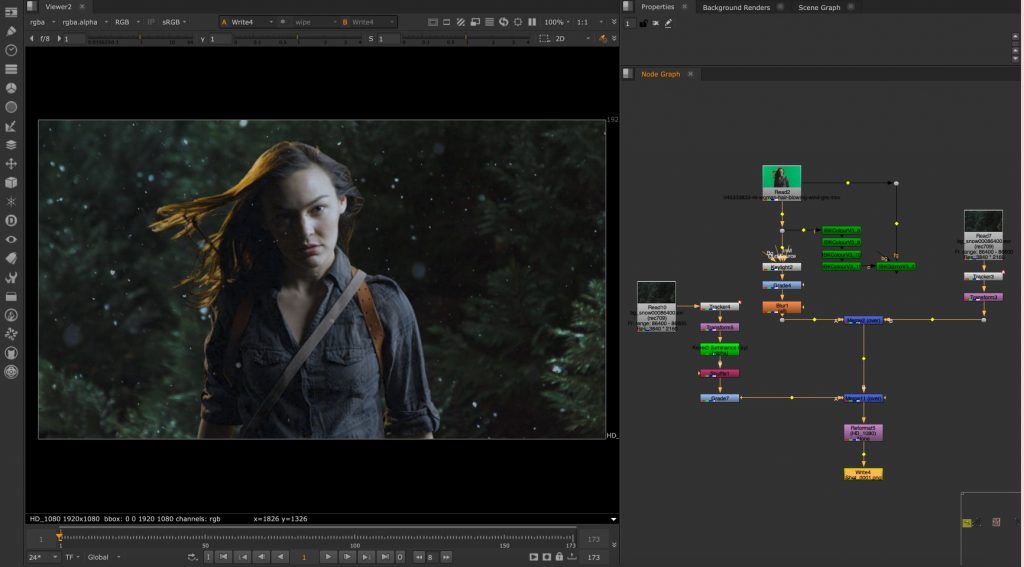
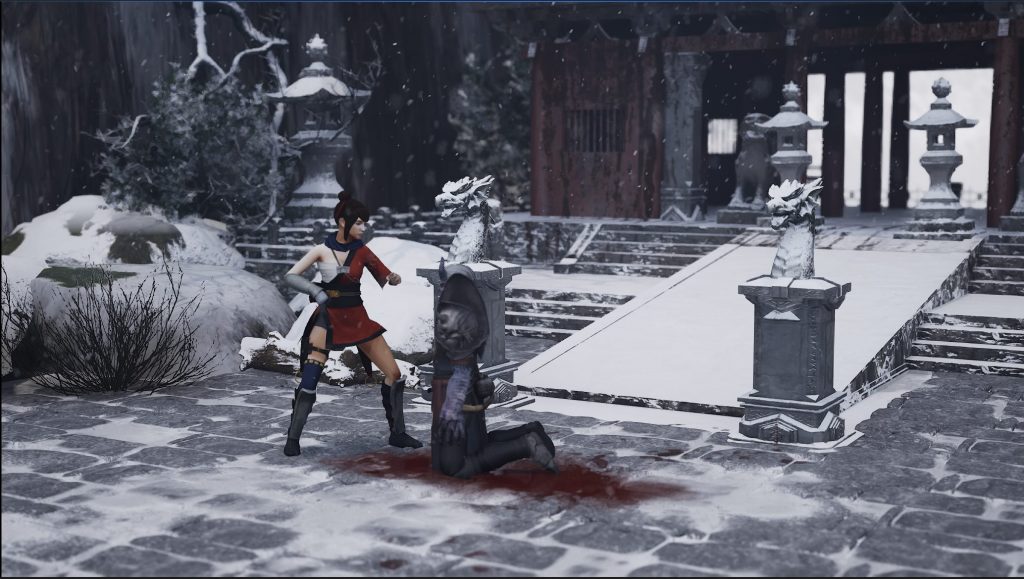
For the second homework in Nuke, we worked on a more advanced green screen compositing exercise. The footage showed a woman with long hair moving in the wind while snow was falling around her.
This project was more complex than simply removing and replacing the background. Besides creating a clean key for the subject, we also had to separate the snow so that some particles appeared behind her and others in front of her. This helped create a stronger sense of depth and made the final composition feel more realistic and immersive.
The movement of the hair and the overlapping snow made the keying process more difficult, since fine details and transparency had to be preserved carefully. Through this exercise, we explored more advanced compositing techniques and gained a better understanding of how layered visual effects are built.
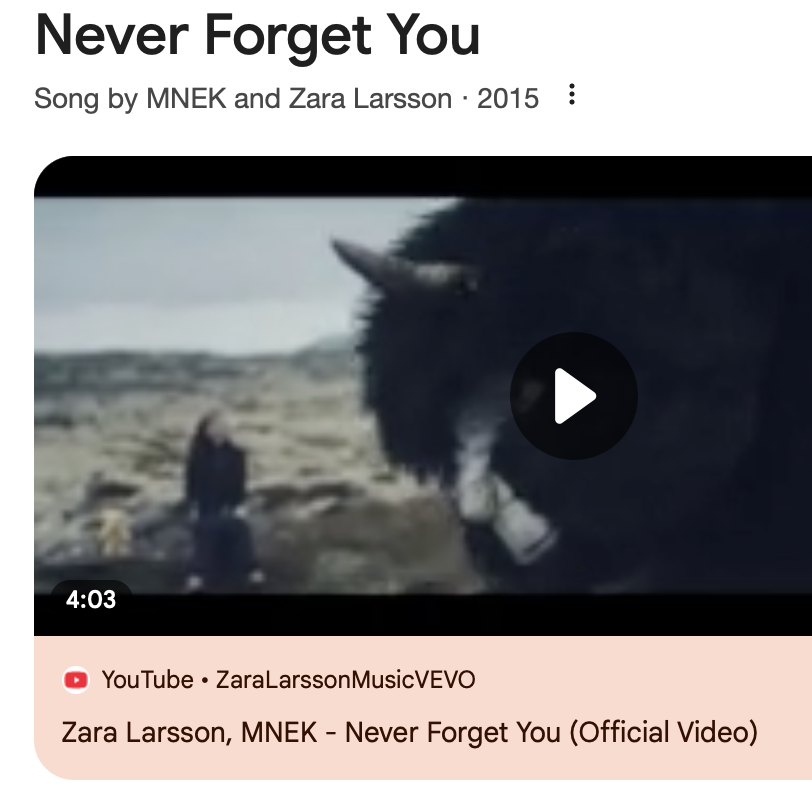
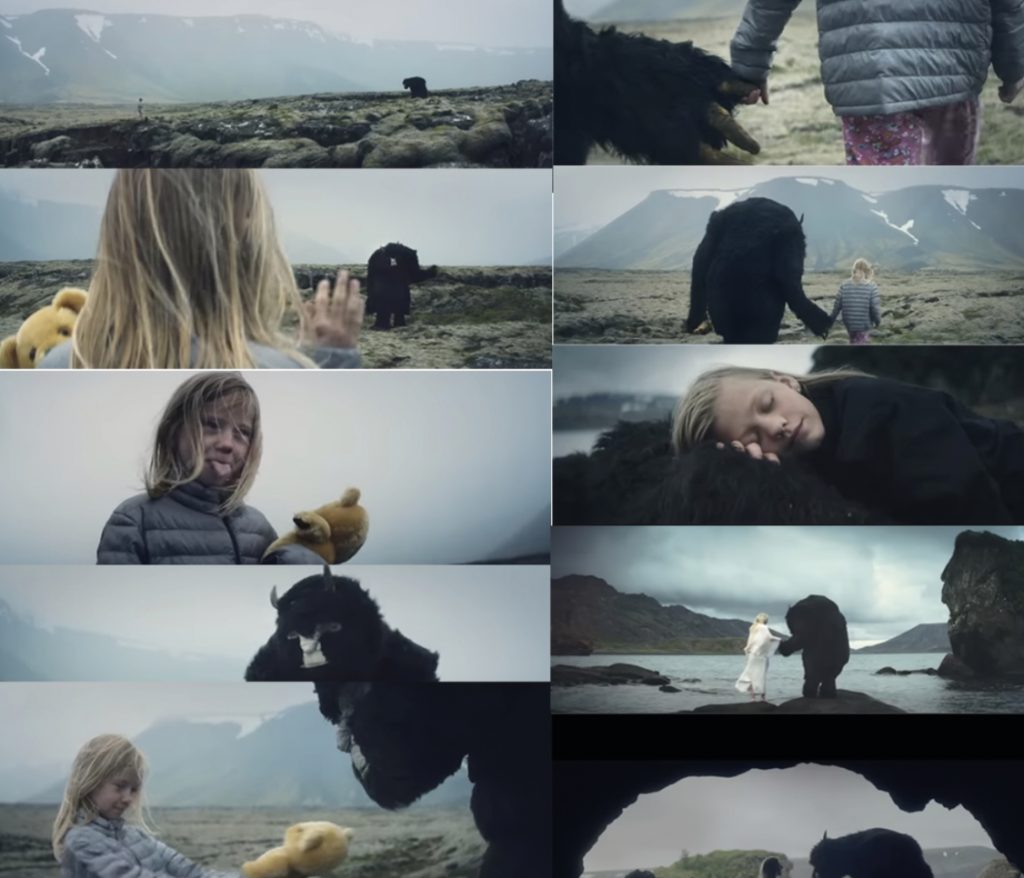
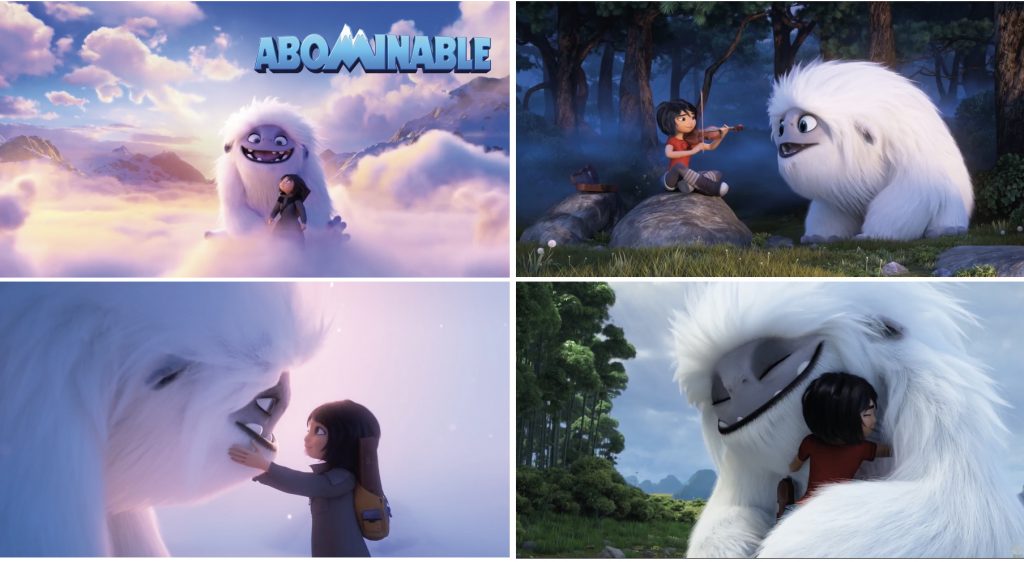
For my exploratory individual project, I began by researching visual references and narrative ideas that focused on the relationship between humans and creatures. I was particularly inspired by a music video by Zara Larsson that explored the connection between a girl and a monster as they gradually became friends. I was also heavily influenced by the animated film Abominable, which tells the story of a friendship between a young girl and a yeti. The emotional connection between the characters and the visual style of the film strongly inspired the direction of my project.
VisualResearch:
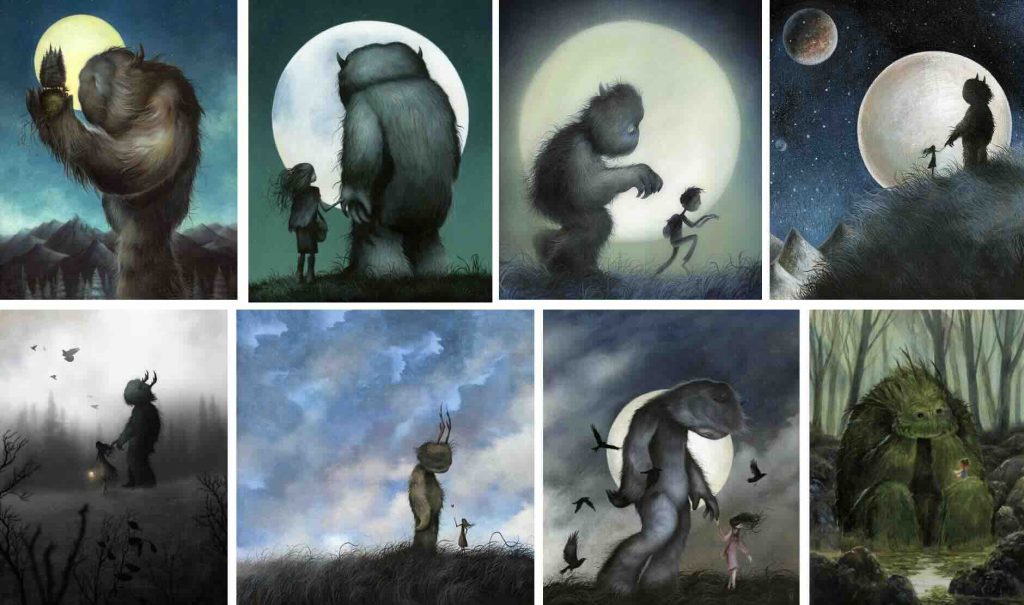
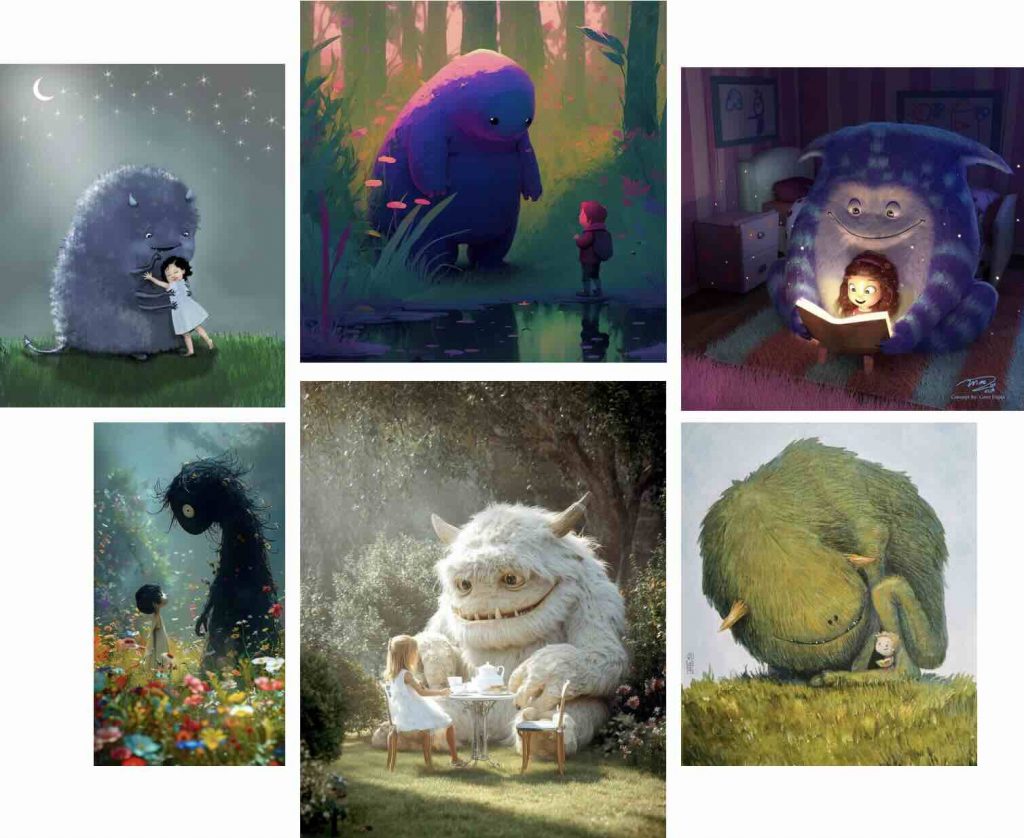
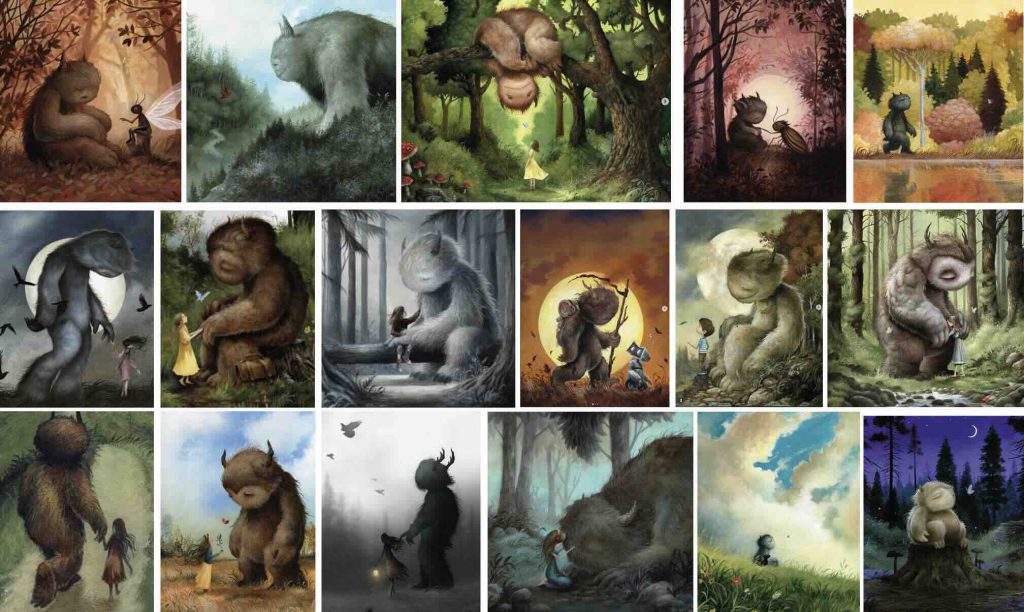
To develop my ideas further, I researched references on platforms such as Pinterest and Instagram, focusing on creature designs, fantasy environments, and the relationship between monsters and their human companions. During this research process, I discovered an Instagram artist whose work particularly inspired me visually and helped influence the atmosphere and aesthetic direction of the project.
Concept Art:
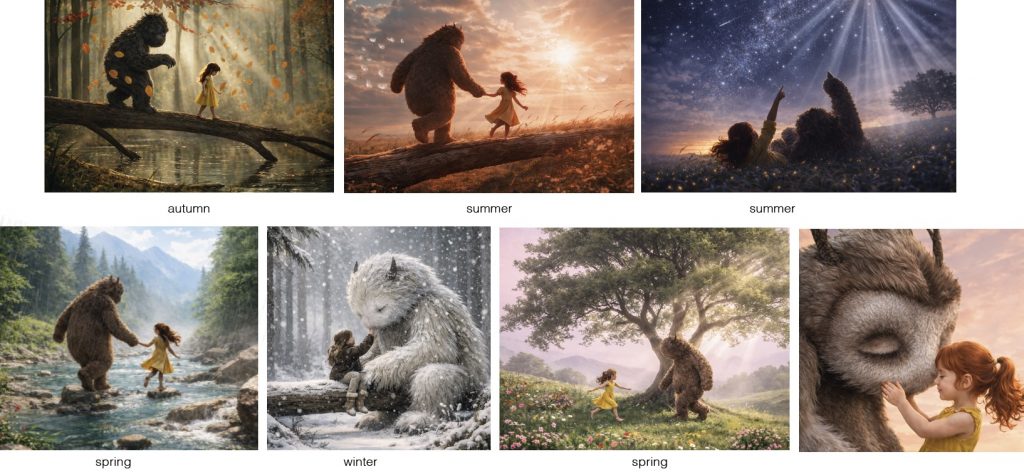
After researching monster imagery and creature–human relationships, I began generating AI images to help develop the visual direction of the project. Instead of creating traditional sketches, I used AI-generated imagery to build a storyboard showing interactions between a young girl and a monster. This process helped me visualise the environments, colour palettes, lighting, and overall mood much more clearly. Using AI-generated concepts allowed me to quickly experiment with atmosphere and composition before deciding on a final storyboard direction.
Final Storyboard:
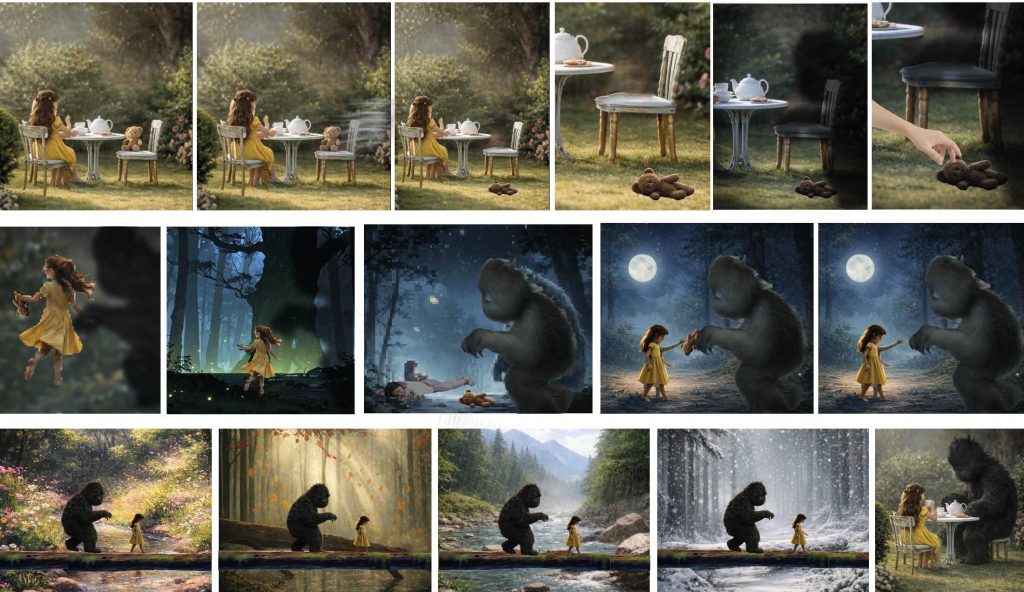
The final storyboard: a young girl is having tea in her garden with her teddy bear when the teddy bear falls to the ground. A large shadow appears, and the girl quickly reaches out to rescue the teddy bear before running away in fear. She runs into the woods, becoming increasingly panicked until she trips and falls. Believing the monster is going to hurt her, she instead discovers that the creature gently picks up her teddy bear and returns it to her. The storyboard then transitions into a sequence showing their friendship developing over time as the seasons change around them, highlighting the passage of time and the growing bond between the girl and the monster. The story ends by returning to the opening scene of the girl having tea in the garden, but this time the monster is sitting beside her, replacing the teddy bear and showing how their friendship has fully developed.
Environment Design:
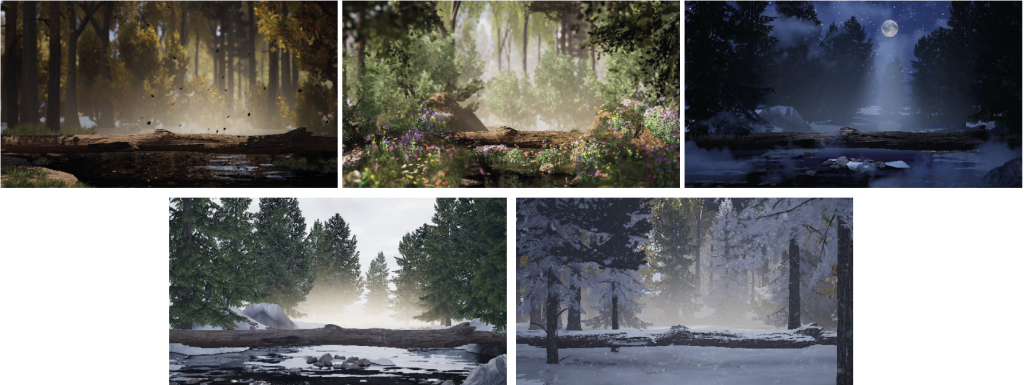
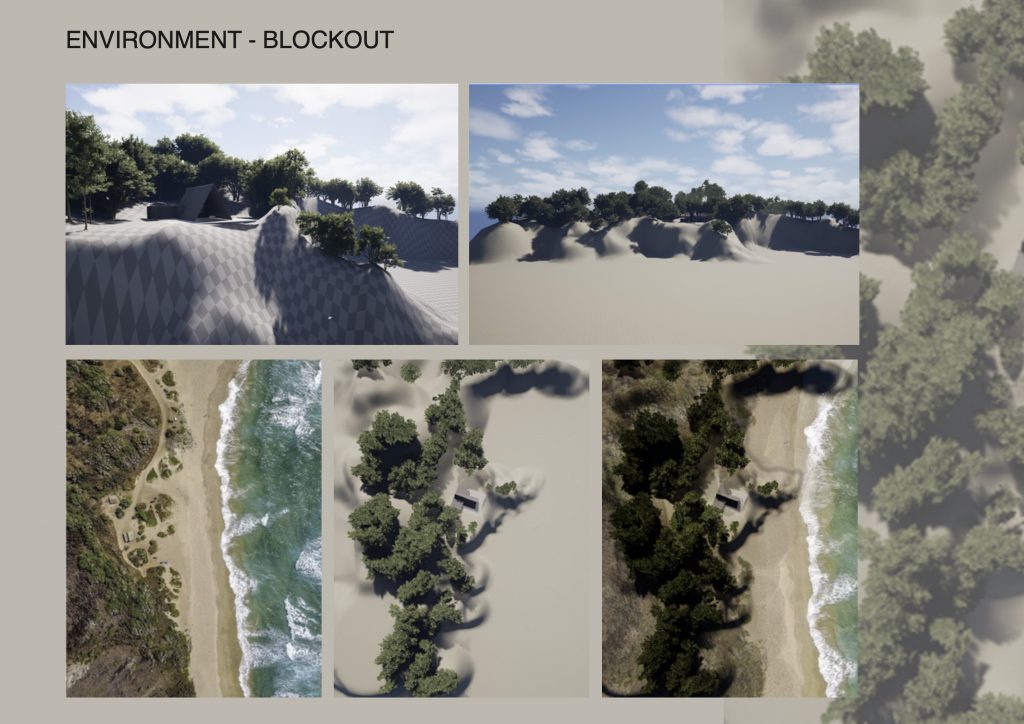
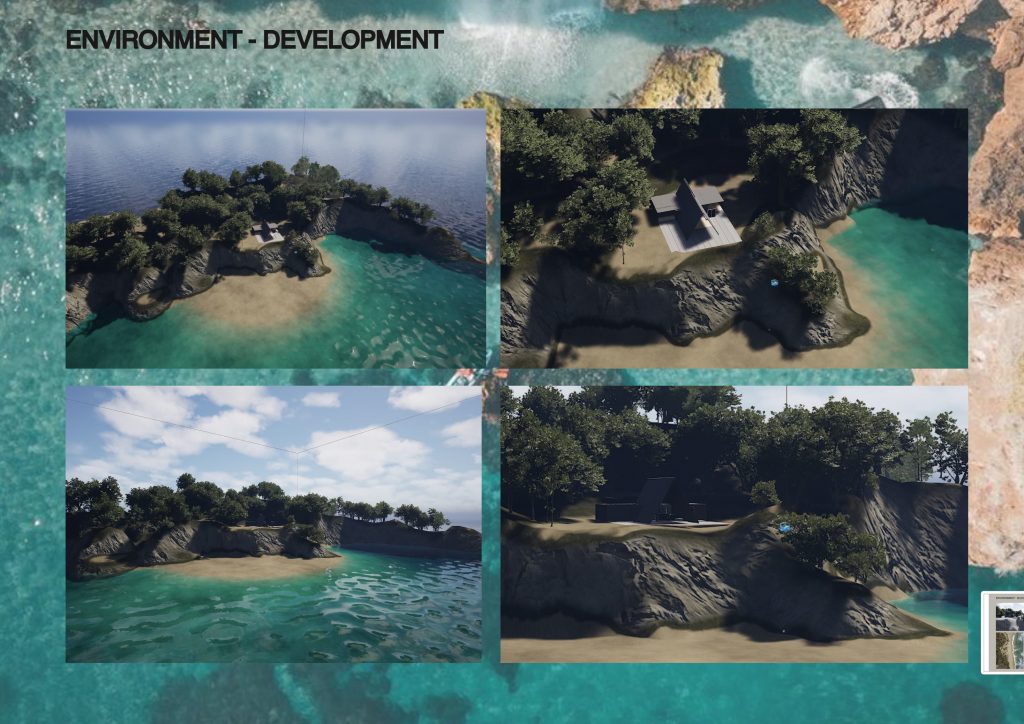
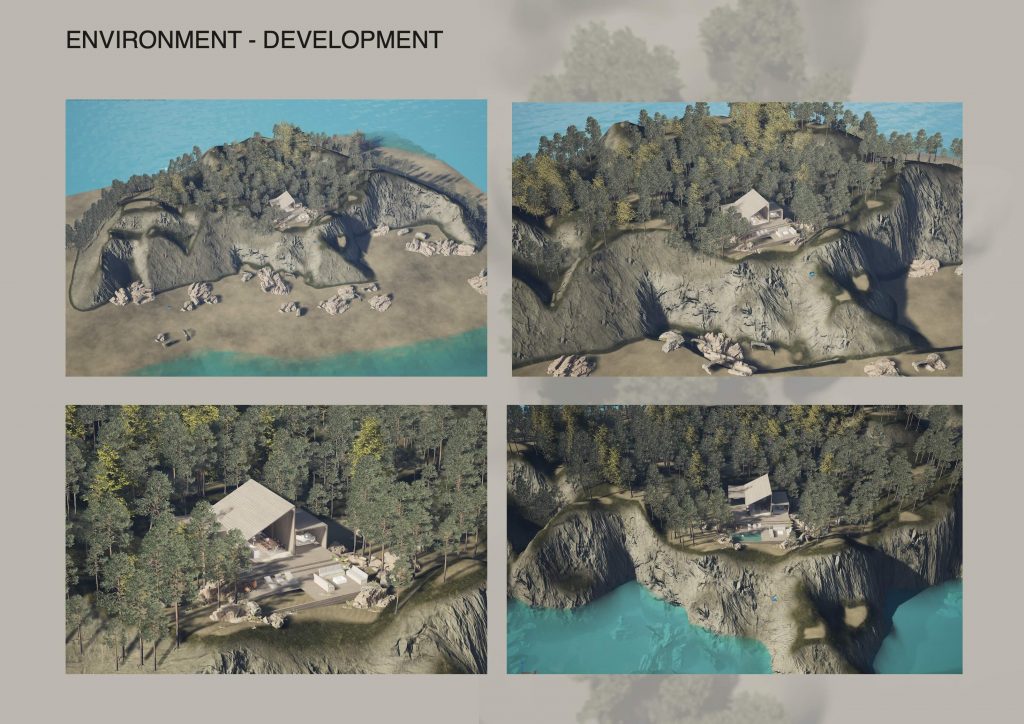
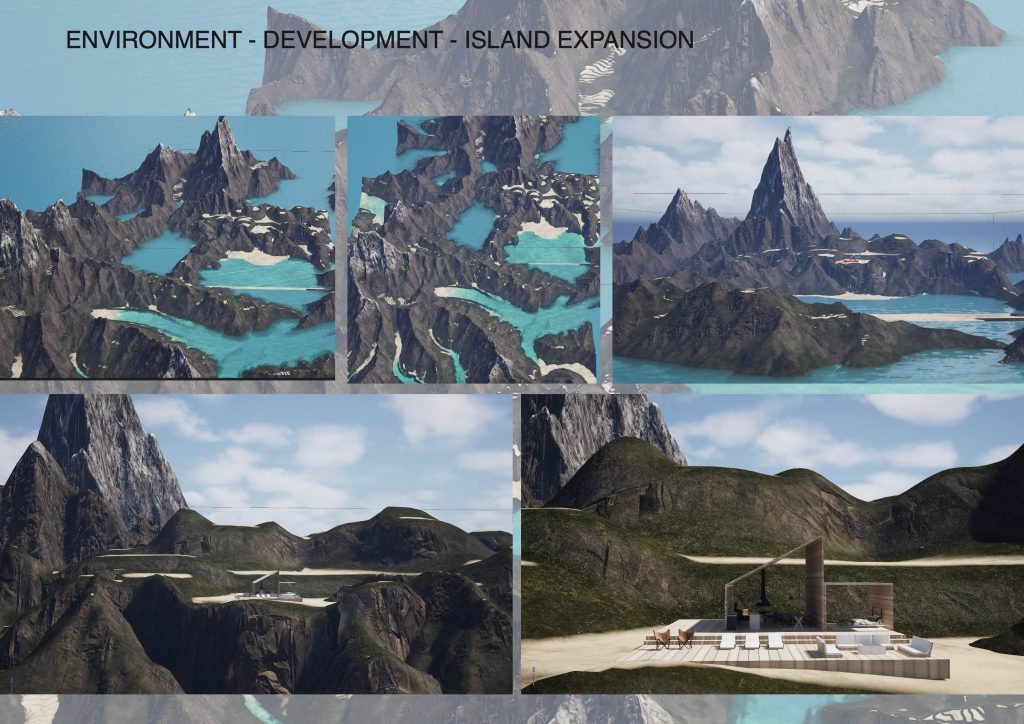
Once the storyboard was established, I moved into environment development in Unreal Engine. I created five different environments using Megascans assets and additional 3D models to explore possible locations and moods for the story.
Testing Scale and Composition:
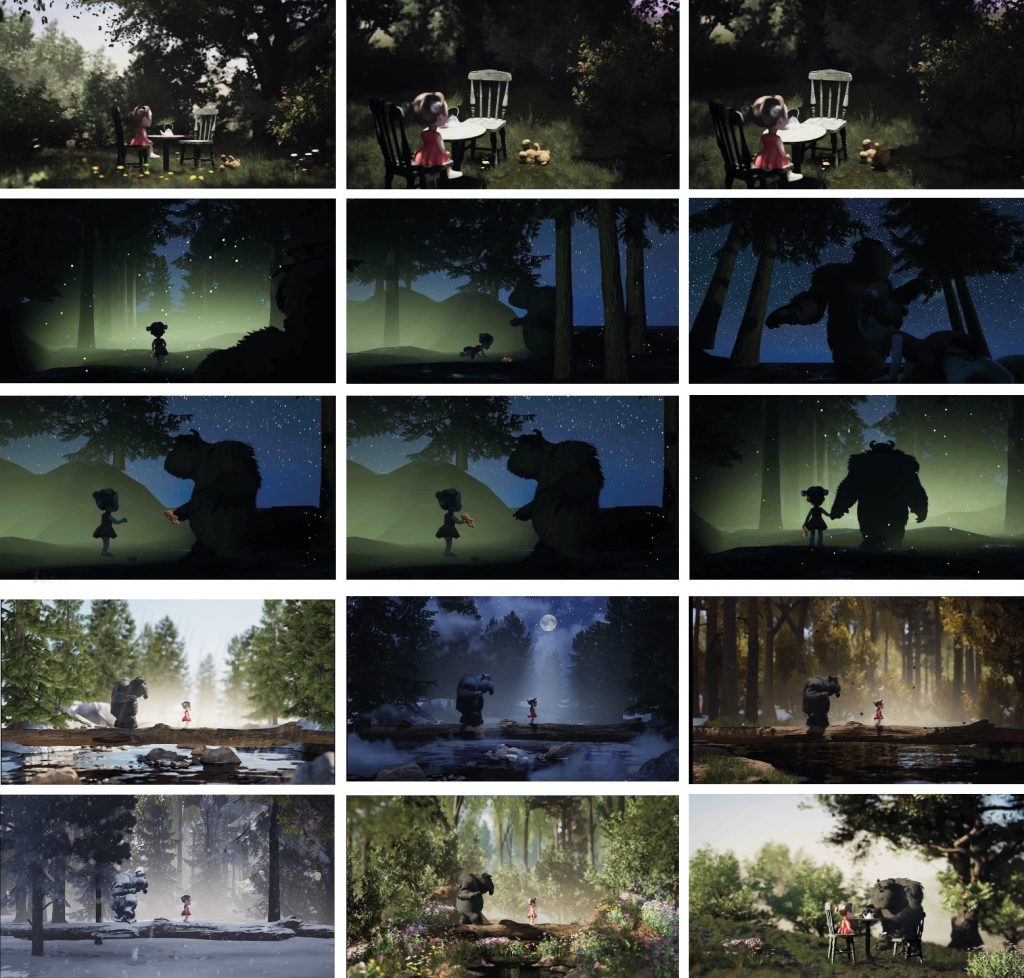
To test scale and composition within these environments, I temporarily placed a creature model asset (Sulley from monster’s Inc) alongside a young girl character. This helped me understand how the characters would occupy the space and interact visually within the scenes. However, the final intention is to design and model my own original monster character rather than using an existing asset.
Lion King Inspiration:
A major inspiration for the storytelling and transitions came from The Lion King, particularly the sequence showing Simba growing up while walking across the landscape. I was inspired by the emotional progression and smooth visual transitions used in that scene, and I wanted to create a similar feeling of growth and passage of time within my own project.
Testing Transitions:
To test how these transitions would work, I created a rough animatic sequence and added sound design to explore the pacing, atmosphere, and emotional flow between scenes. This helped me understand how the visuals and audio could work together to strengthen the storytelling.
3D Storyboard:
I then began building rough 3D versions of the opening scene and forest environment. These early models were not intended to be final designs, but instead acted as visual prototypes to help shape the story structure, camera angles, and environmental layout before moving into more detailed environment building.
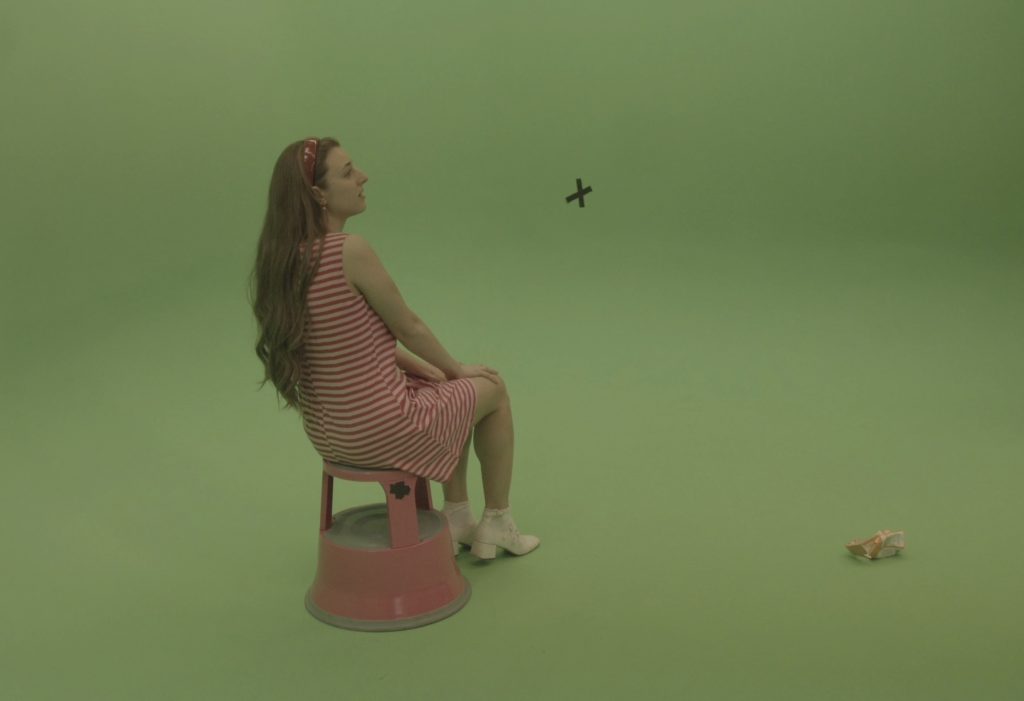
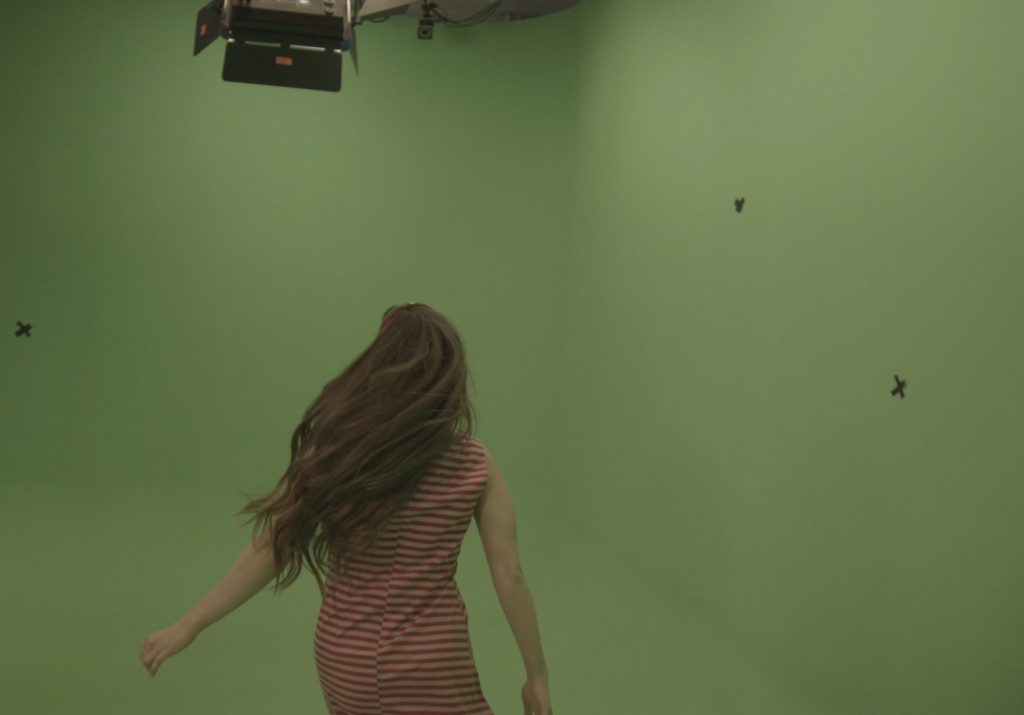
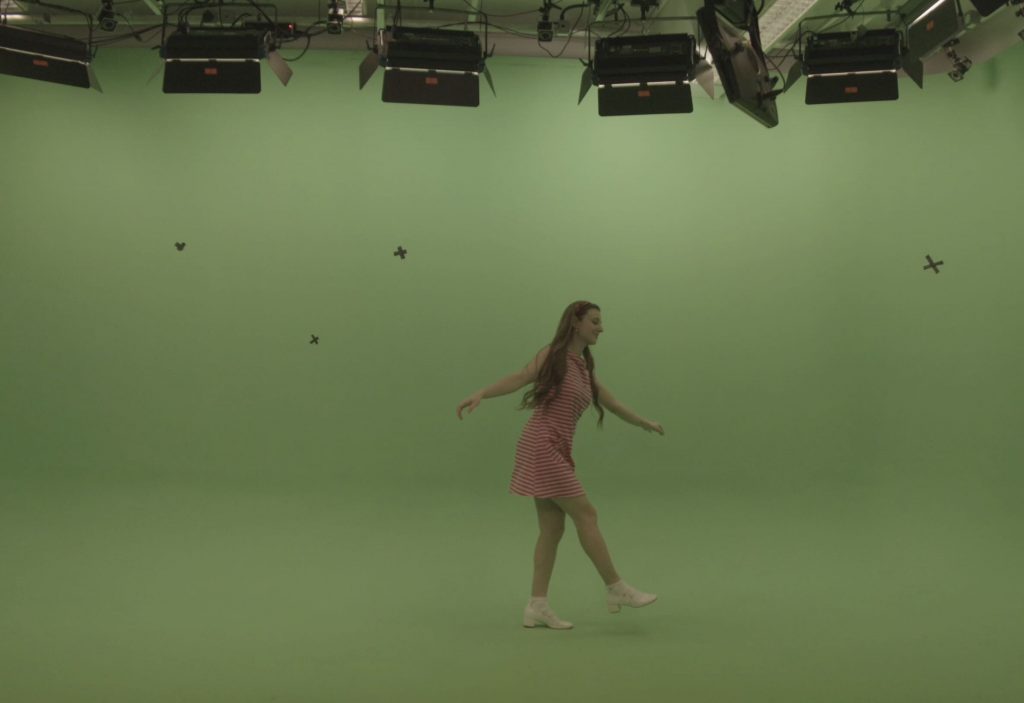
Green Screen Shoot:
As part of the production process, I also organised a green screen shoot for the live-action footage. Since I did not have access to a child actor, I performed the role of the young girl myself in order to test the concept and continue developing the project. Although I understood that I did not physically resemble the intended age of the character, this approach allowed me to experiment with performance, composition, and integration between live-action footage and the digital environments while working within the limitations of the project.
Compositing:
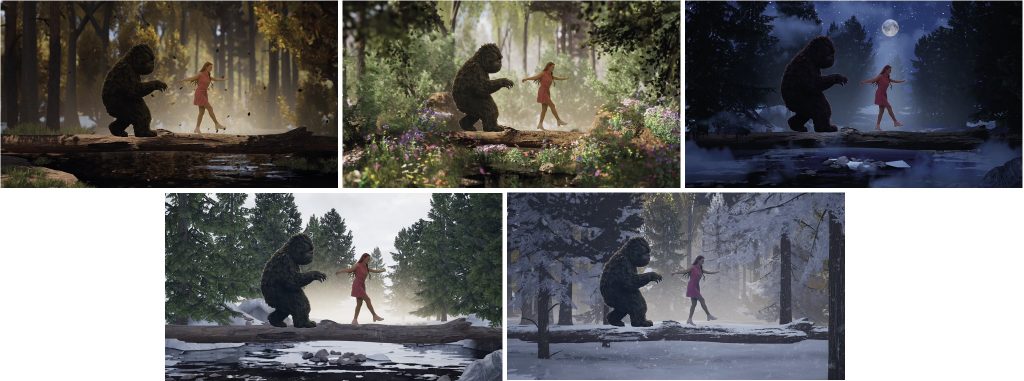
After developing the environments and filming the green screen footage, I moved into Nuke to begin testing the compositing process. I selected one of the environments created in Unreal Engine and removed the green screen from the live-action footage in order to place the character into the digital scene. This was an early compositing test designed to evaluate scale, framing, and how naturally the footage integrated into the environment. At this stage, the scene was not yet fully colour graded or refined, as the main purpose was to explore the initial visual relationship between the live-action element and the 3D environment.
After completing the first test, I experimented with placing the footage into the other four environments to compare how the character interacted with different spaces and atmospheres. I also added a temporary monster image into the scenes and tracked it within Nuke to test positioning, movement, and composition alongside the live-action footage. These tests helped me understand how the monster and human character could coexist within each environment and allowed me to evaluate which settings created the strongest visual and emotional impact for the story.
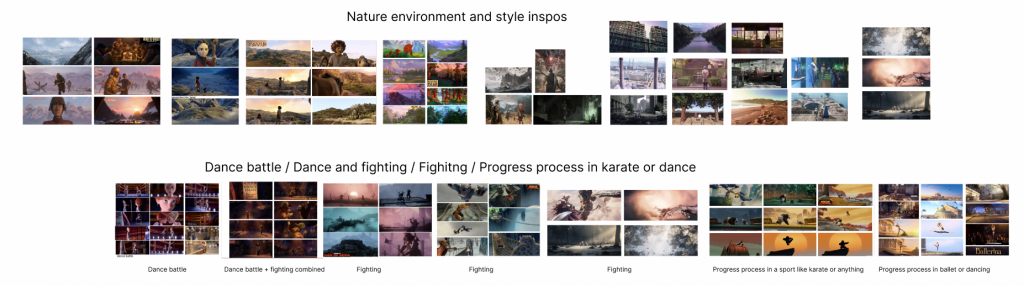
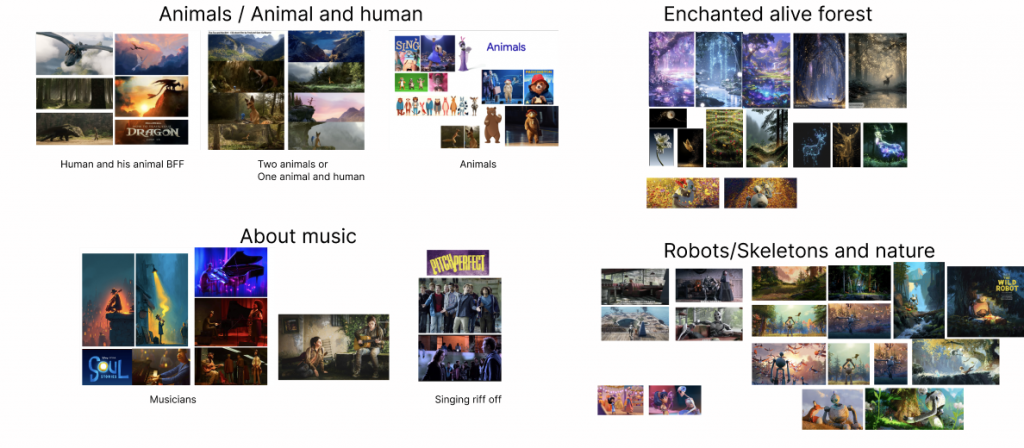
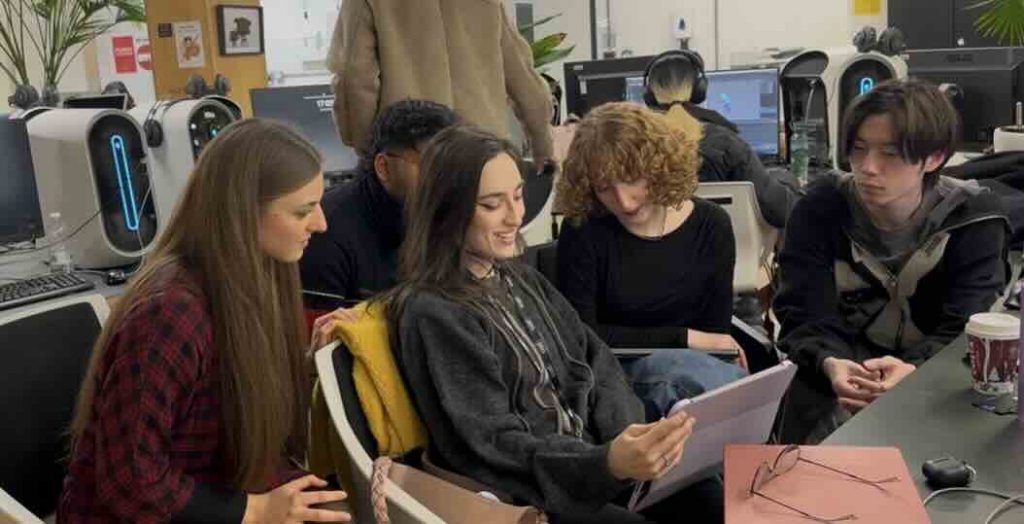
For our group project, our team consisted of five members: four VFX students — Nora, Aniela, Sahil, and Lex , and one animation student, Maria. From the beginning, we wanted the project to feel visually strong and emotionally engaging, so we started by collaborating on a shared Figma board where we collected references, ideas, and visual inspirations. At this stage, we kept our options completely open and explored a wide variety of themes, art styles, stories, and cinematic looks before narrowing down our direction.
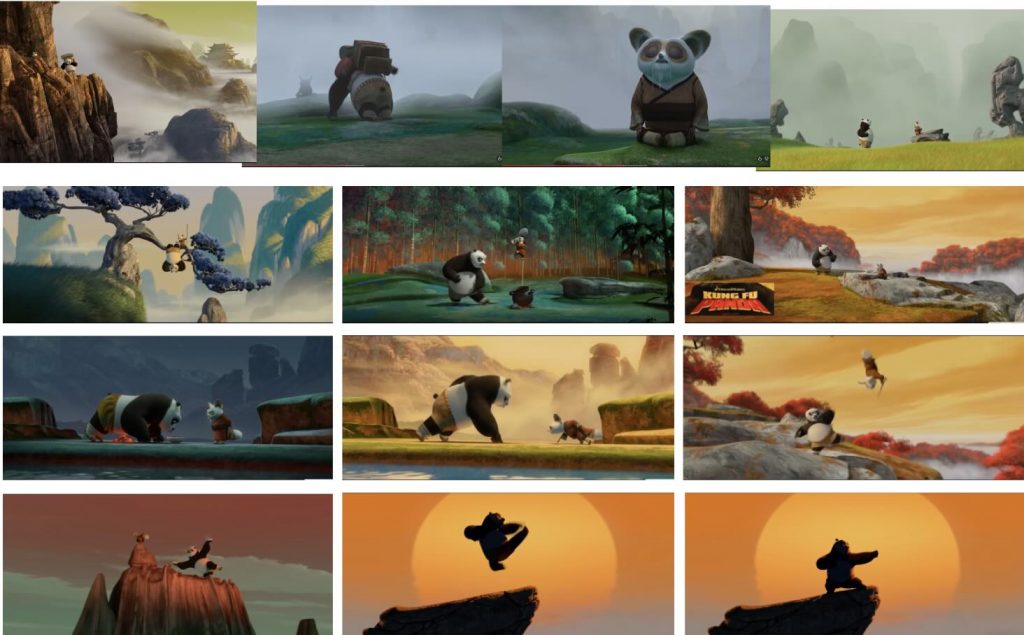
Kung Fu Panda as main inspiration:
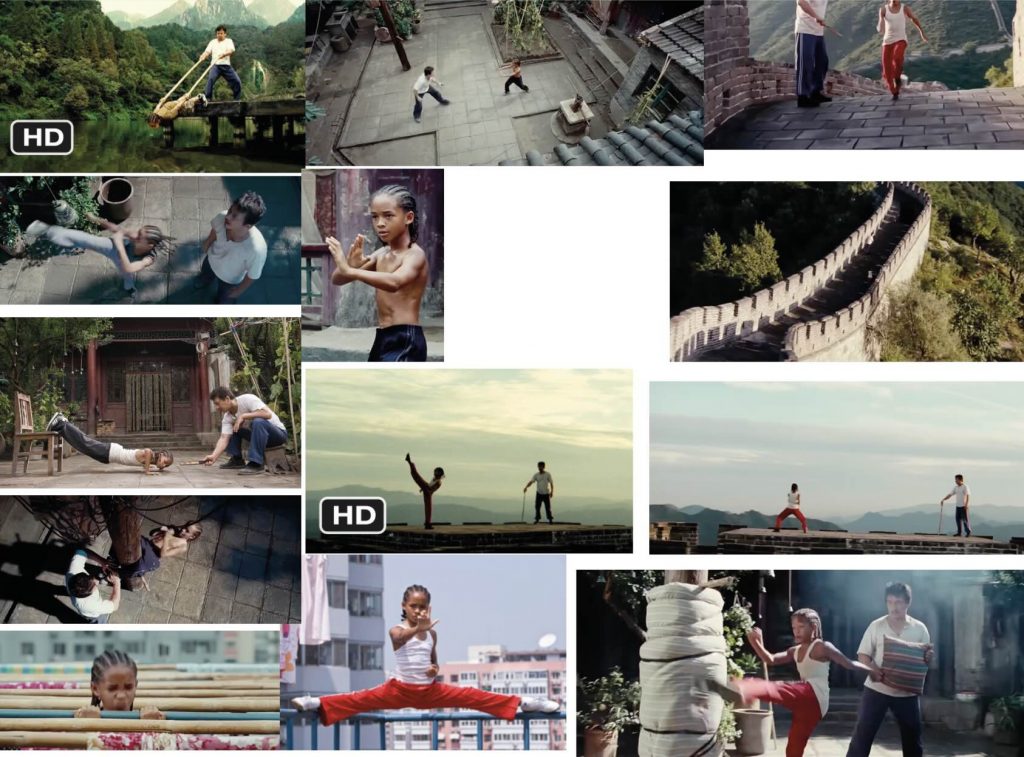
A large part of our research focused on animated films and video games, both visually and narratively. After many discussions and research sessions, we found ourselves most inspired by films such as Kung Fu Panda and The Karate Kid. What stood out to us was the idea of growth through discipline and training. In Kung Fu Panda, we were inspired by Po’s journey from being completely inexperienced to becoming confident and powerful through persistence and self-belief. We also looked closely at the training montage in The Karate Kid, where the progression of learning is shown through physical repetition and gradual improvement. That sense of transformation became central to our concept.
Script:
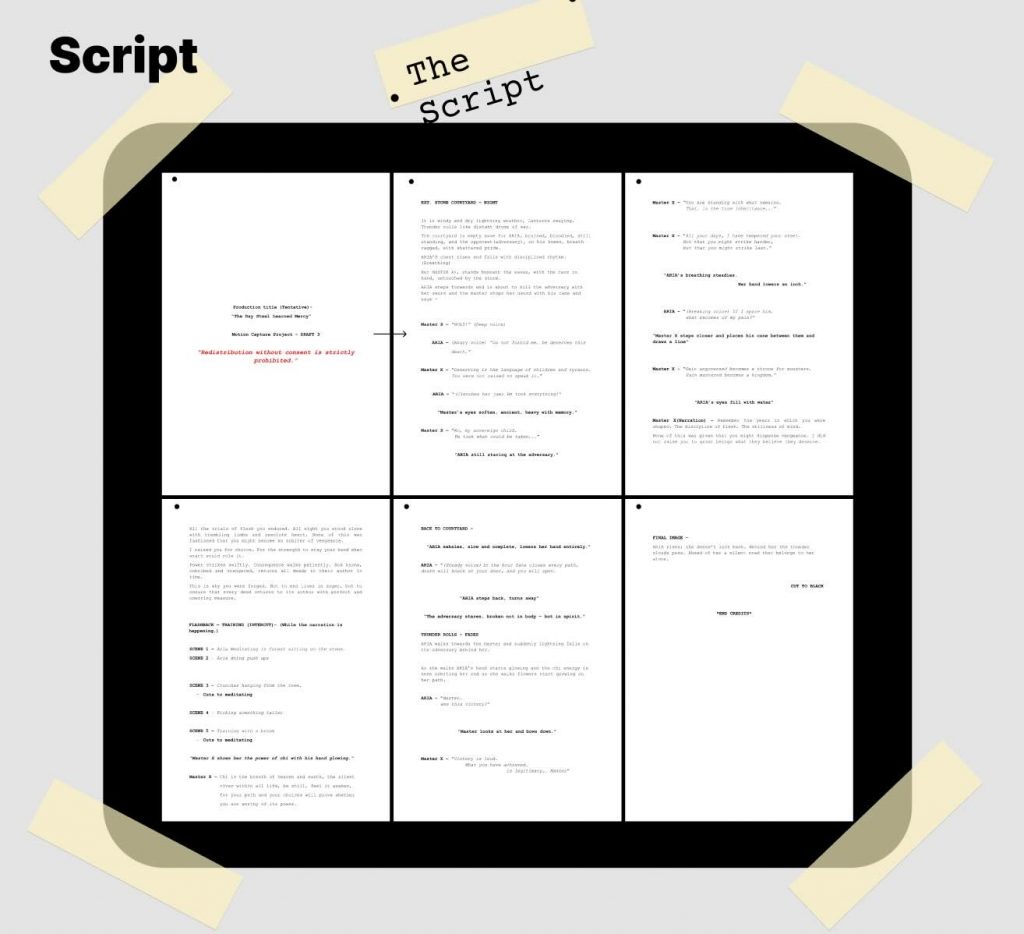
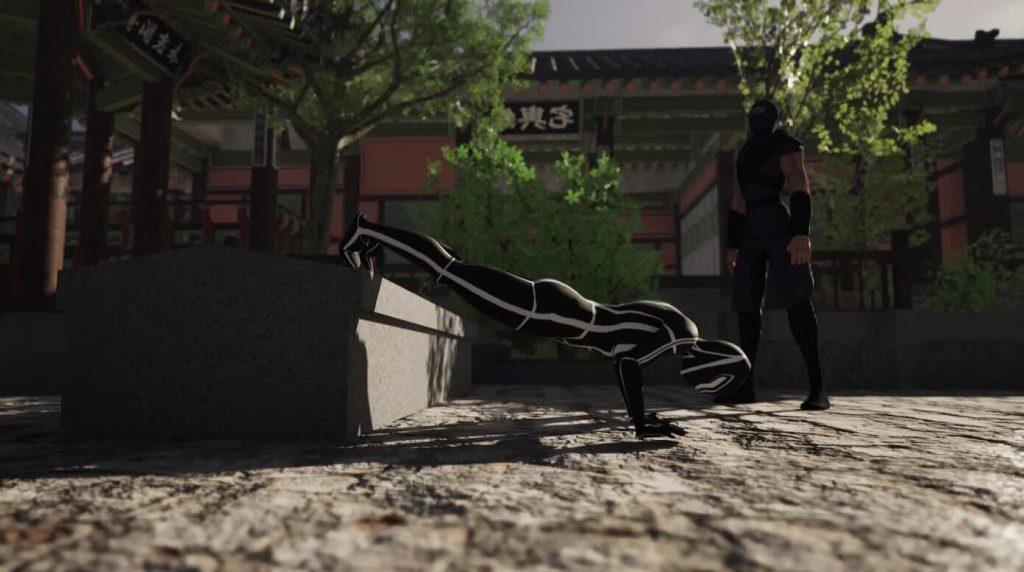
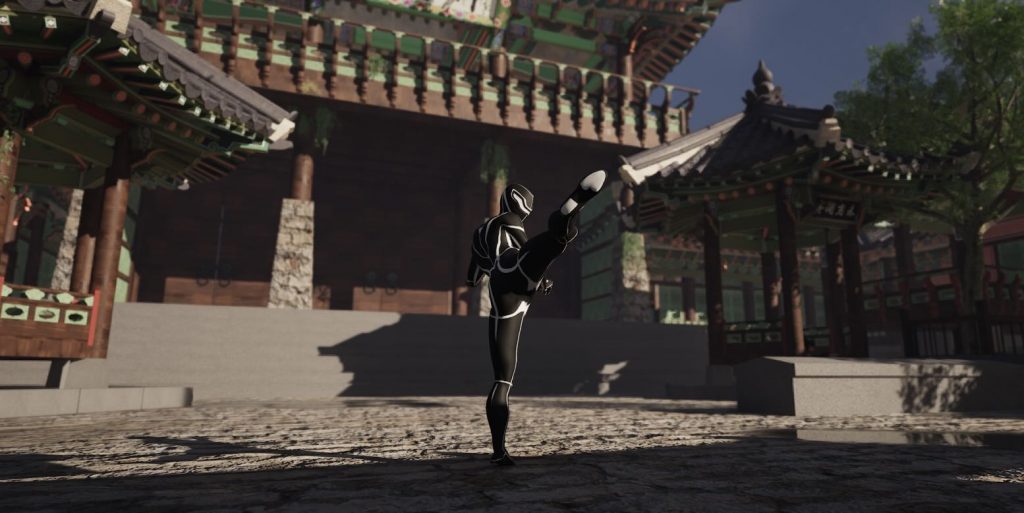
Once we established the core idea, we moved on to writing the script and creating a storyboard. We carefully planned out the training sequences and discussed which movements would best communicate progression and determination. Some of the exercises we included were pull-ups, carrying water buckets, kicking drills, push-ups, and crunches. Each movement was chosen to visually represent both physical and mental growth throughout the character’s journey.
Storyboard:
Once we established the core idea, we moved on to writing the script and creating a storyboard. We carefully planned out the training sequences and discussed which movements would best communicate progression and determination. Some of the exercises we included were pull-ups, carrying water buckets, kicking drills, push-ups, and crunches. Each movement was chosen to visually represent both physical and mental growth throughout the character’s journey.
Chi energy:
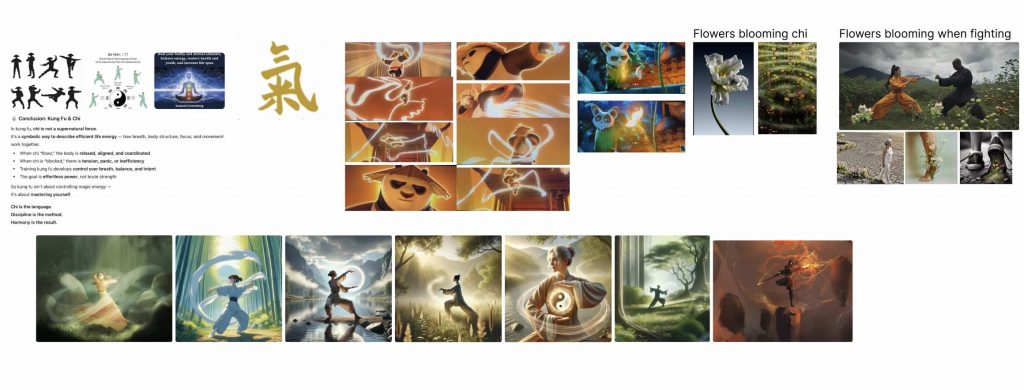
As our concept developed further, we continued researching the themes behind Kung Fu Panda, particularly the idea of chi energy. We learned that chi represents an internal life force or energy that flows through all living things. In the story, mastering chi requires balance, inner peace, and a strong connection with both nature and oneself. This idea strongly influenced the direction of our project because it connected physical training with emotional and spiritual growth. We wanted our film to communicate not only strength and discipline, but also the importance of self-awareness and inner balance.
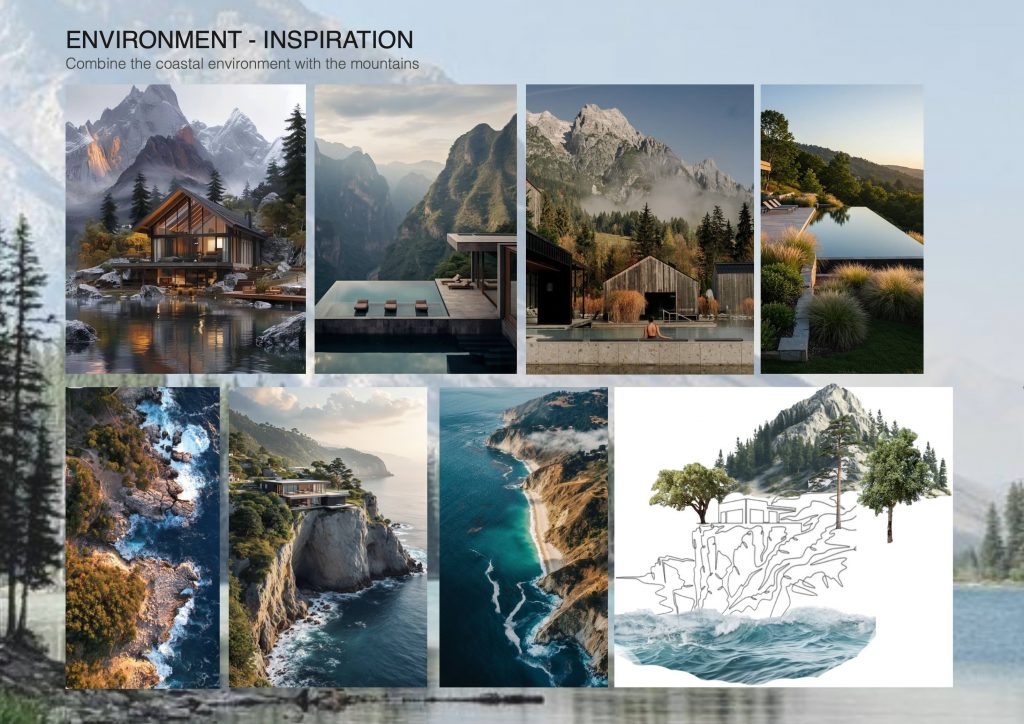
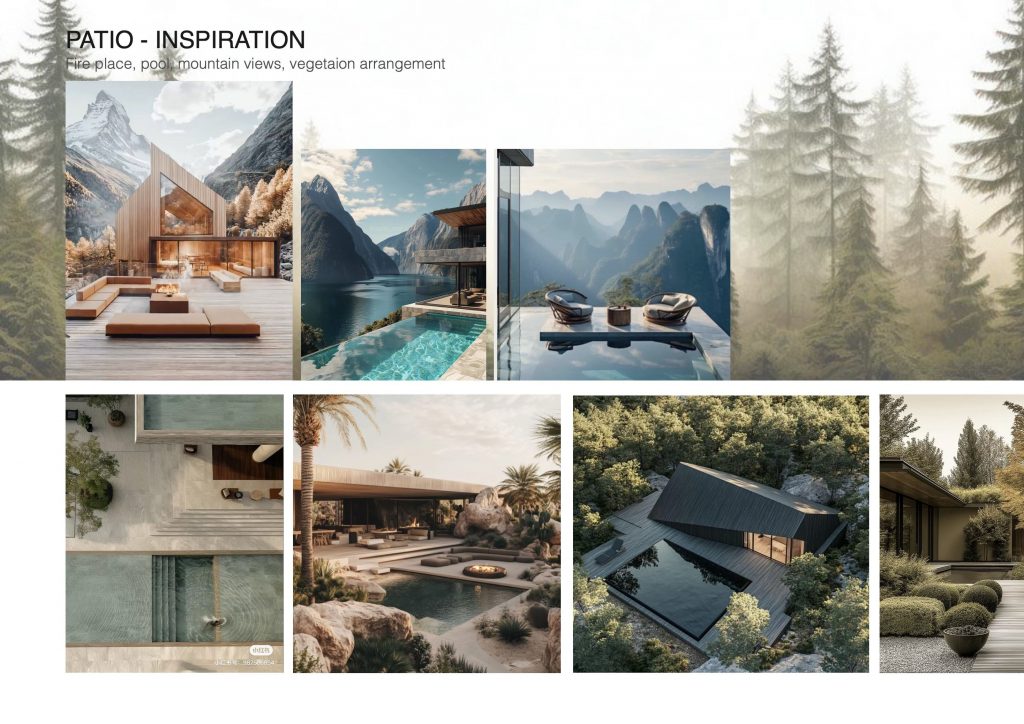
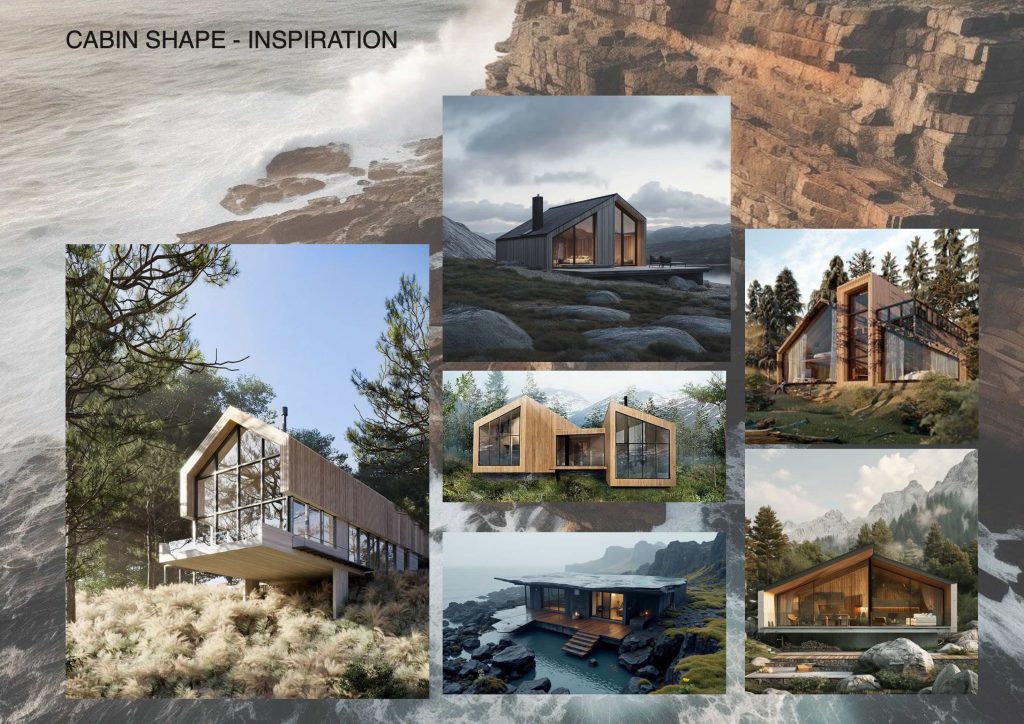
Environment Research:
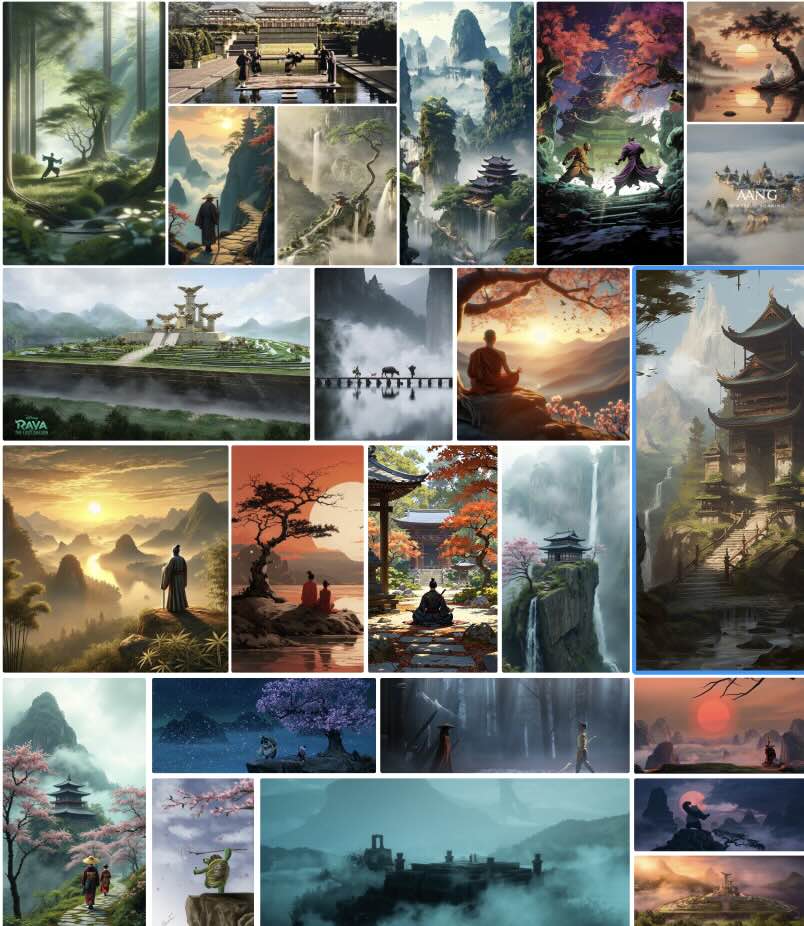
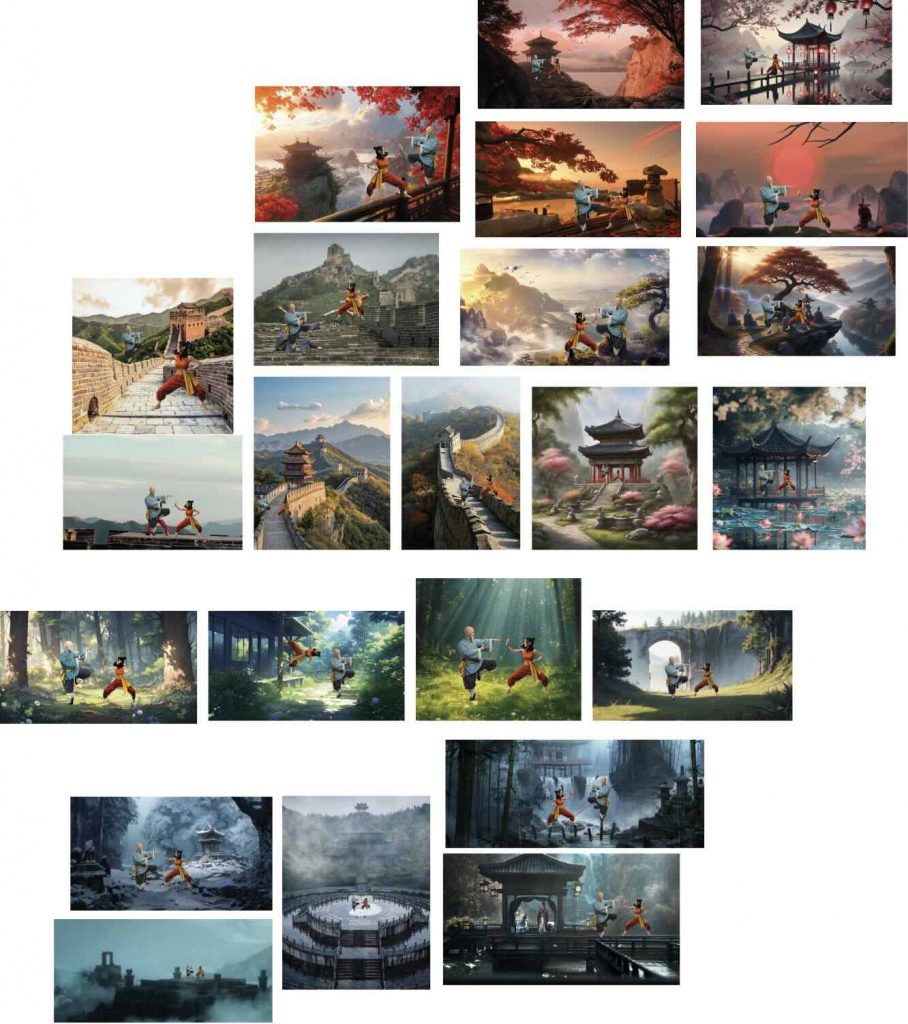
After developing the core concept and story direction, we began researching environmental inspiration to build the visual world of the project. We used platforms like Pinterest to collect references for architecture, lighting, atmosphere, colour palettes, and natural elements that could support the tone of the story. Since Aniela and I were especially interested in environment design, we focused heavily on creating immersive spaces that would visually communicate the character’s emotional and physical journey.
Scale and Composition Tests:
To explore different visual directions, I created rough Photoshop compositions by placing images of the characters into various Pinterest-inspired environments. This allowed us to experiment with how the characters would interact with different spaces and atmospheres before beginning production. It also helped us better understand composition, scale, lighting, and the overall mood we wanted to achieve.
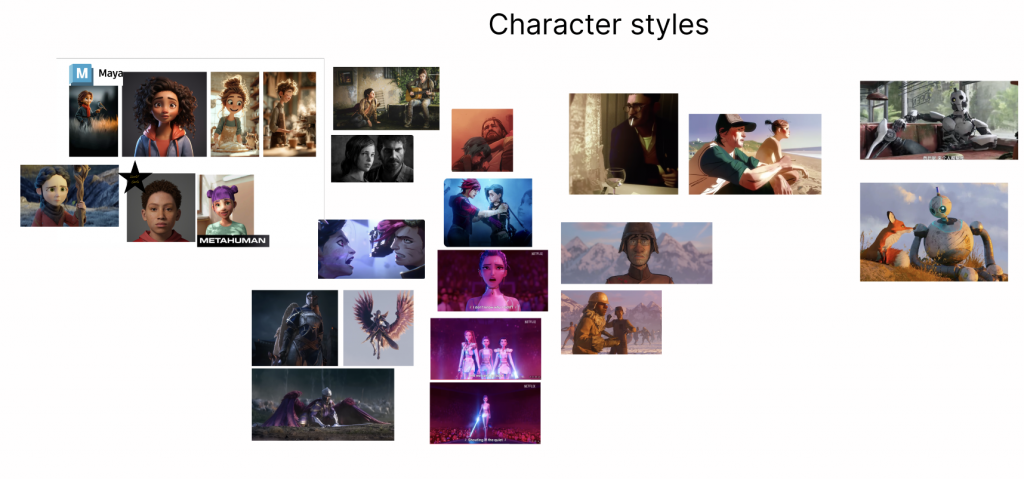
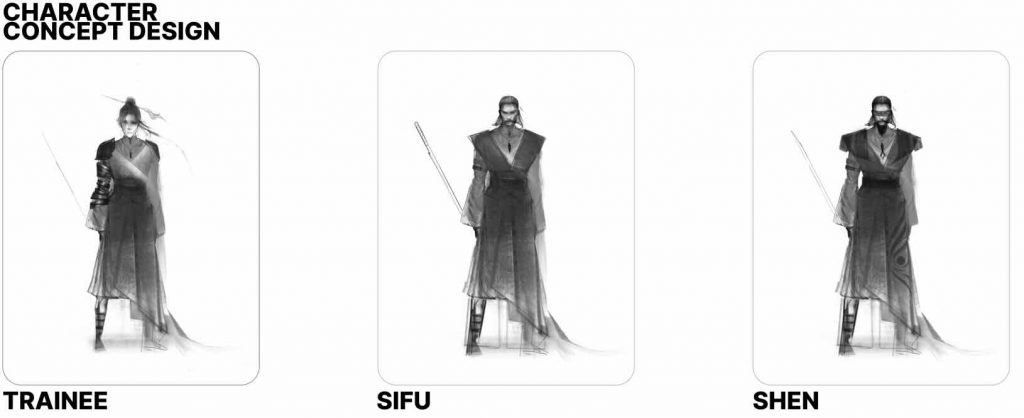
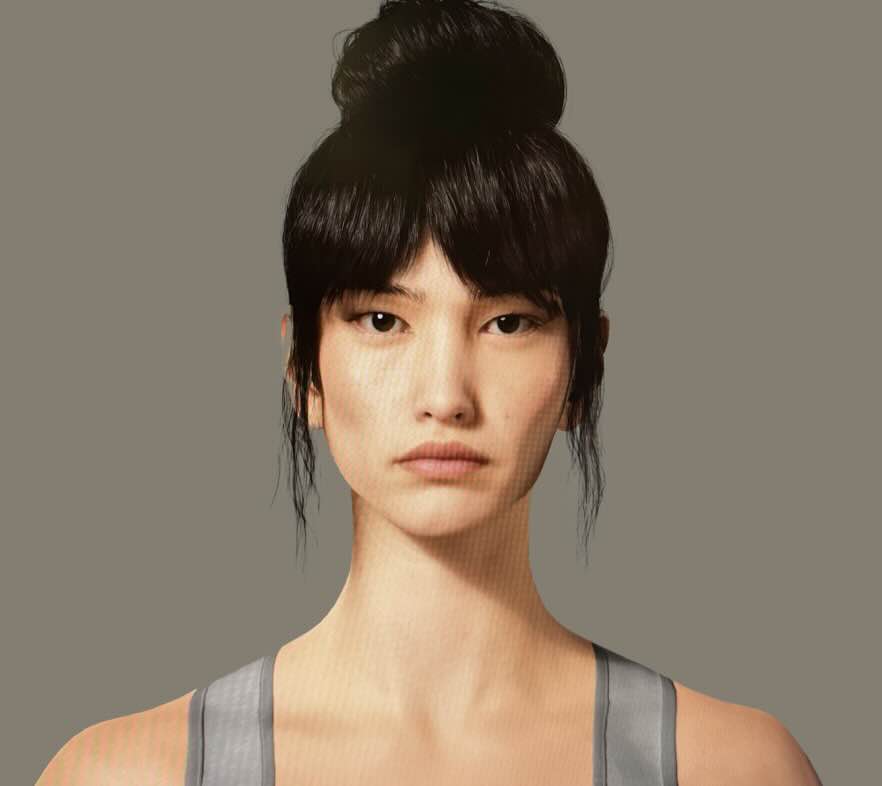
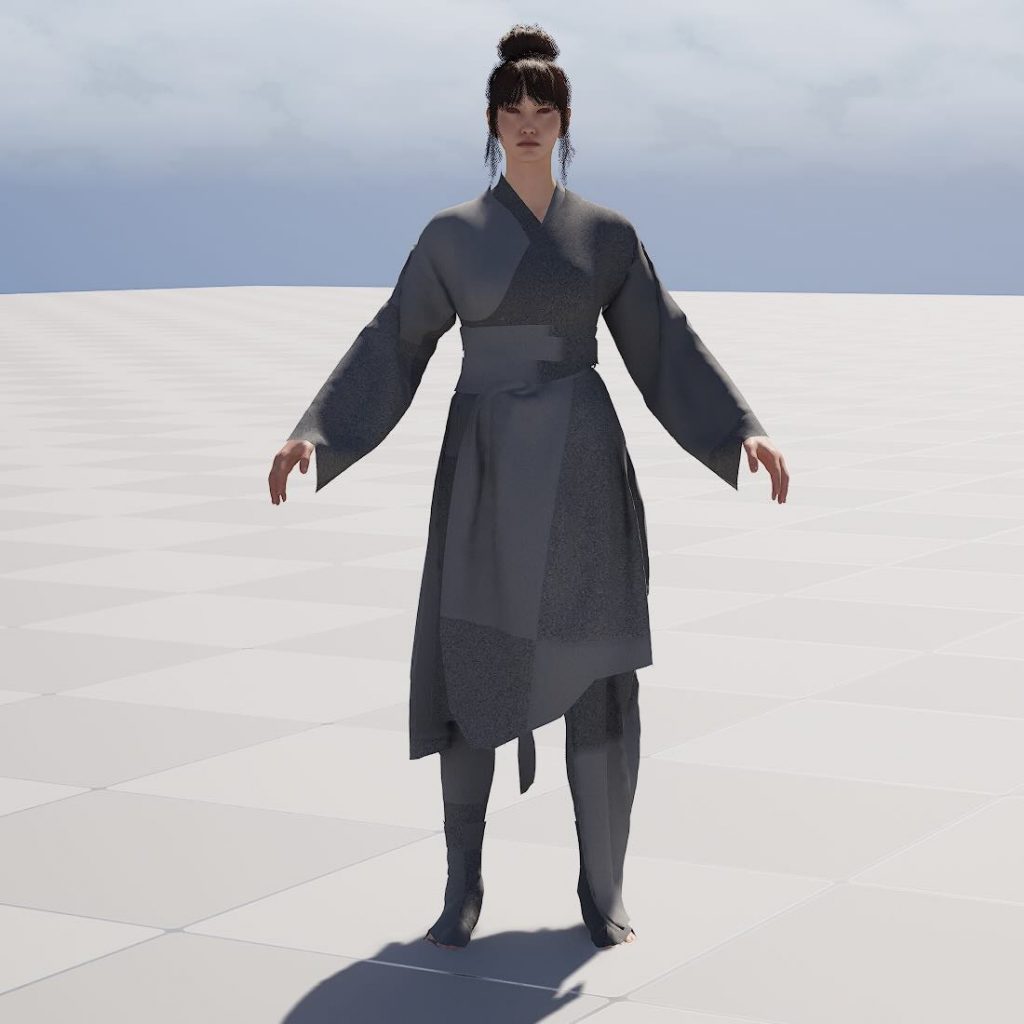
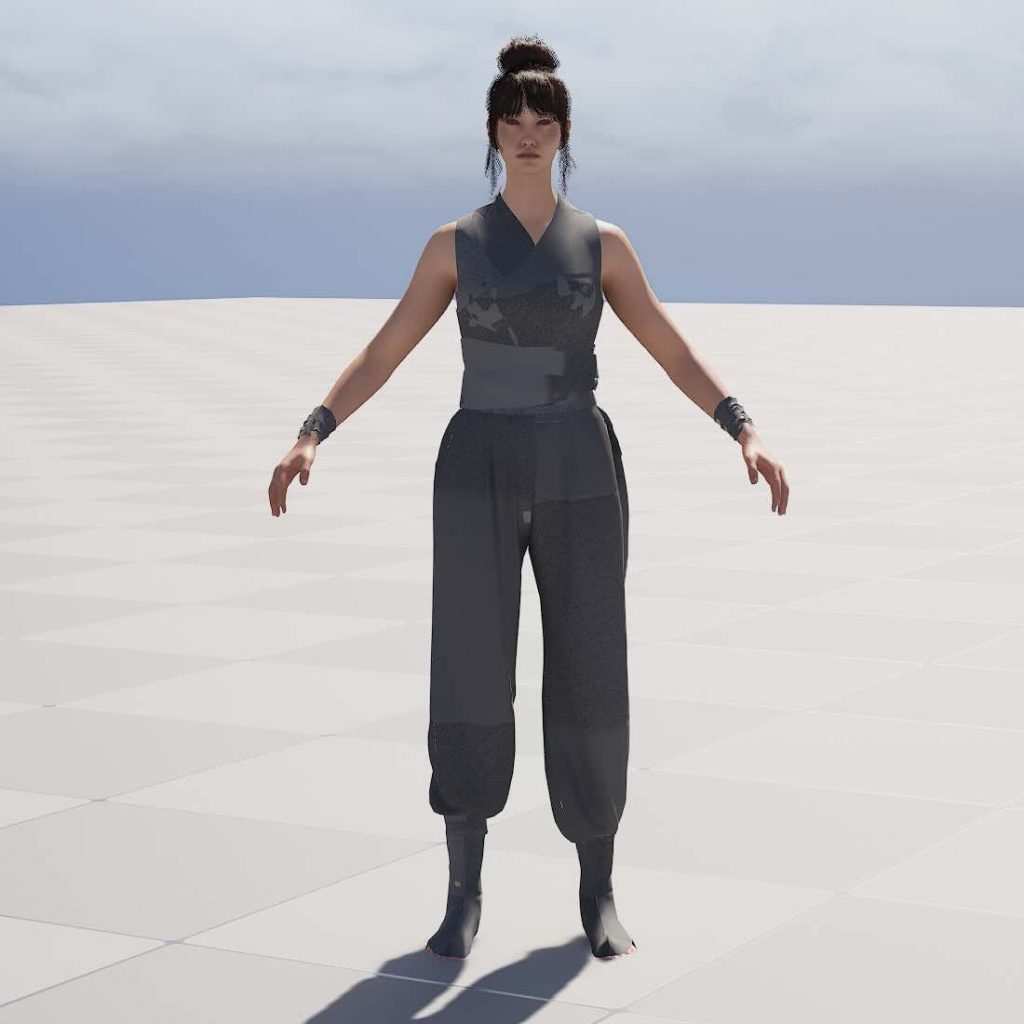
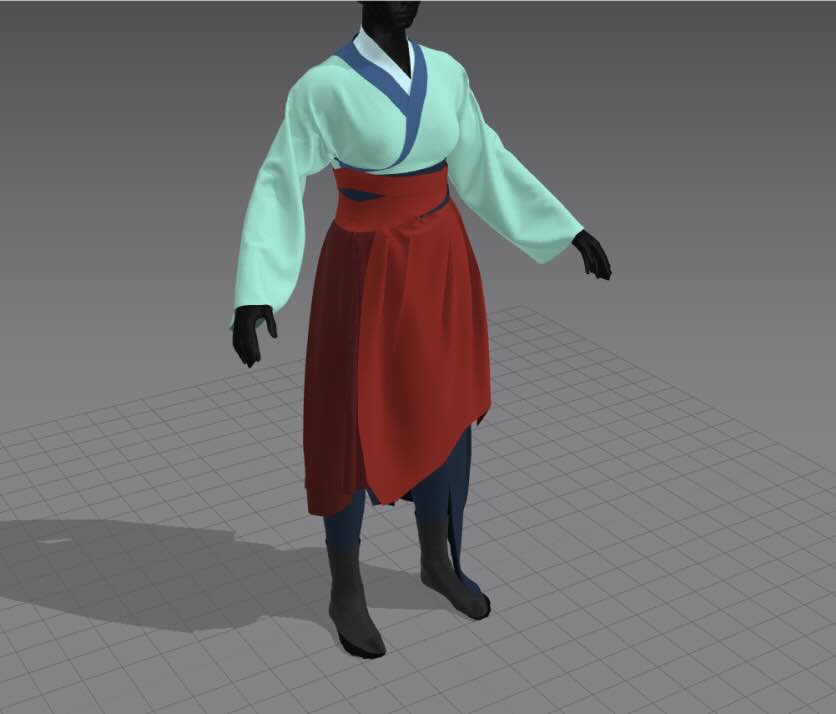
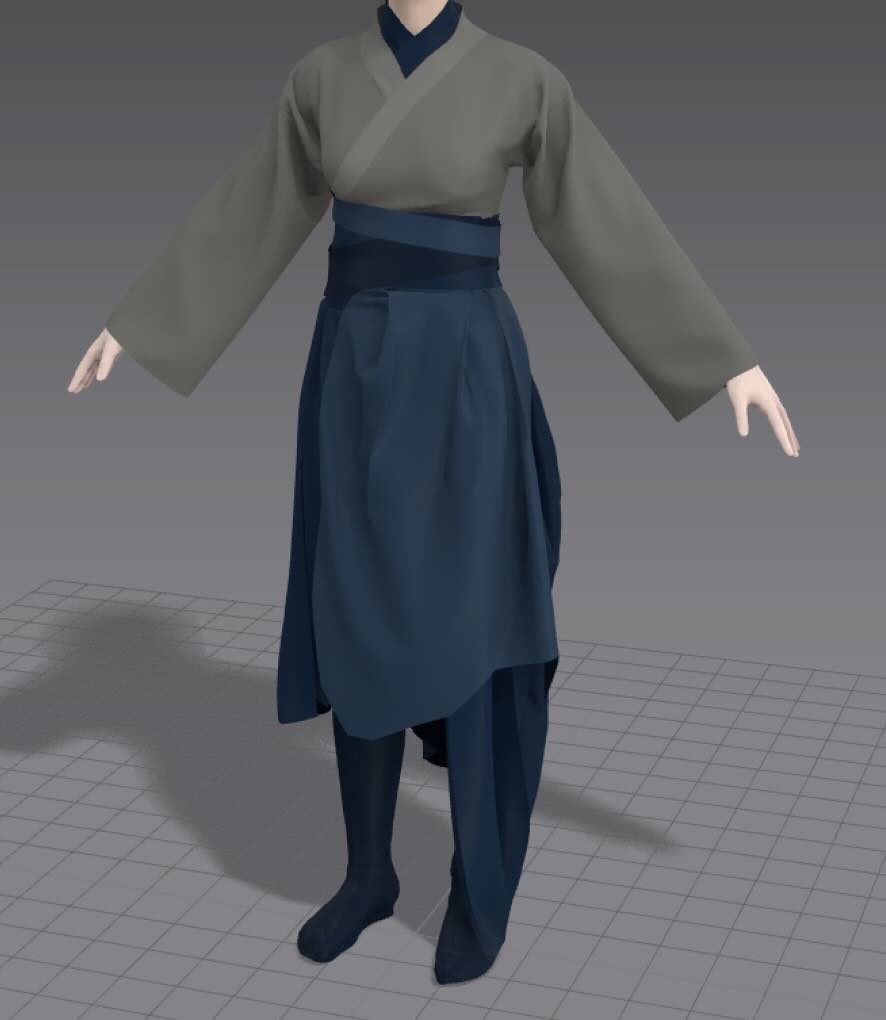
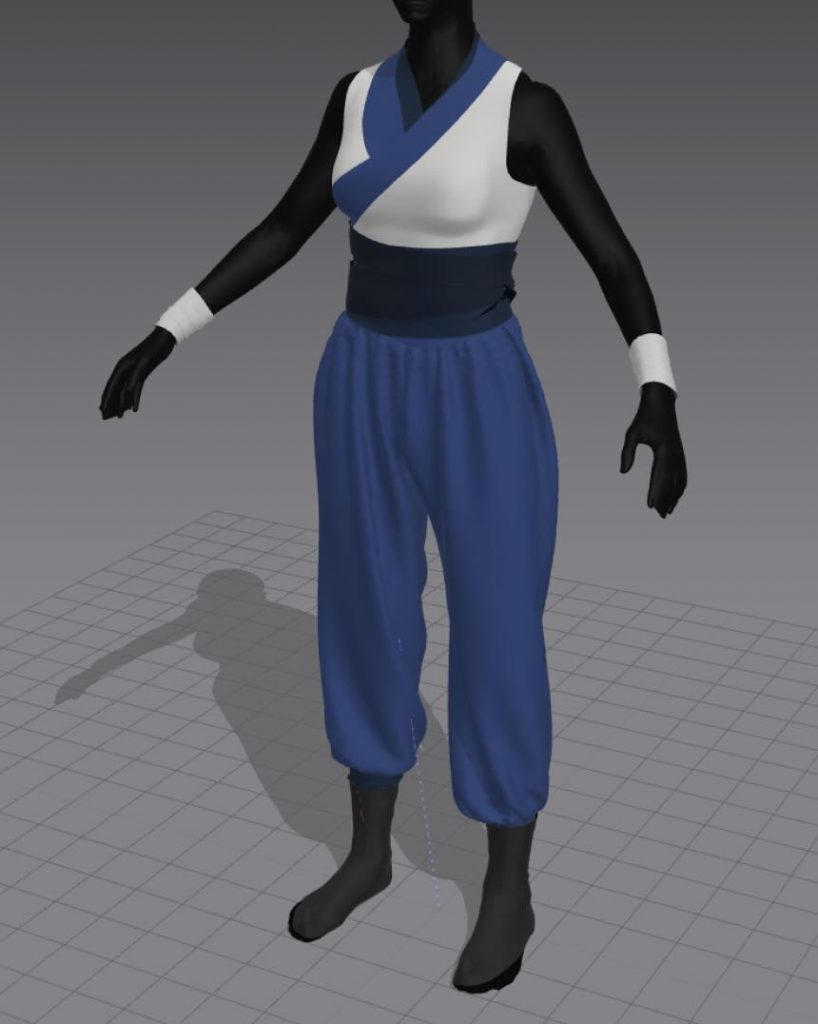
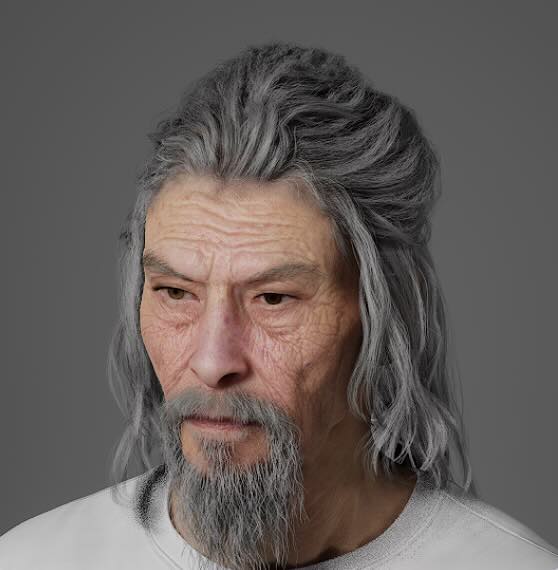
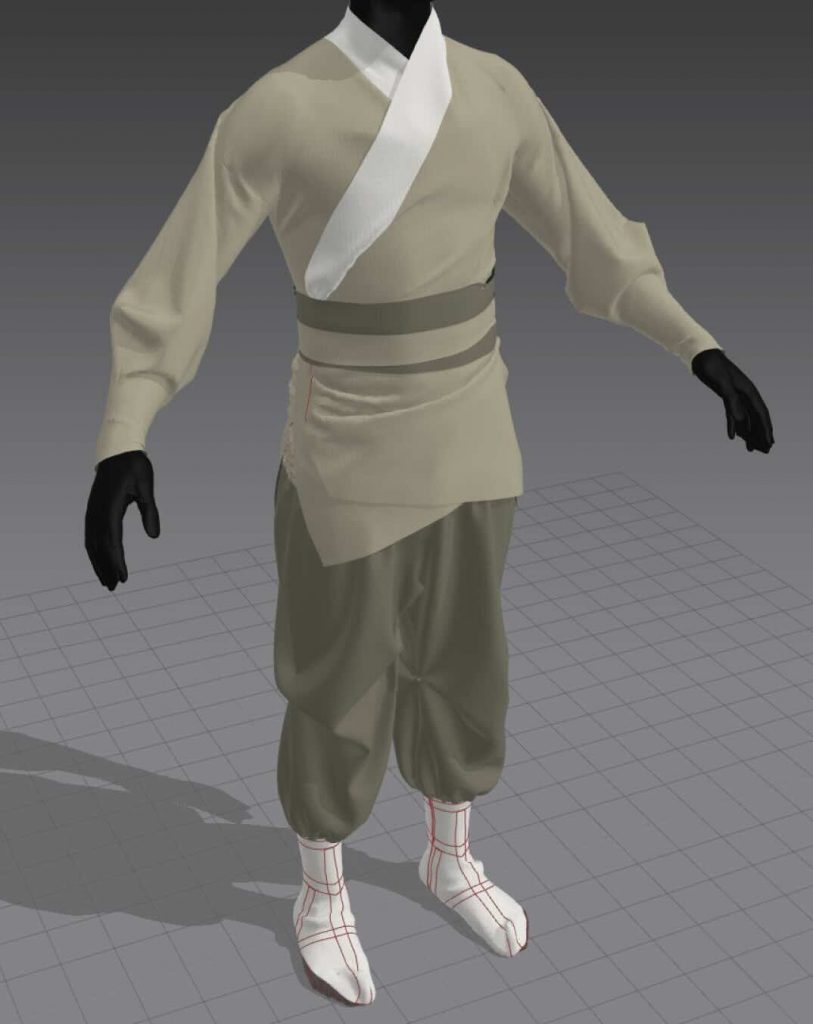
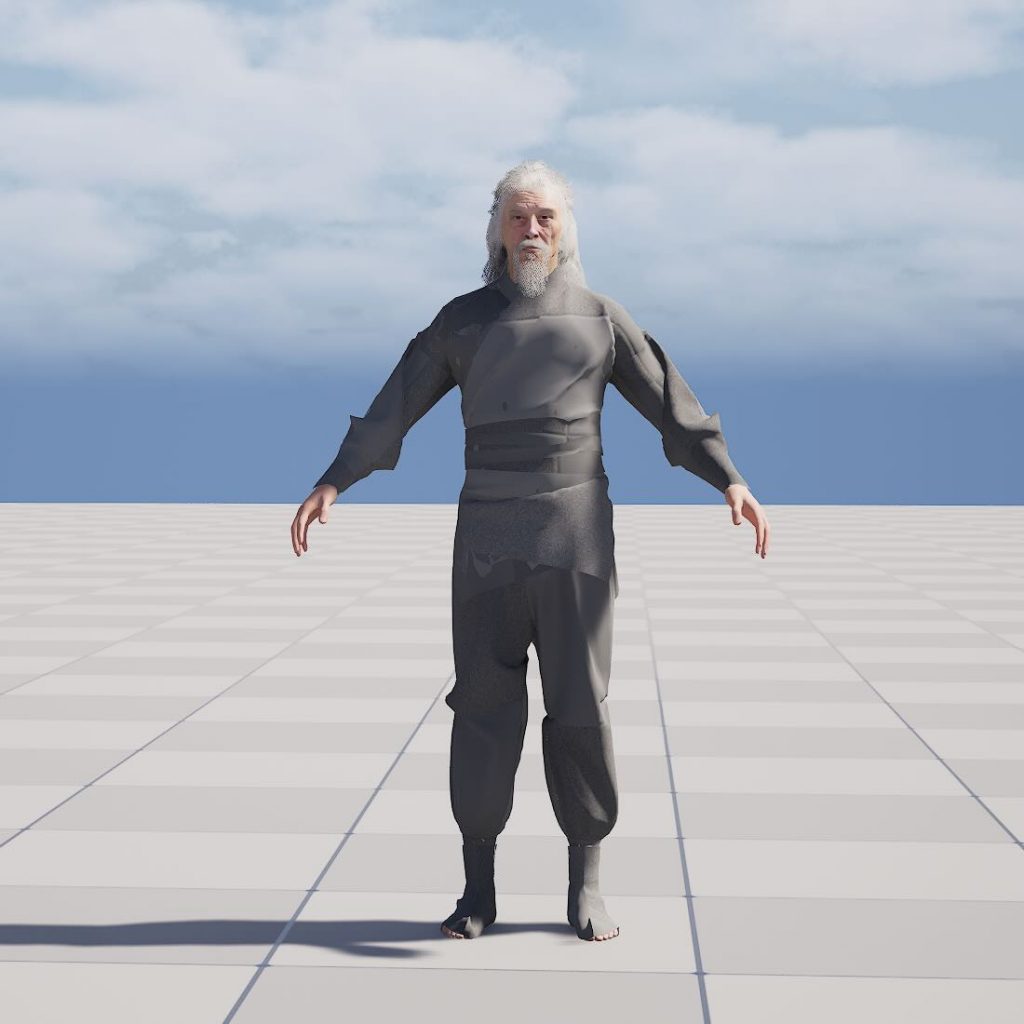
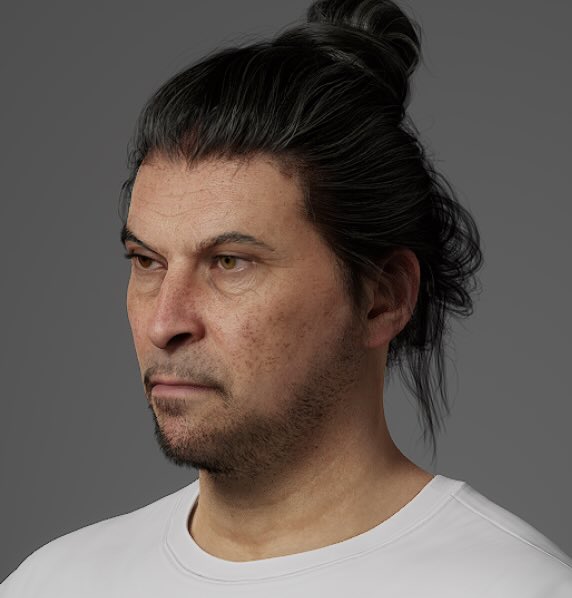
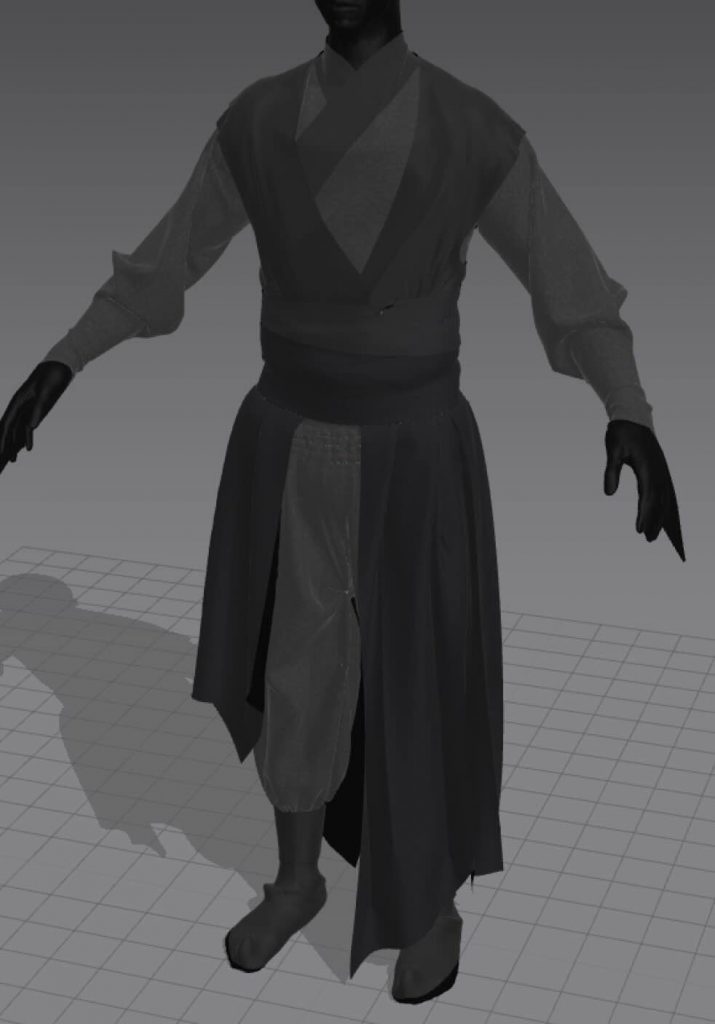
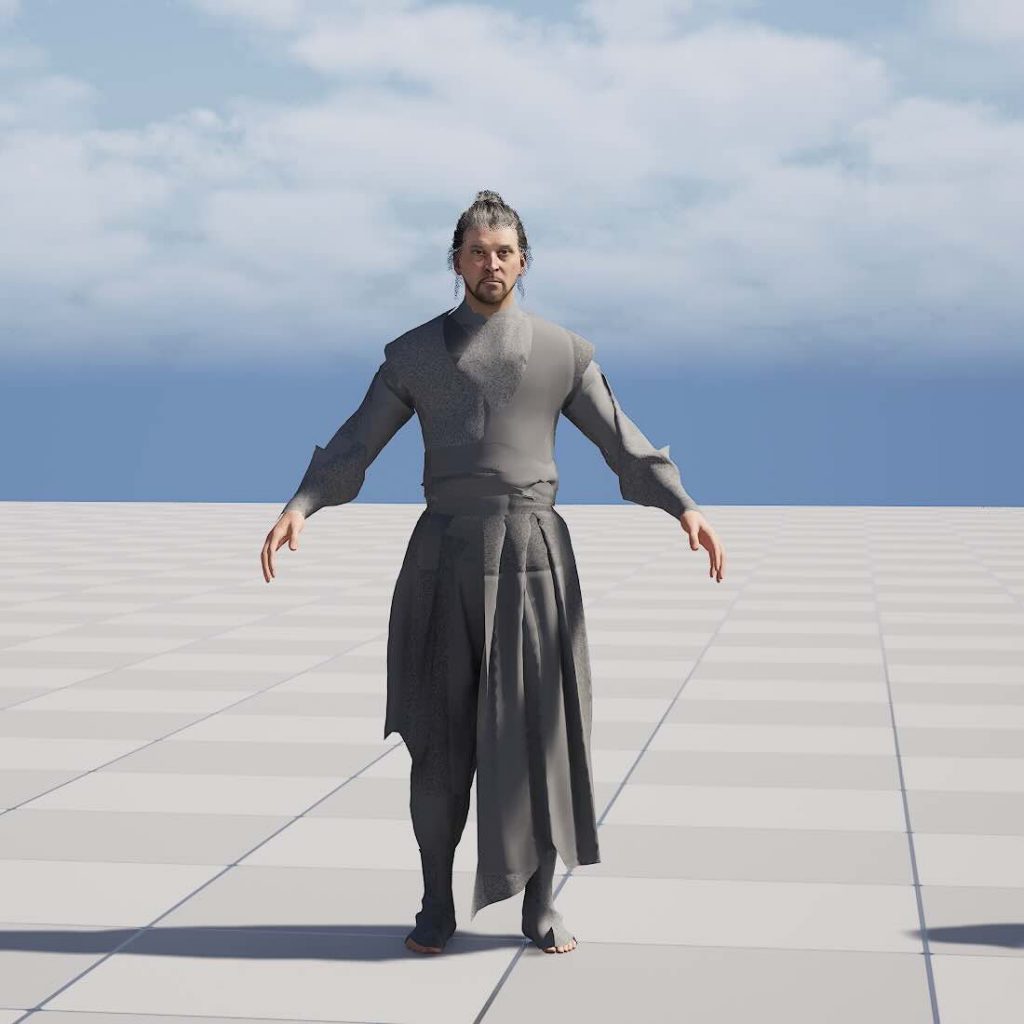
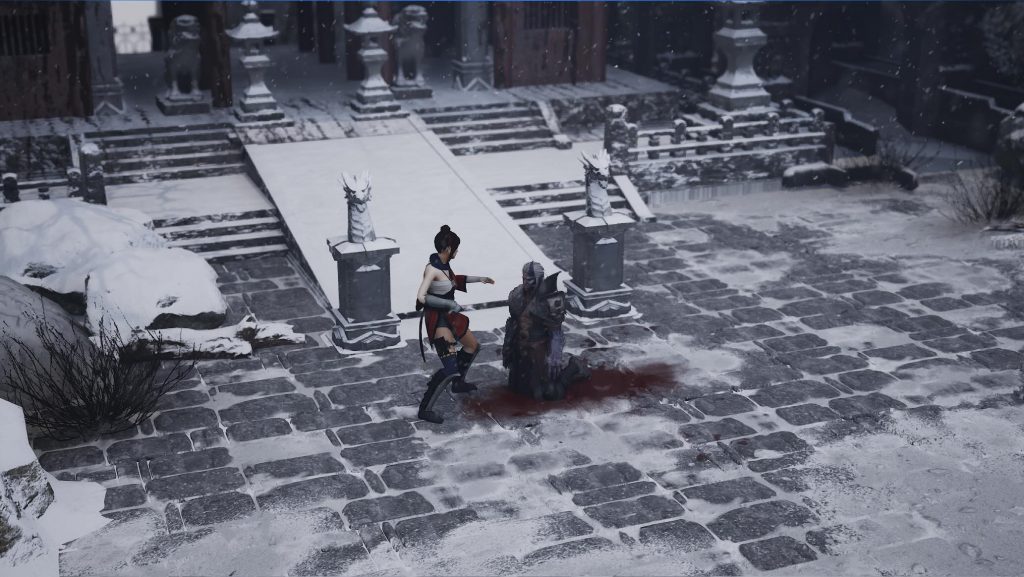
Character Design:
The character design process was also progressing. Lex focused on designing the two male characters and creating the clothing for the three characters, while Maria developed the appearance of the female character and did all the retargeting and animation corrections.
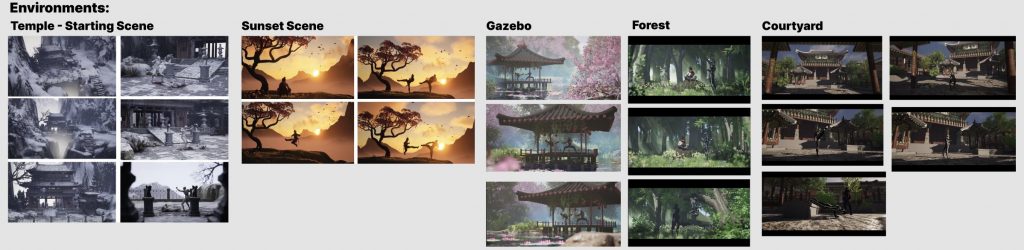
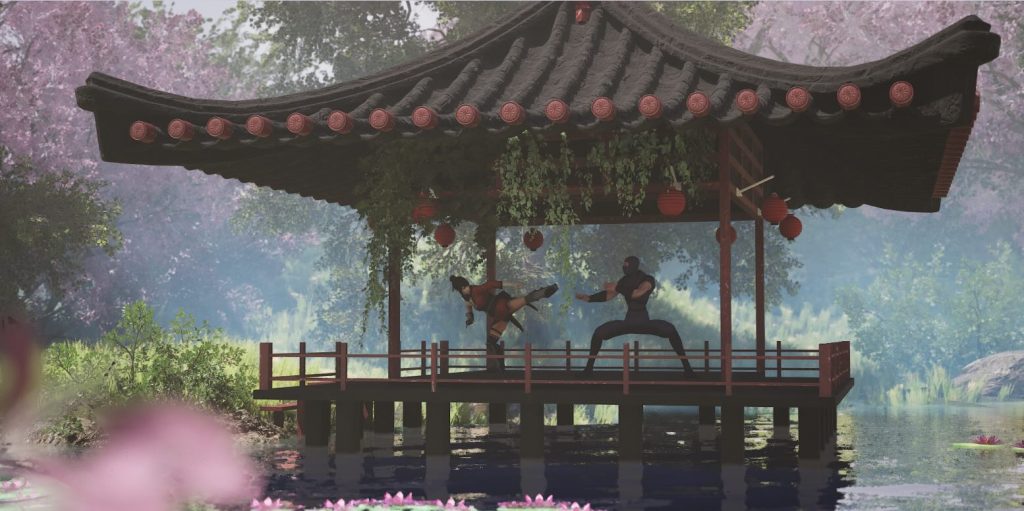
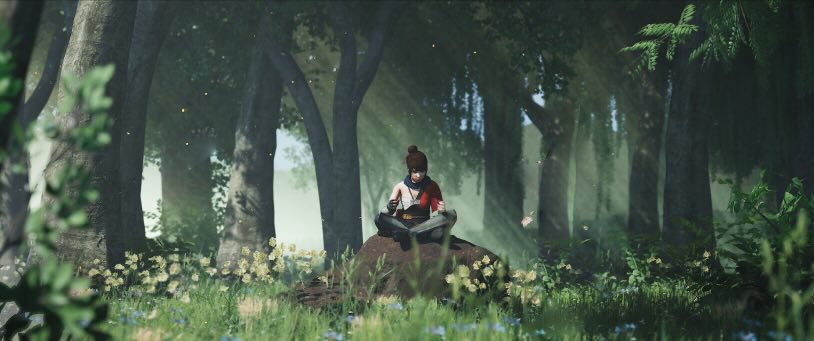
Environments:
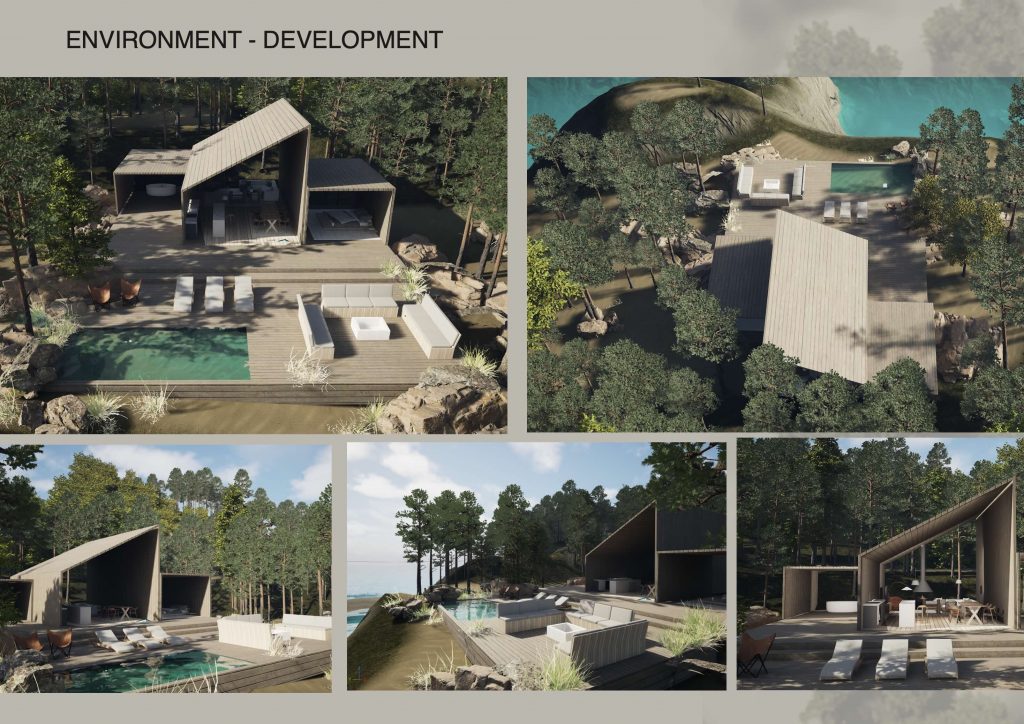
After finalising our visual direction, Aniela and I built the environments in Unreal Engine using 3D assets and Megascans. Together, we developed five different environments, each designed to support different moments within the story while maintaining a consistent visual style. We experimented with lighting, environmental storytelling, and composition to create cinematic and immersive scenes.
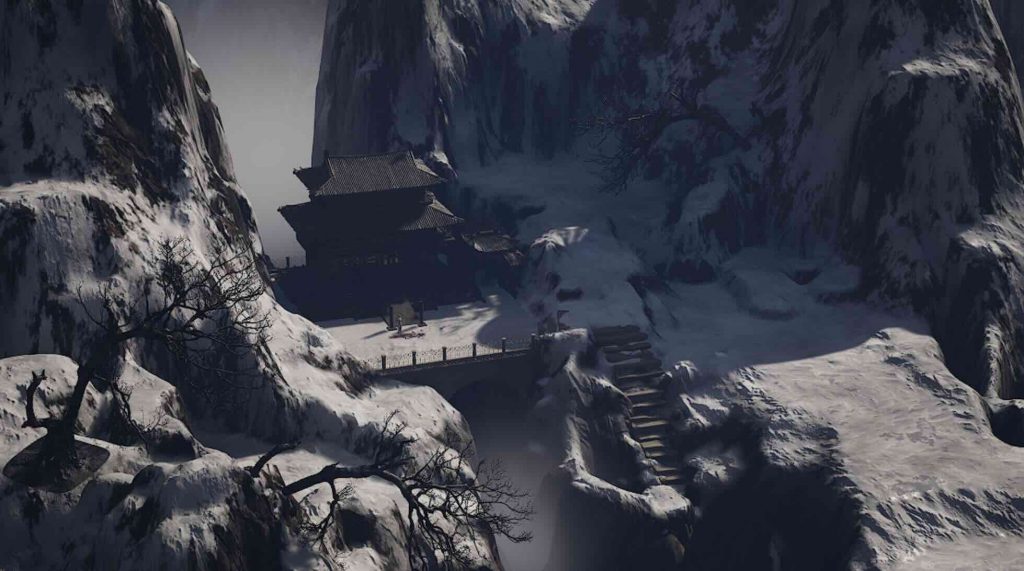
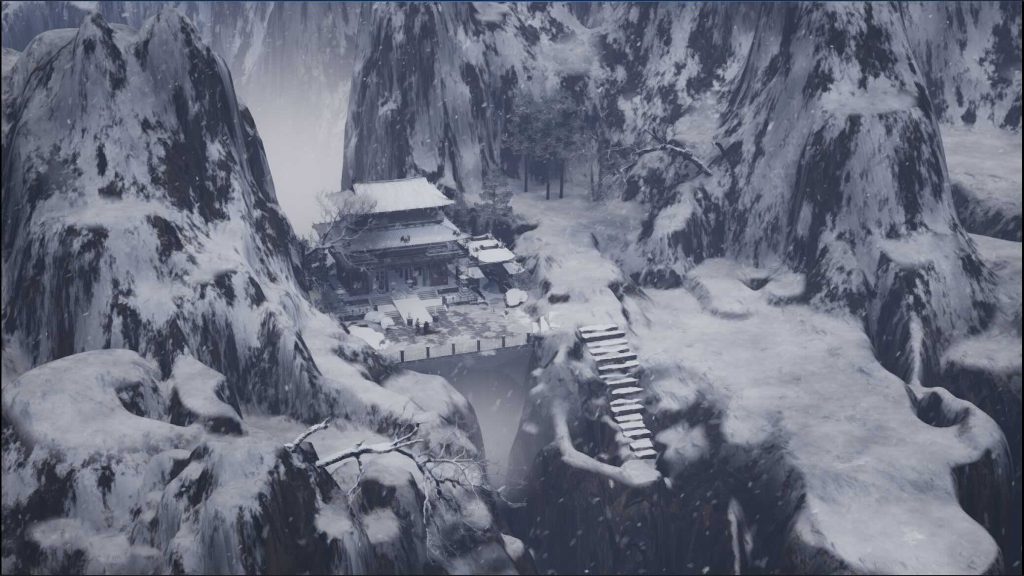
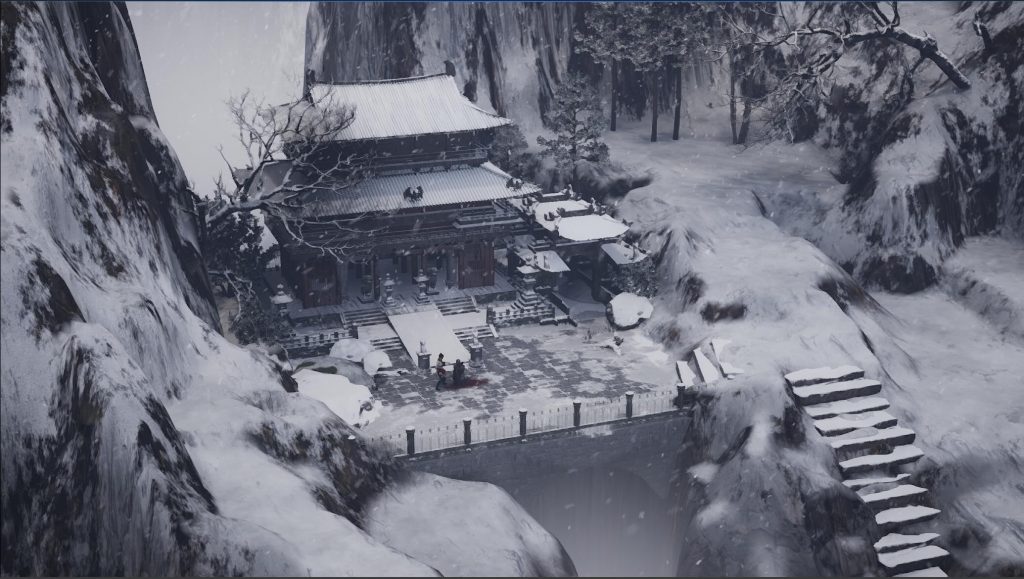
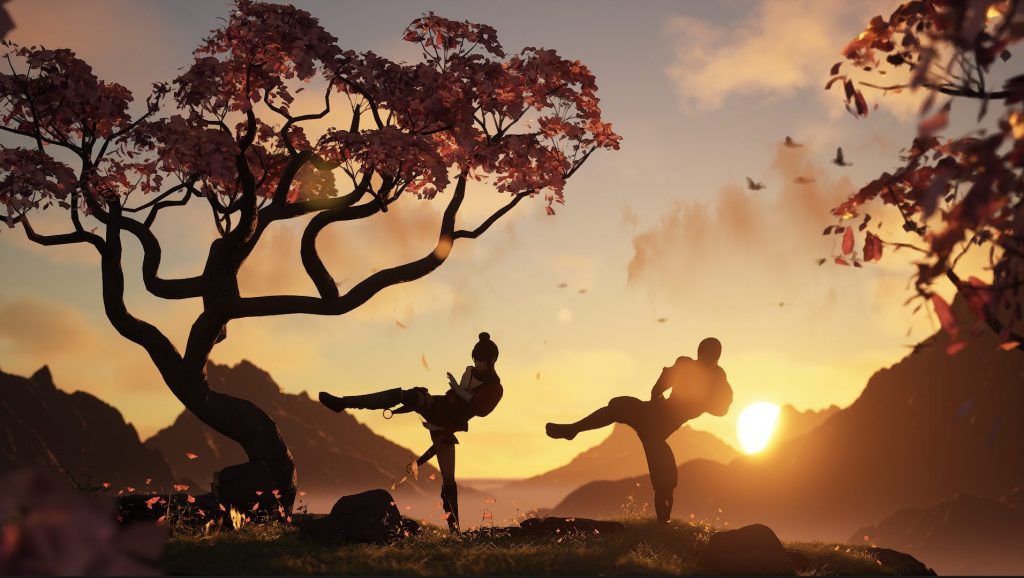
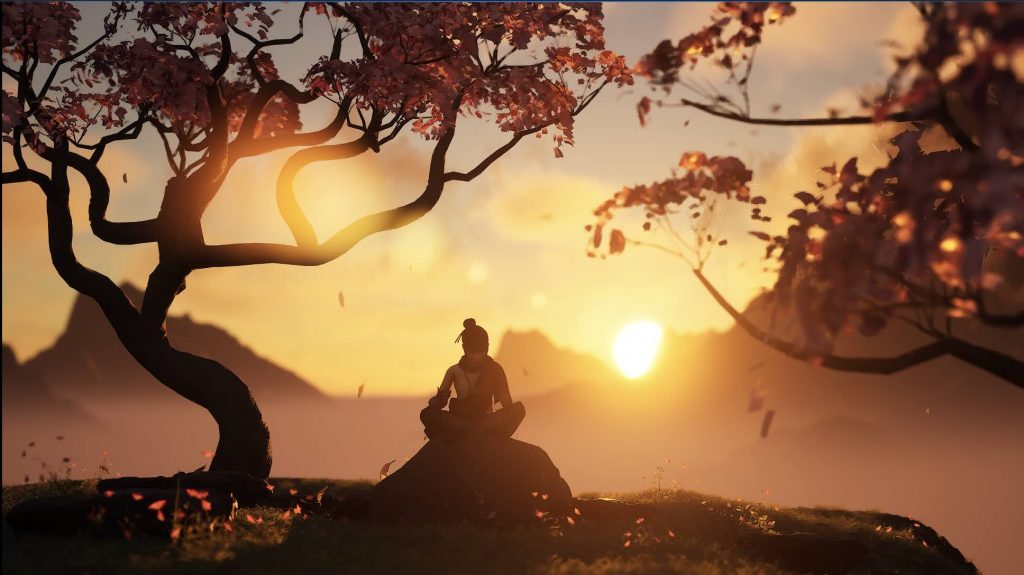
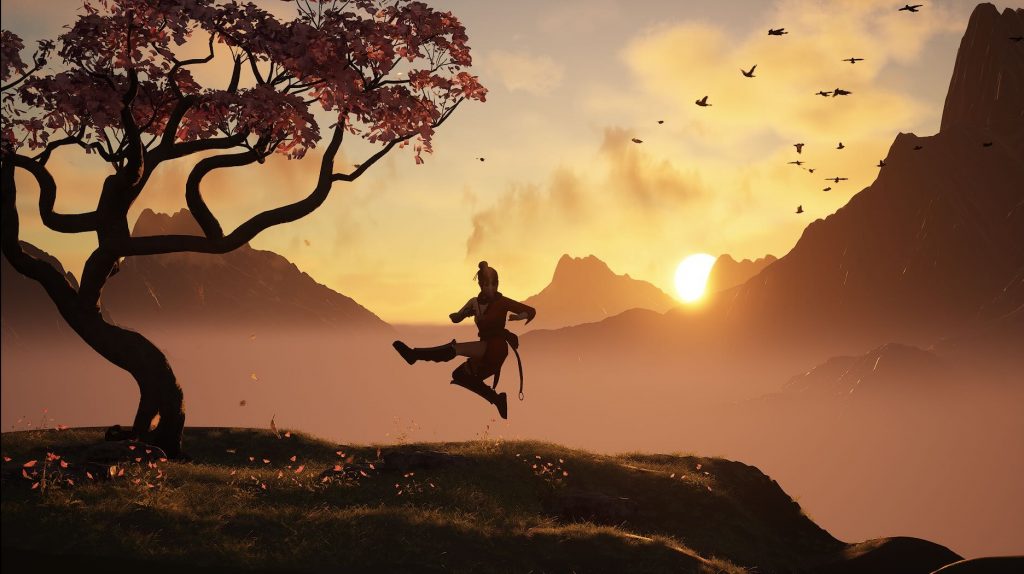
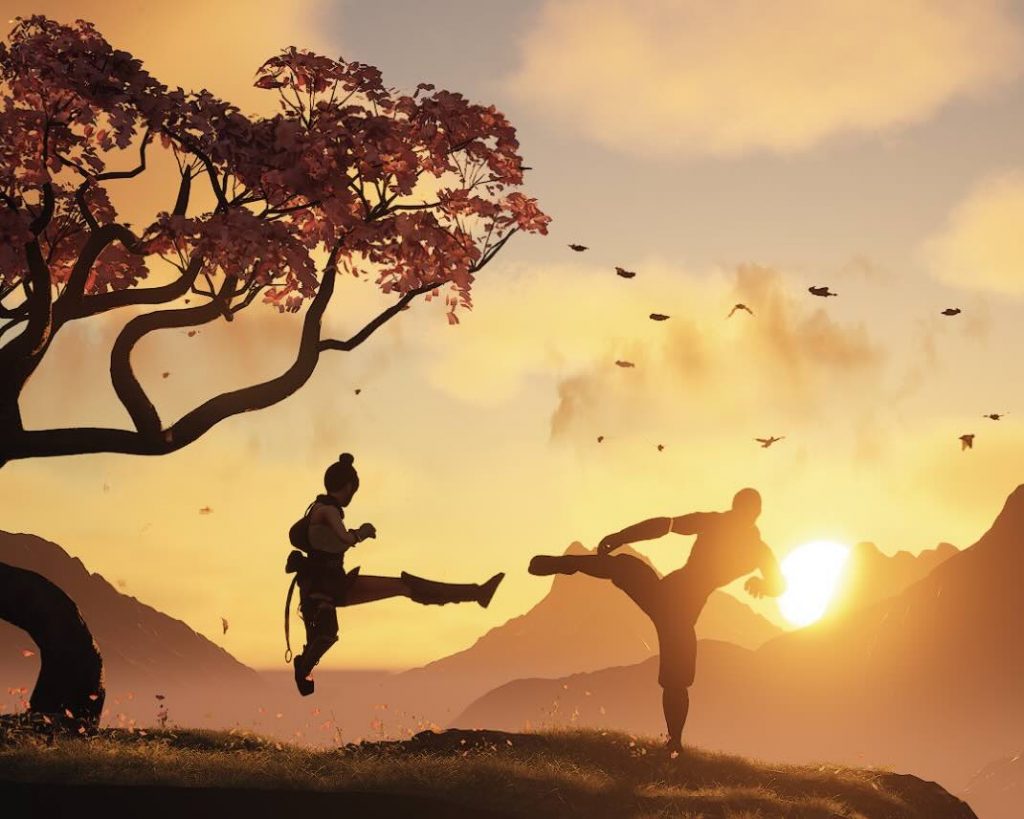
The environments I created:
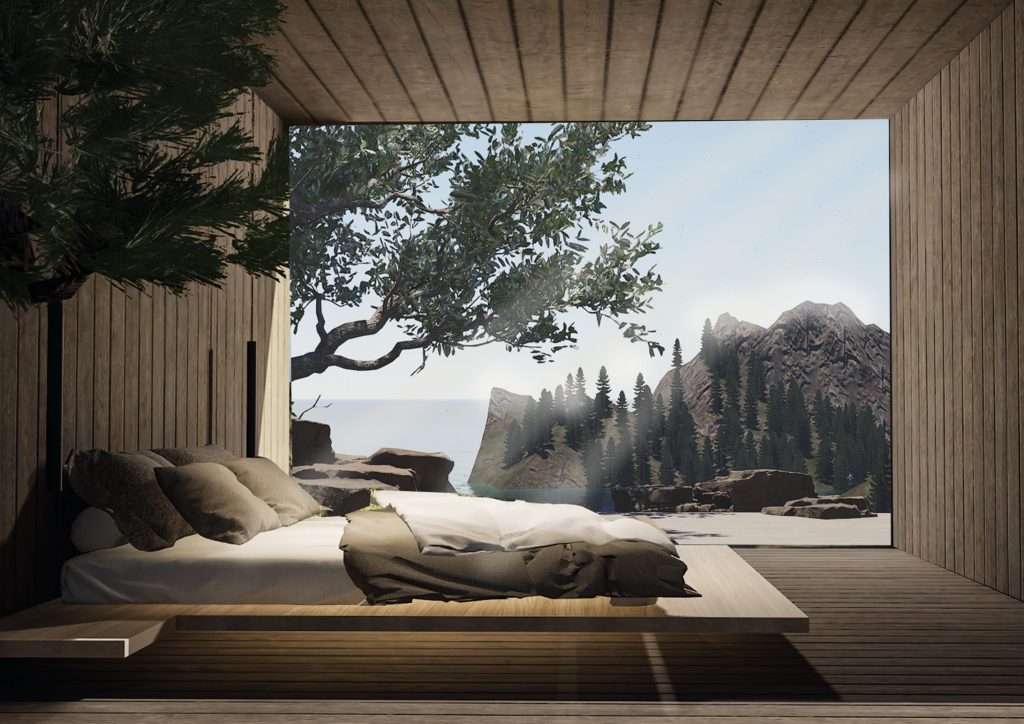
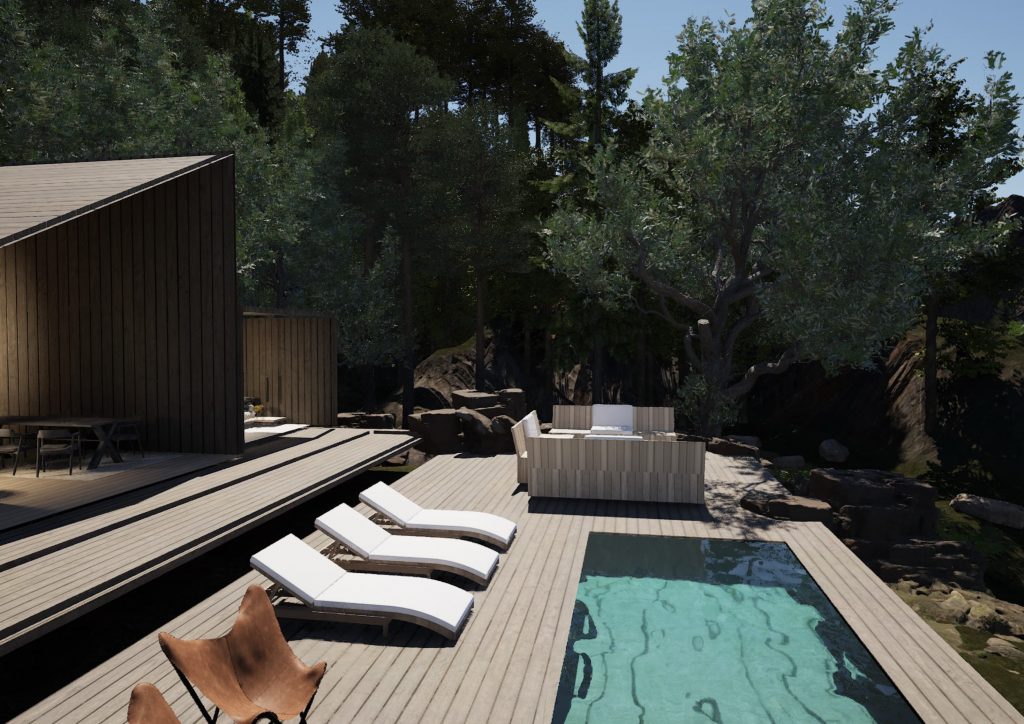
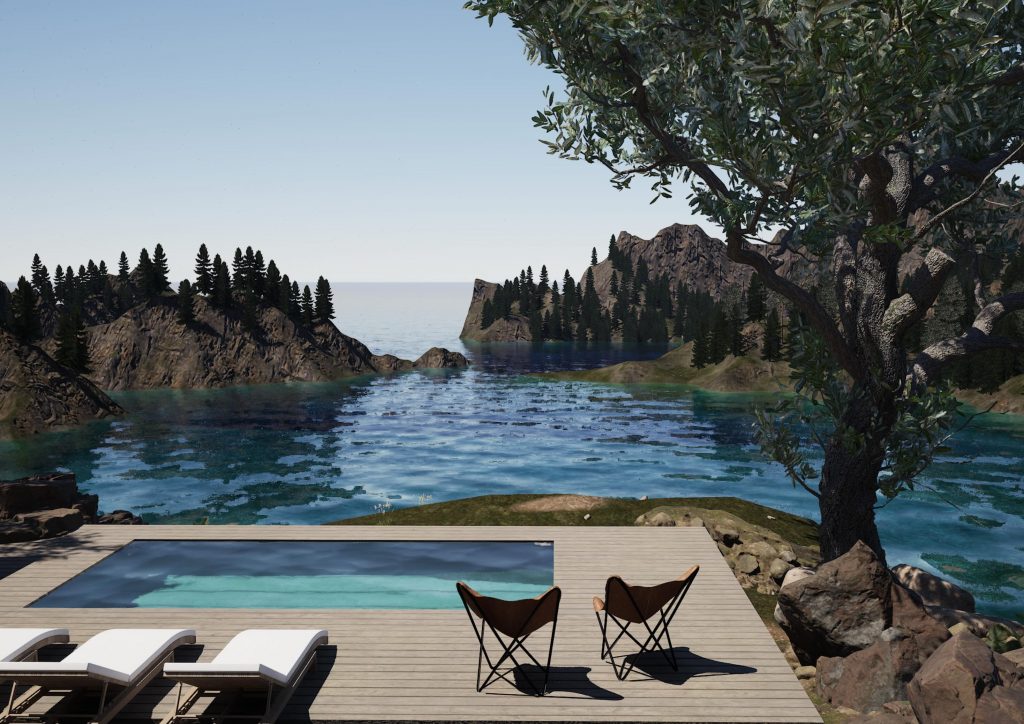
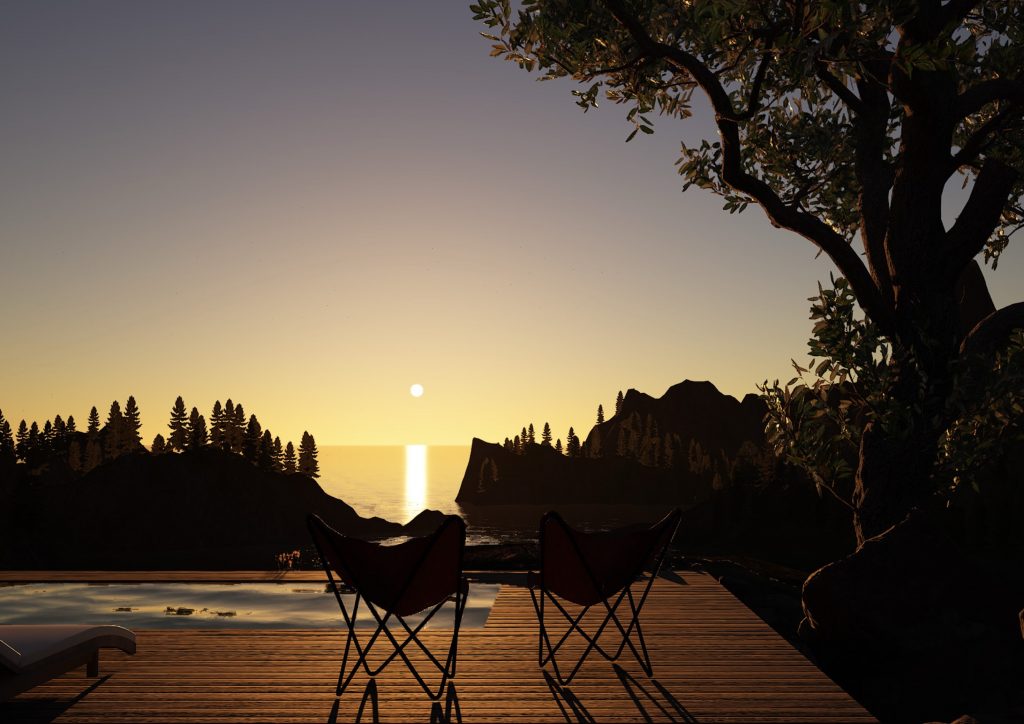
For the final environments, I was responsible for creating the opening scene as well as the sunset environment. I focused on developing the atmosphere, lighting, and composition to create visually engaging scenes that supported the emotional progression of the story. This process involved testing different assets, environmental details, and lighting setups to achieve the final cinematic look.
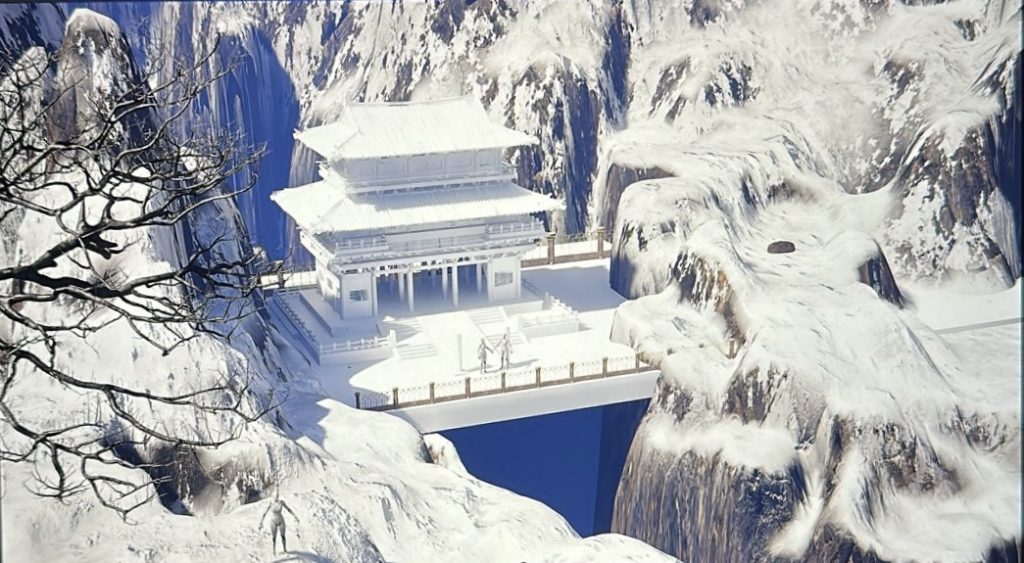
Opening scene Environment:
Sunset Scene Environment:
Aniela’s Environments:
Aniela created the remaining environments for the project, each contributing its own atmosphere and visual identity while fitting cohesively within the overall world we designed as a team.
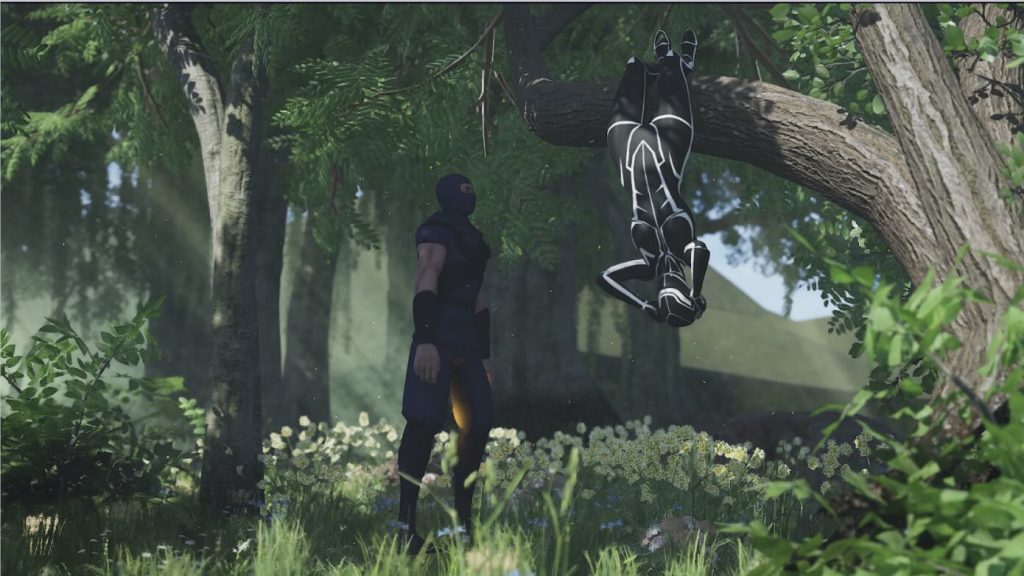
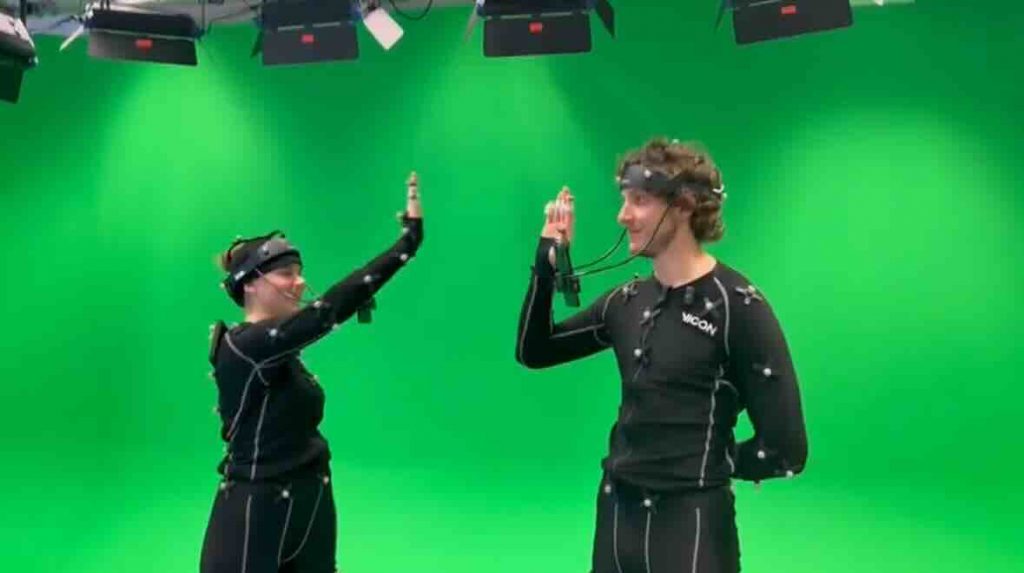
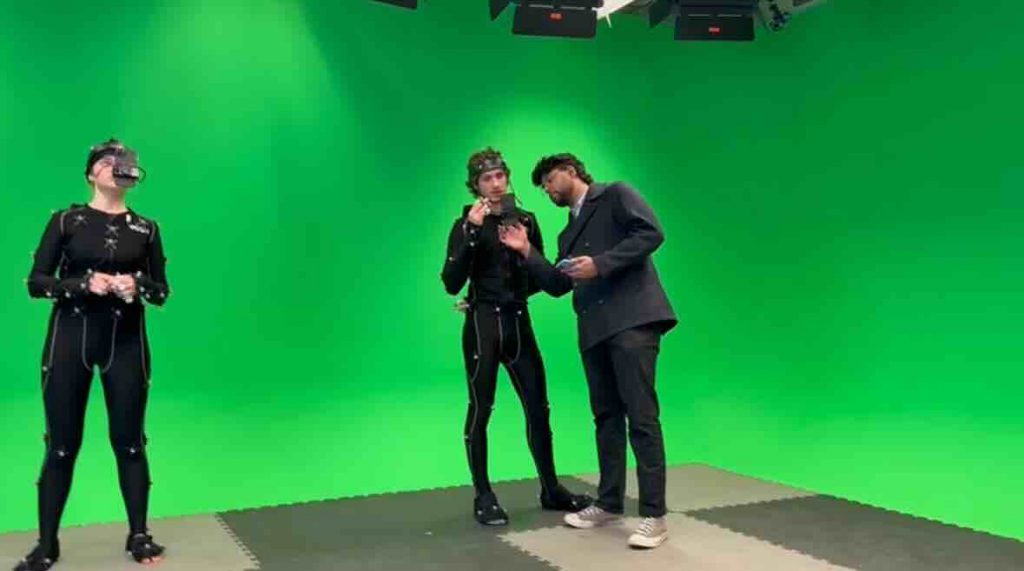
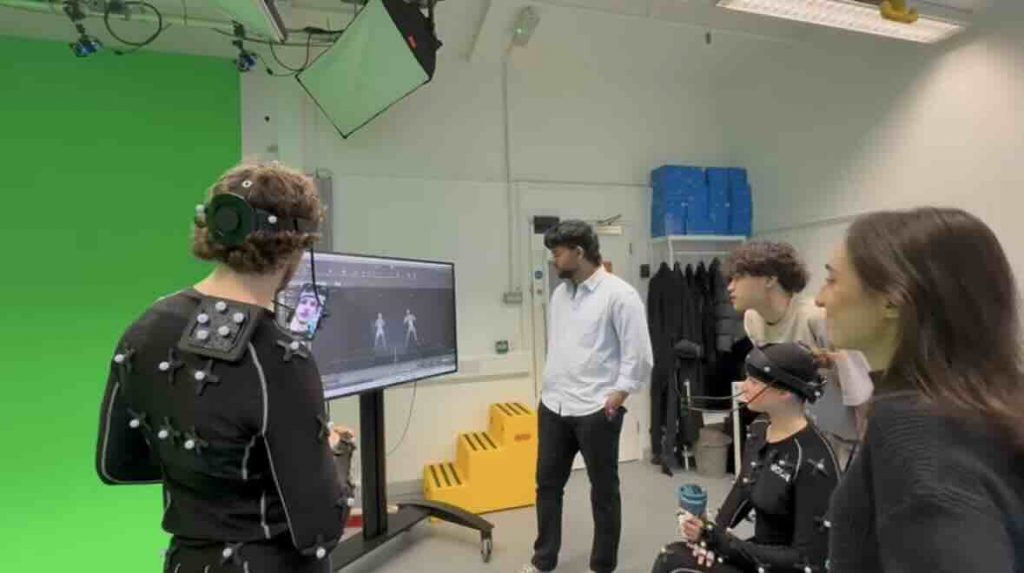
Motioncapture and Collaboration:
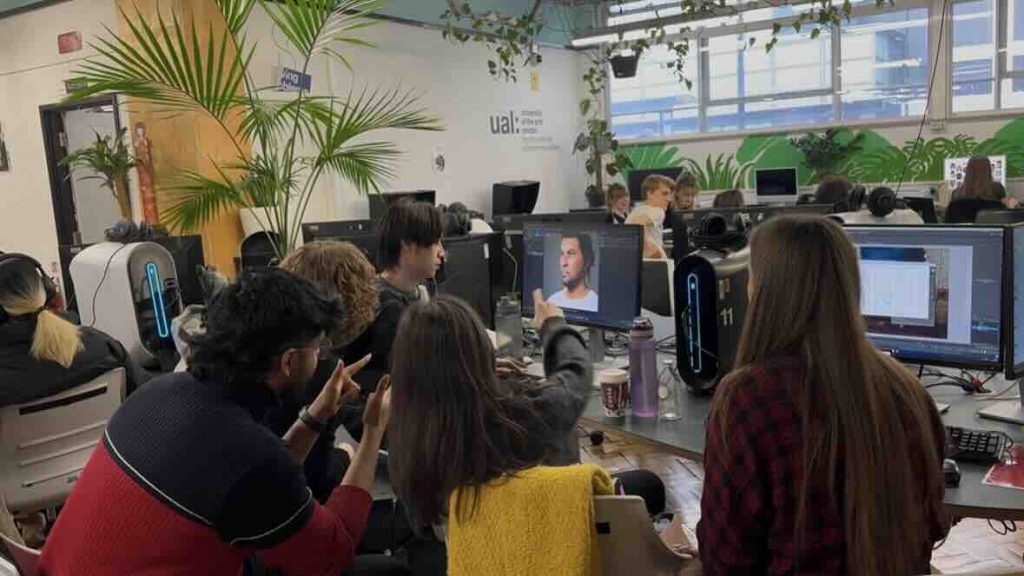
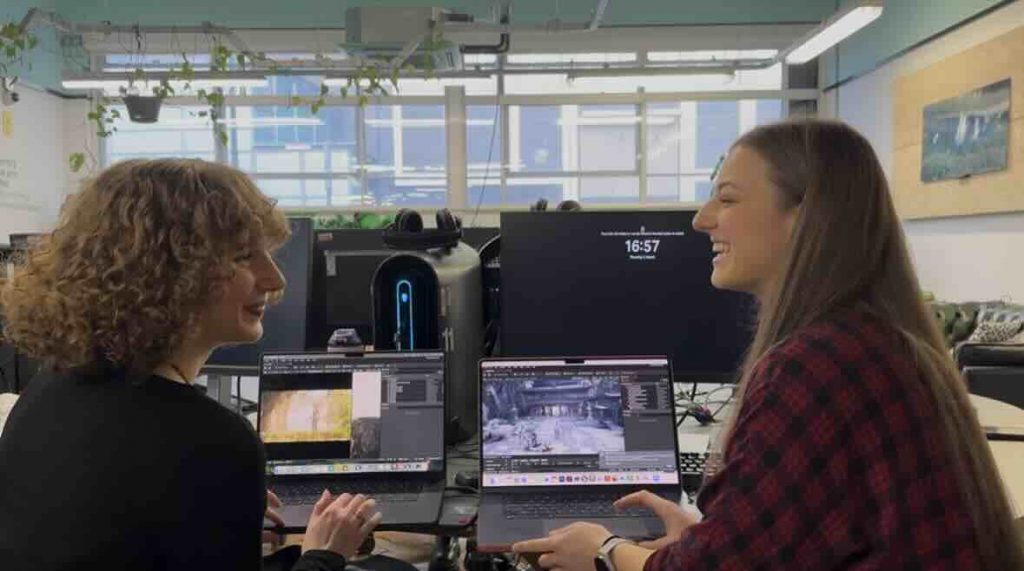
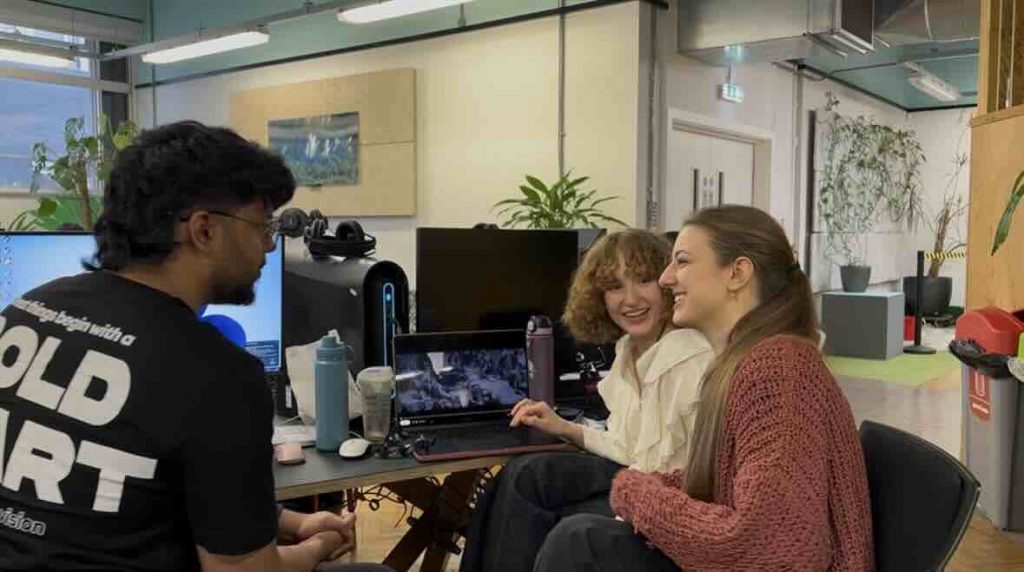
Throughout the production process, collaboration became one of the most important aspects of the project. We worked closely together during planning, environment creation, character development, and motion capture sessions. Documenting our collaboration and mocap process highlighted the amount of teamwork and communication involved in bringing the project to life. Although the process was challenging at times, it was also incredibly rewarding and became a valuable learning experience for all of us. Working together on such a large-scale production allowed us to strengthen both our technical and creative skills while gaining experience in managing a collaborative workflow.
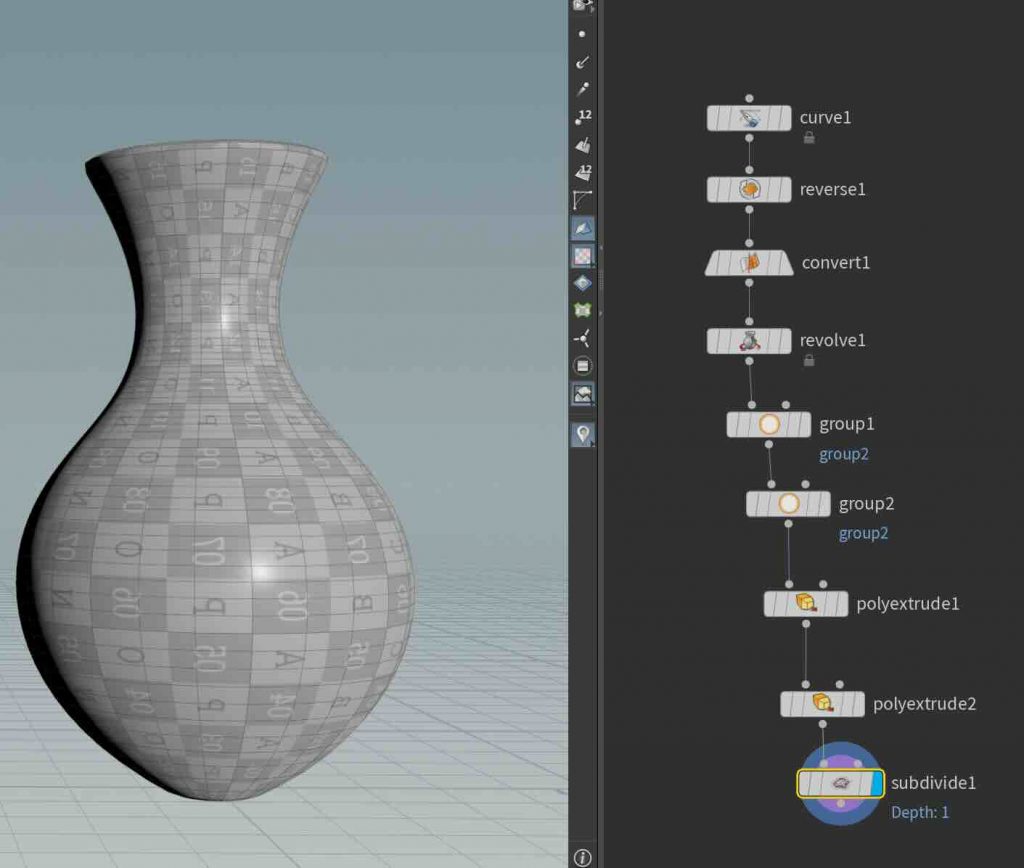
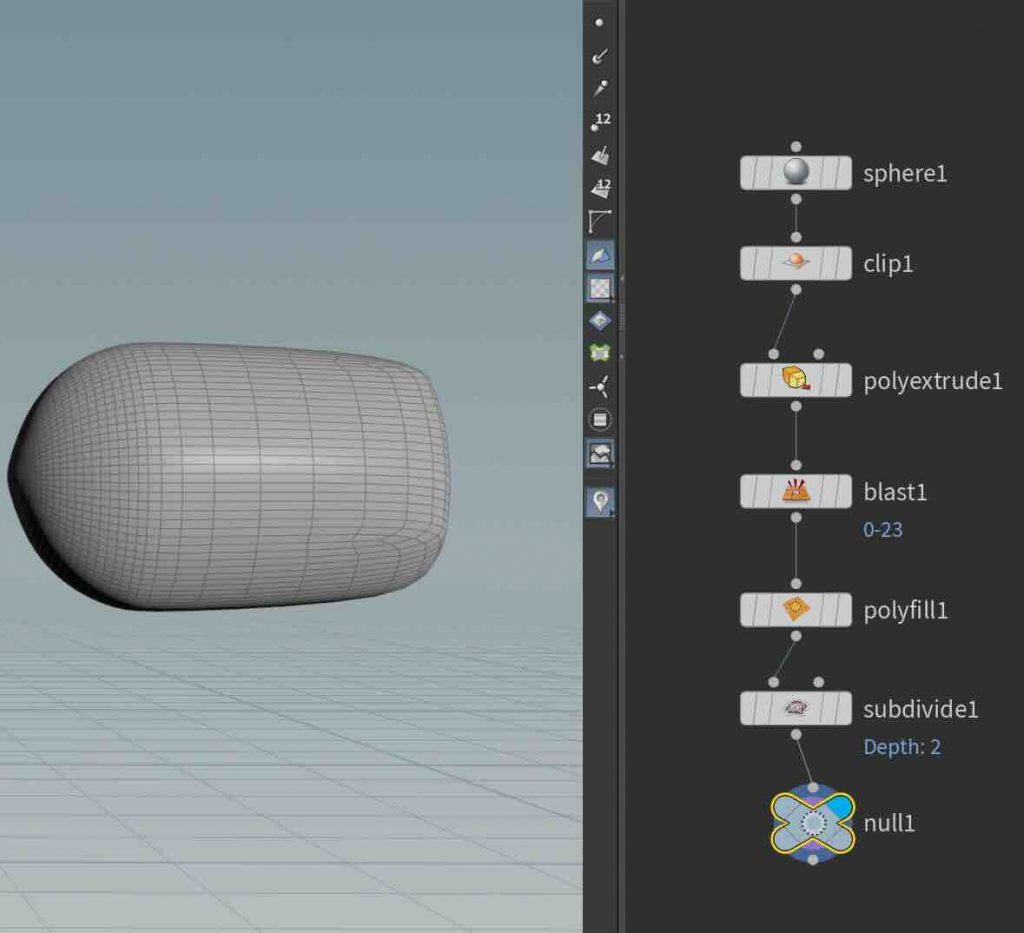
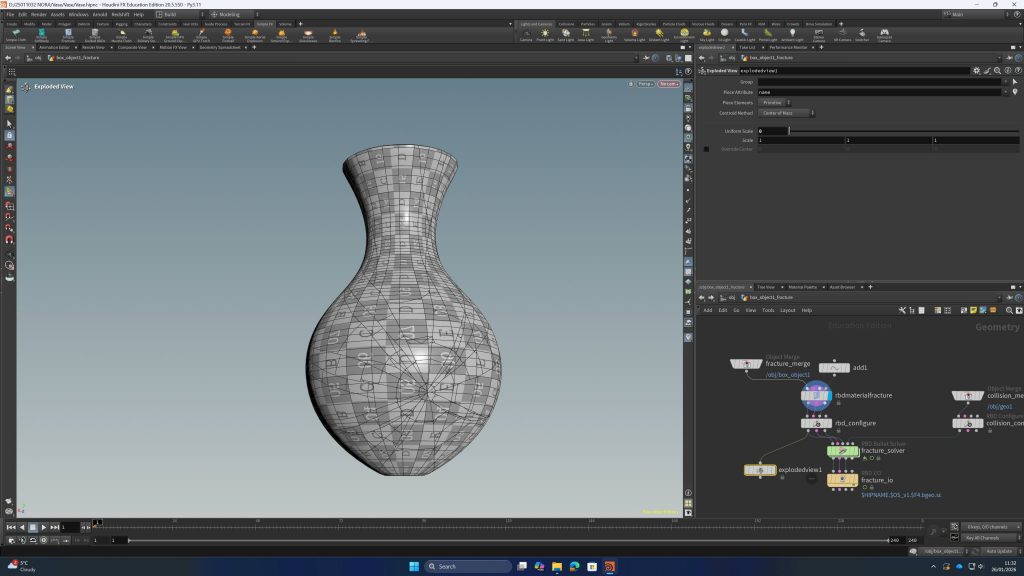
In our first class using Houdini, we were introduced to both basic modeling and simple simulation. We started by creating a vase, learning how to shape it and adjust its form step by step using a procedural workflow.
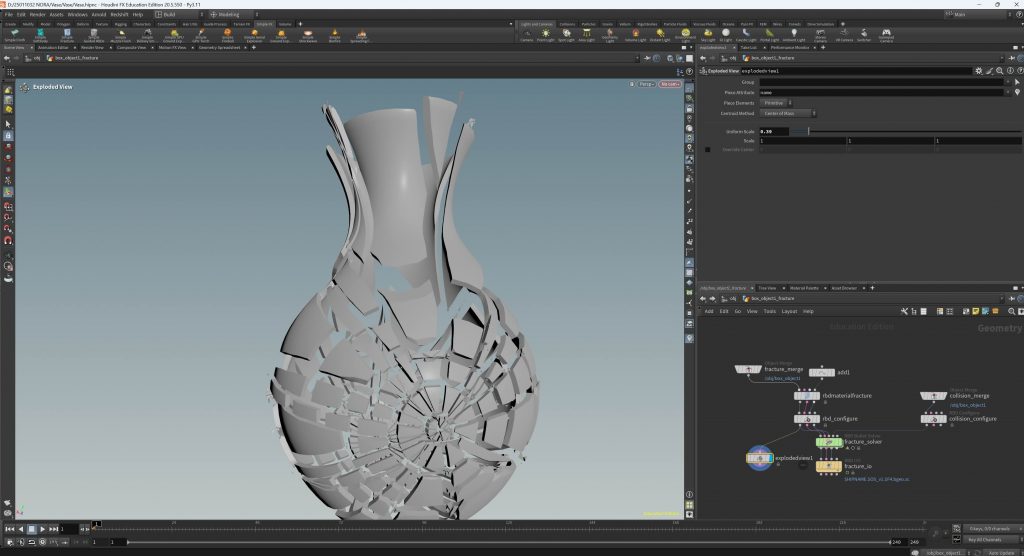
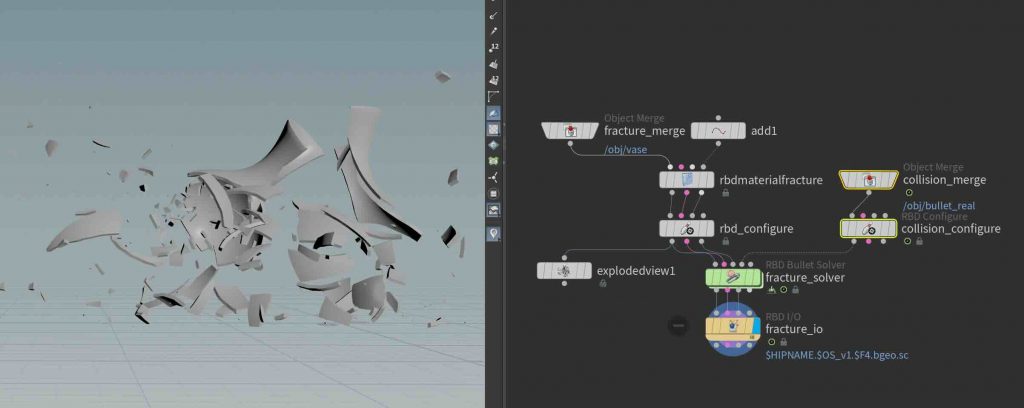
After that, we turned the vase into part of a small scene where a bullet collides with it. On impact, the vase breaks apart and explodes into pieces, giving us a first look at how destruction effects work. It was interesting to see how something we modeled ourselves could quickly become part of a dynamic, animated moment.
This first exercise gave a glimpse into how Houdini combines modeling and simulation, making it possible to create both objects and the effects that act on them.
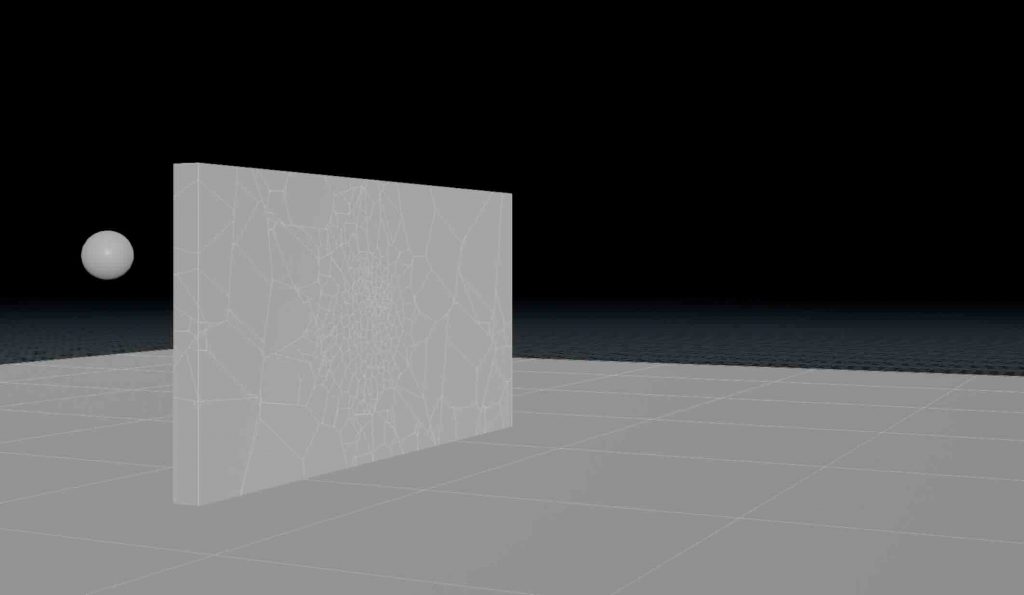
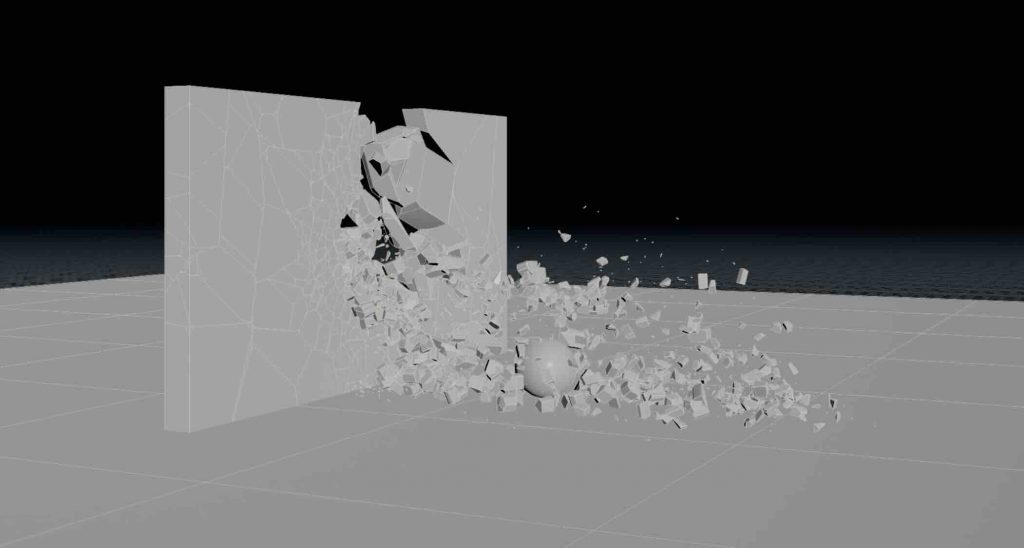
Wall and Ball:
In our second class using Houdini, we worked on a destruction simulation where a ball crashes into a wall and breaks it apart. We created the wall, set up the collision, and simulated the impact so the wall would shatter into pieces when the ball hit it.
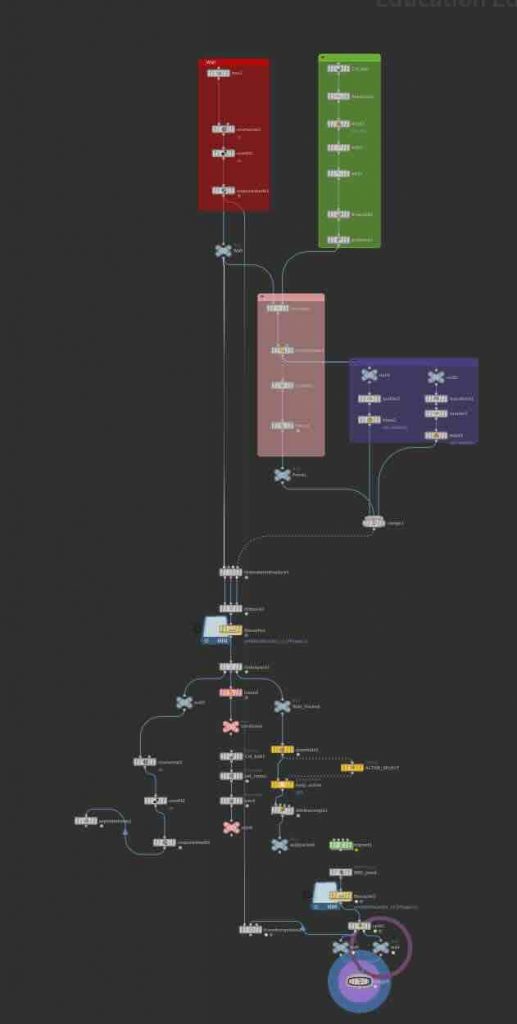
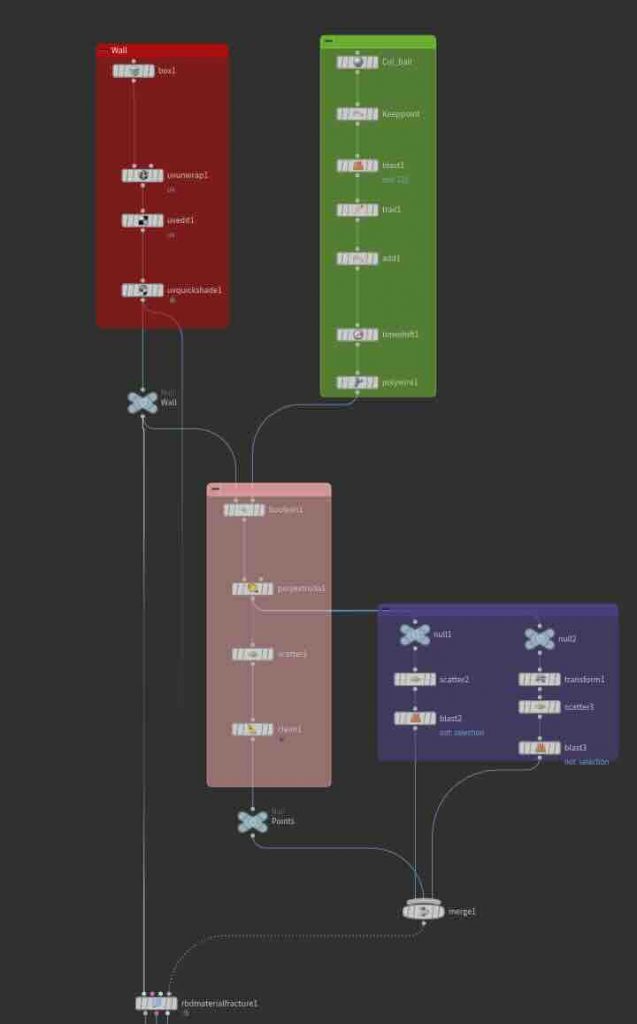
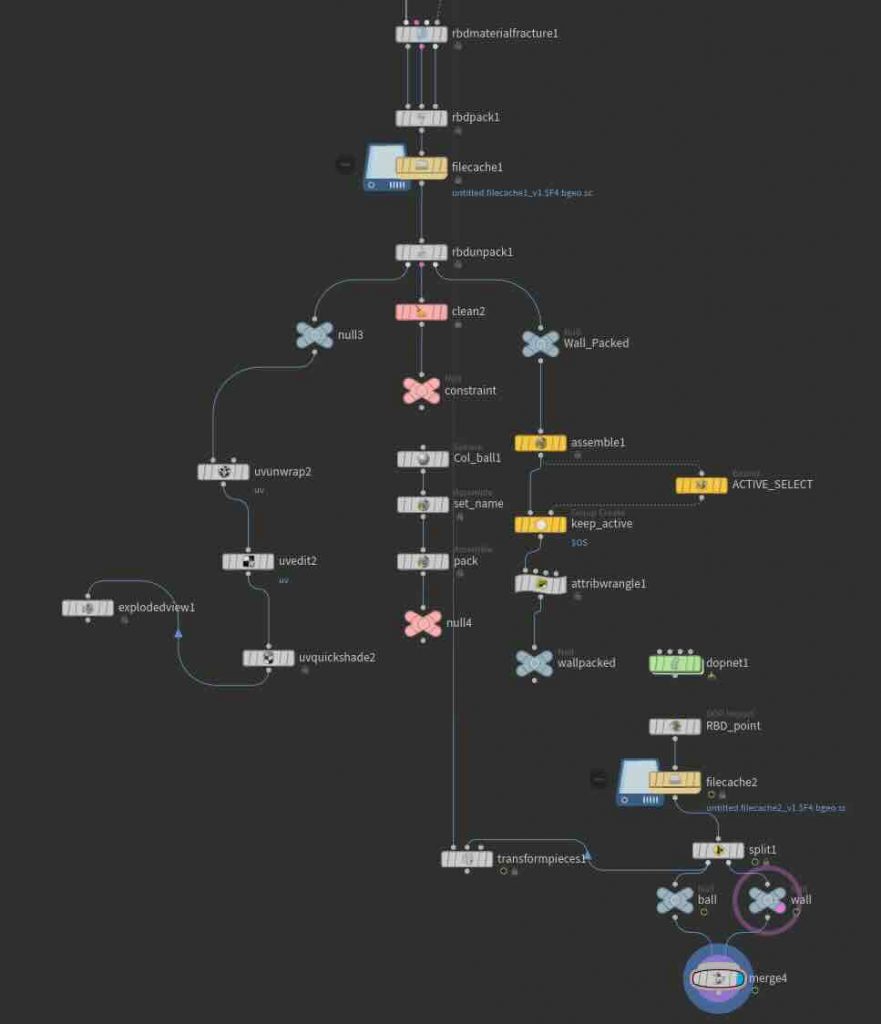
The process was challenging because Houdini has a very technical and complex workflow, especially for someone using it for the first time. A lot of the work involved understanding different nodes, simulation settings, and how physics-based effects interact inside the software. Even though it was difficult to follow at times, the final result showed how detailed and realistic destruction effects can be created through simulation.
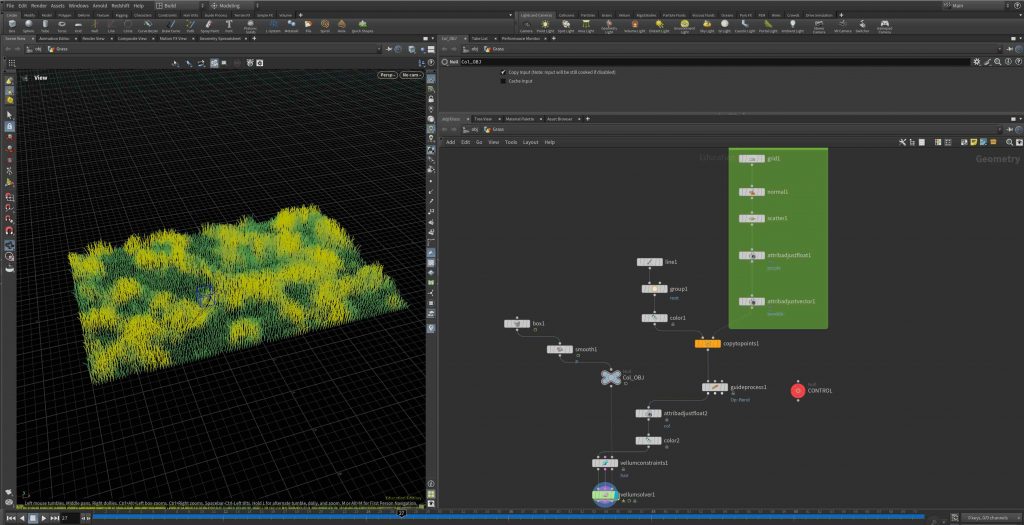
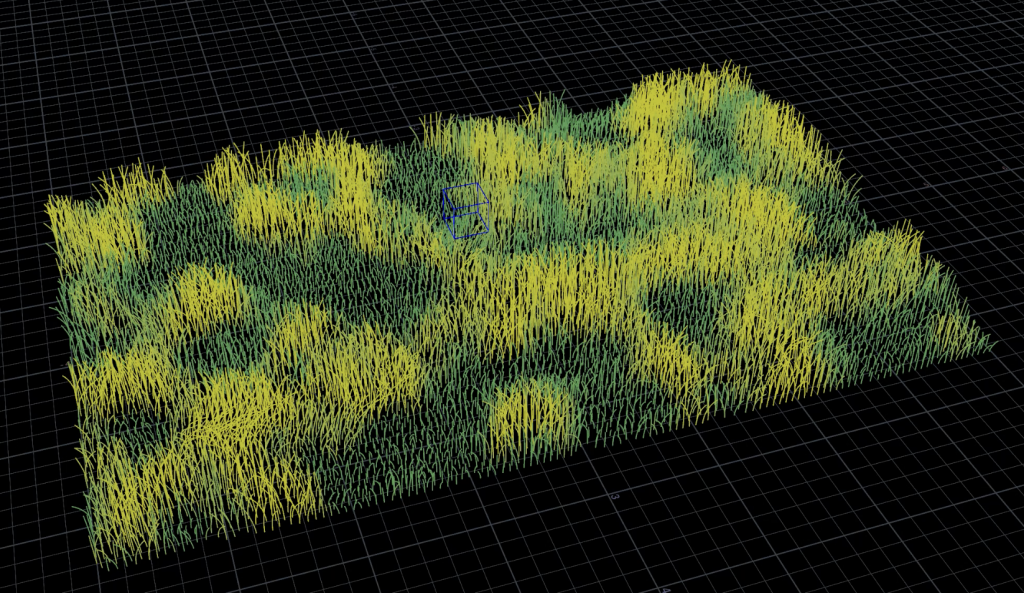
Grass and Cube:
In our second class using Houdini, we worked on a destruction simulation where a ball crashes into a wall and breaks it apart. We created the wall, set up the collision, and simulated the impact so the wall would shatter into pieces when the ball hit it.
The process was challenging because Houdini has a very technical and complex workflow, especially for someone using it for the first time. A lot of the work involved understanding different nodes, simulation settings, and how physics-based effects interact inside the software. Even though it was difficult to follow at times, the final result showed how detailed and realistic destruction effects can be created through simulation.
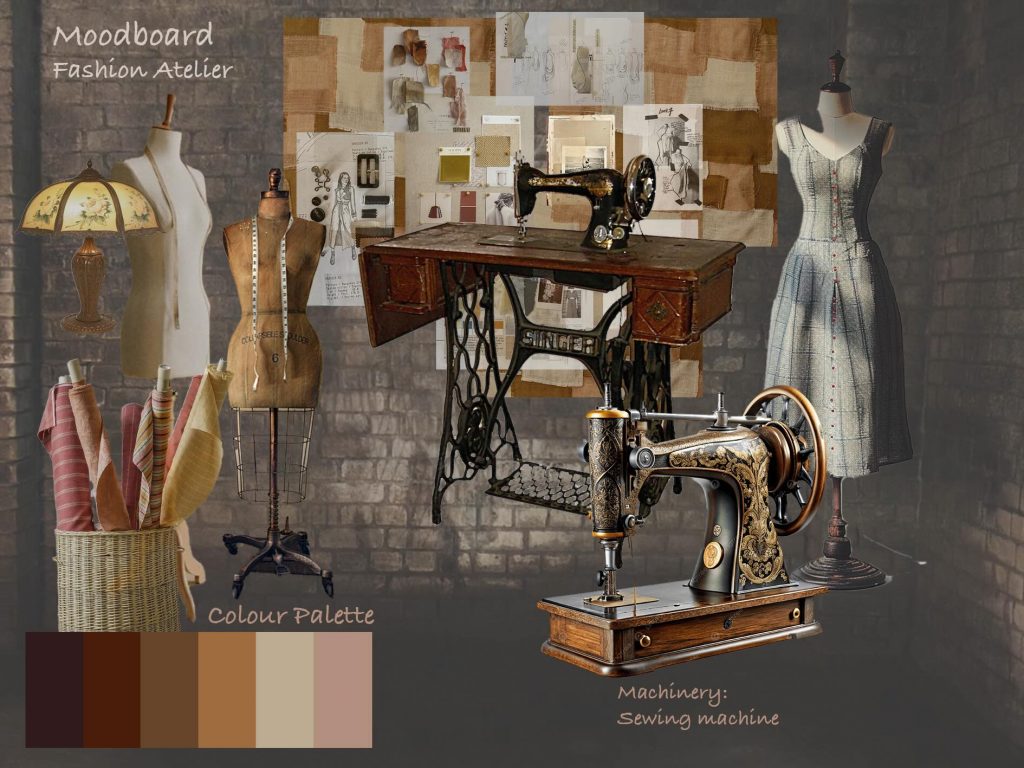
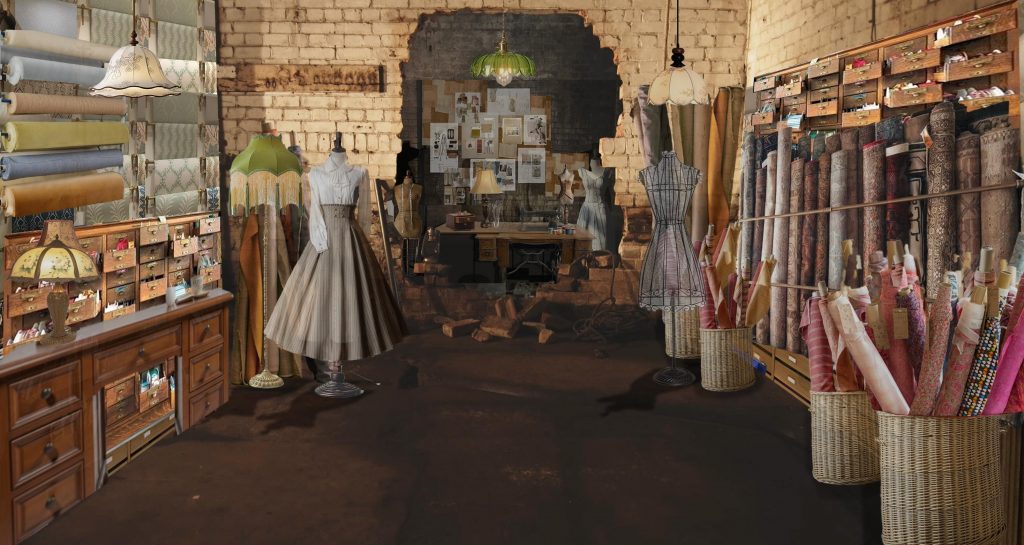
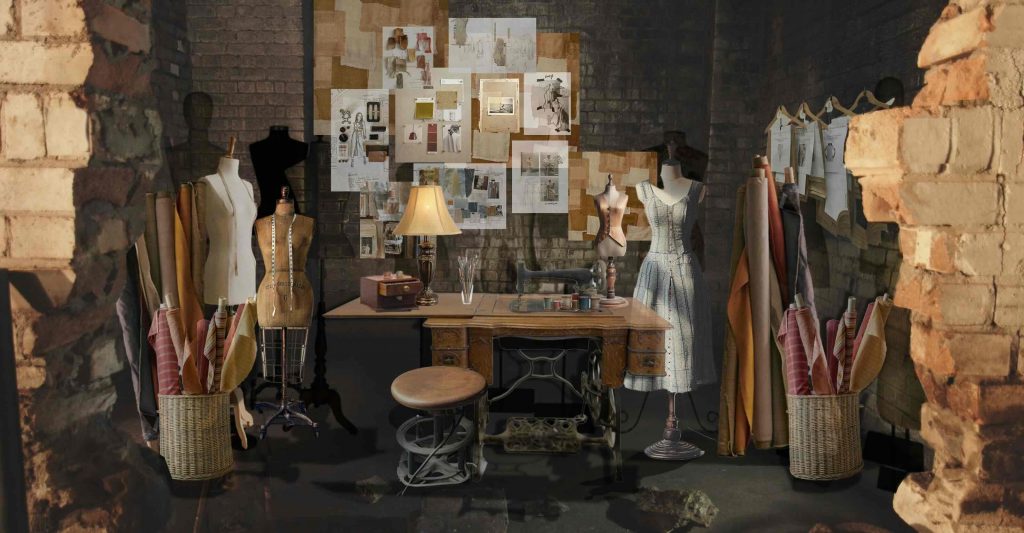
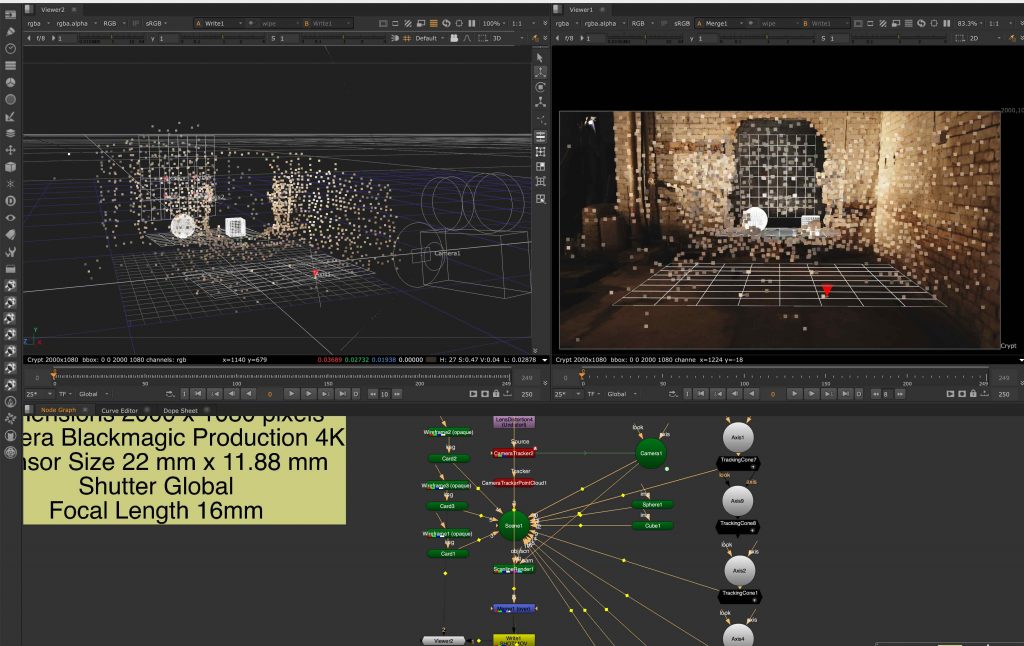
For our biggest project in Nuke, we worked with footage of an abandoned garage and transformed the space by integrating 3D elements into the scene. The goal was to make the environment feel more visually interesting and believable by adding machinery and other objects that fit naturally into the space.
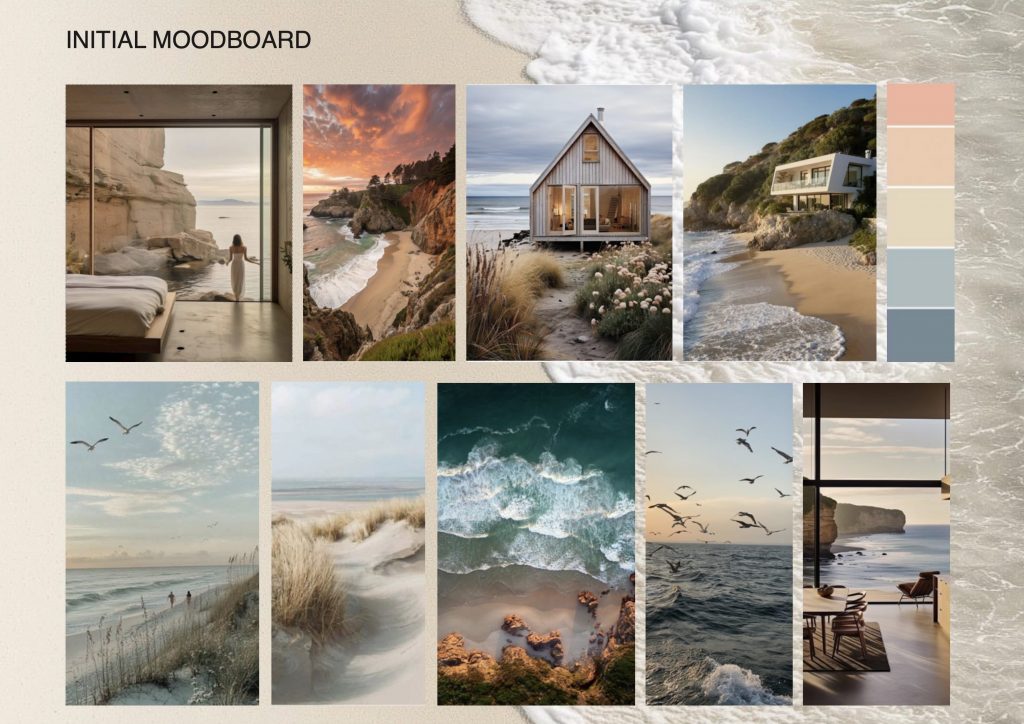
Concept and Moodboard:
Before starting the compositing process, we had to develop a concept and create a moodboard to plan how the final scene would look.
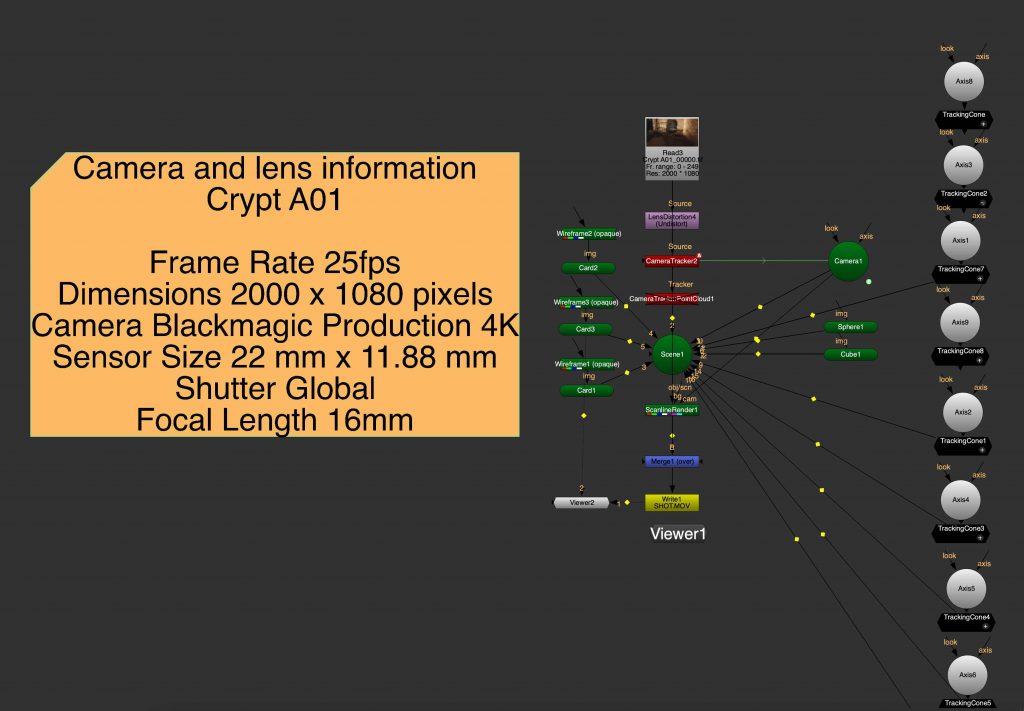
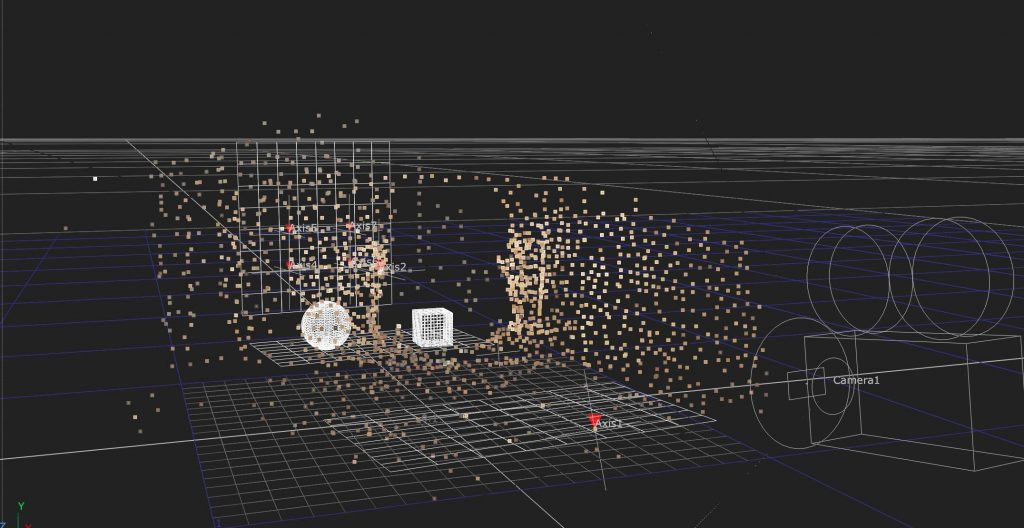
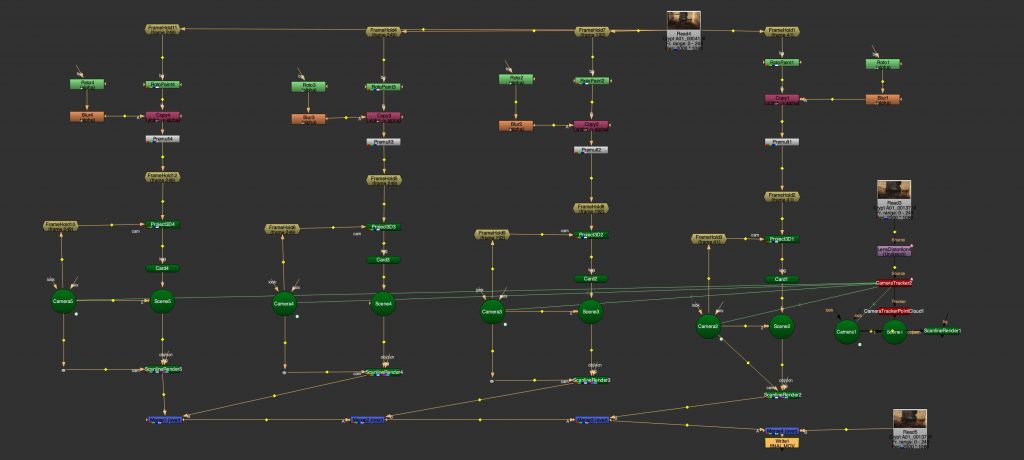
Tracking and working in 3D Nuke space:
We began by tracking the footage and placing cones onto the tracking points to check whether the camera tracking was stable and accurate. After that, we started building the basic 3D scene by placing floor planes and simple objects, such as cubes, into the environment to match the perspective and movement of the original footage.
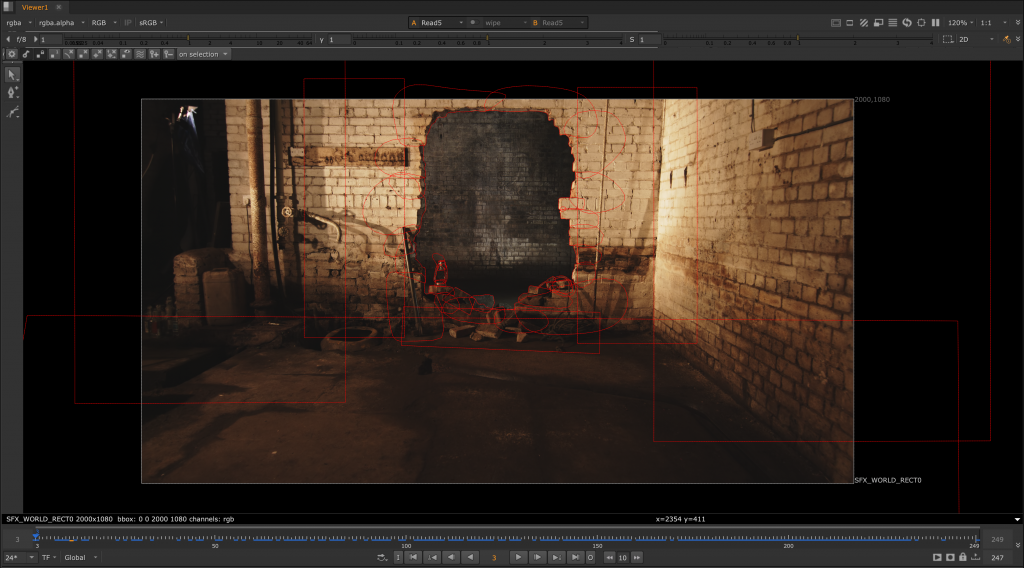
Rotoscoping:
To gain more control over the composition, we also rotoscoped the first room from the second room, separating the spaces so the added elements could interact more naturally within the scene.
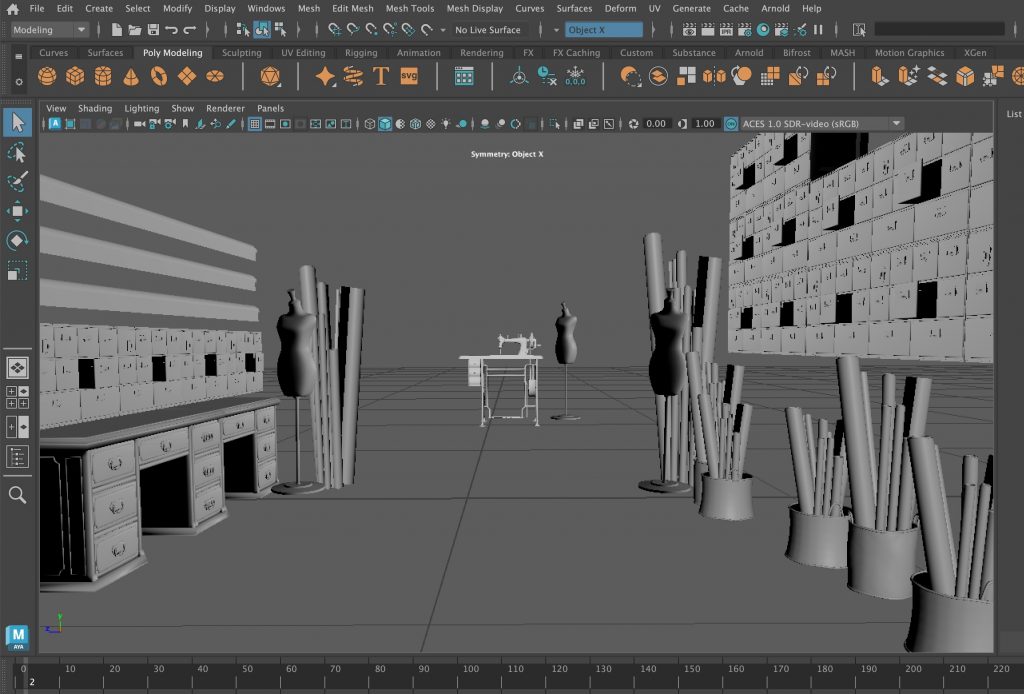
3D Models:
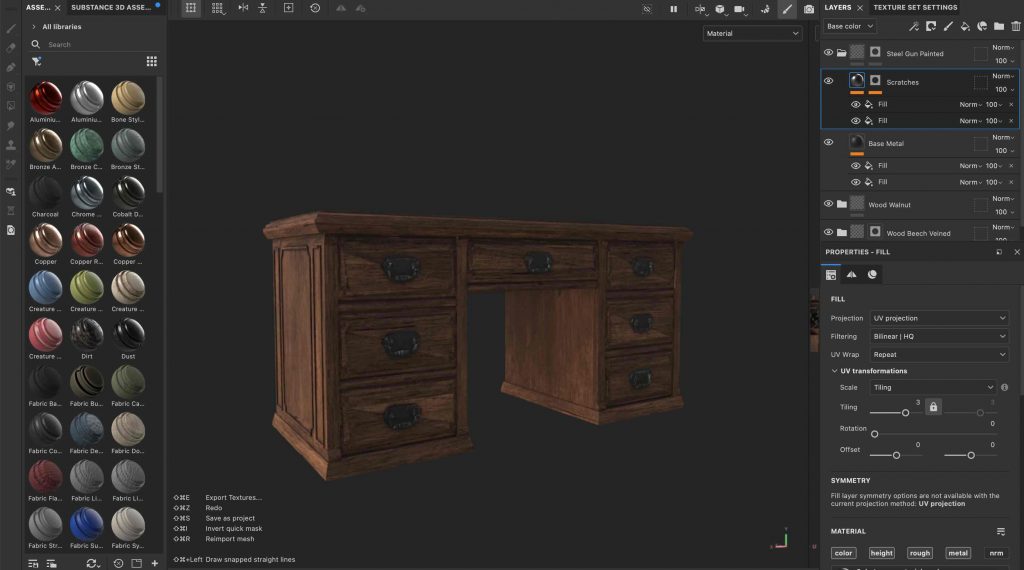
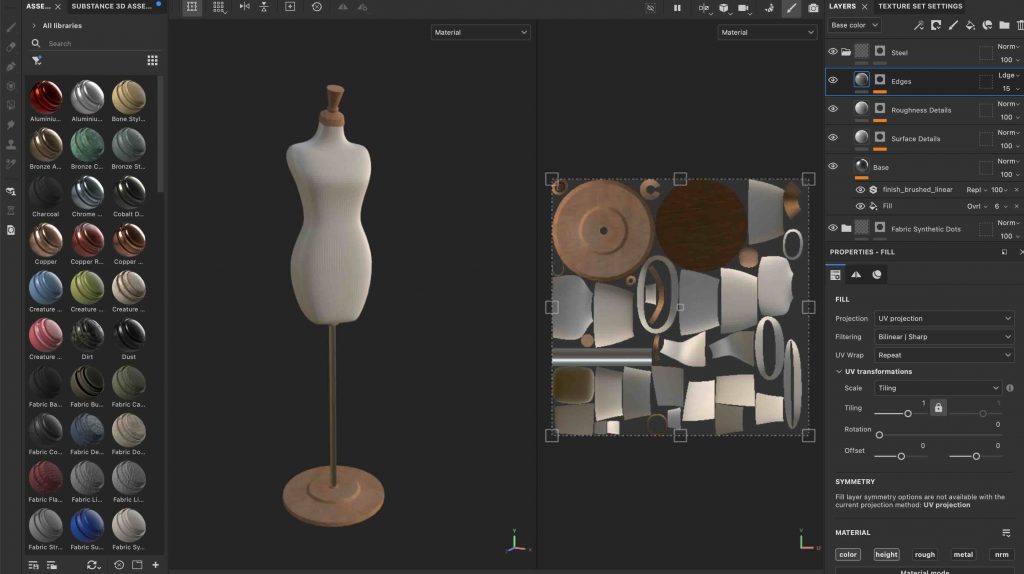
For the 3D elements, I decided not to model the objects myself and instead focused on learning texturing.
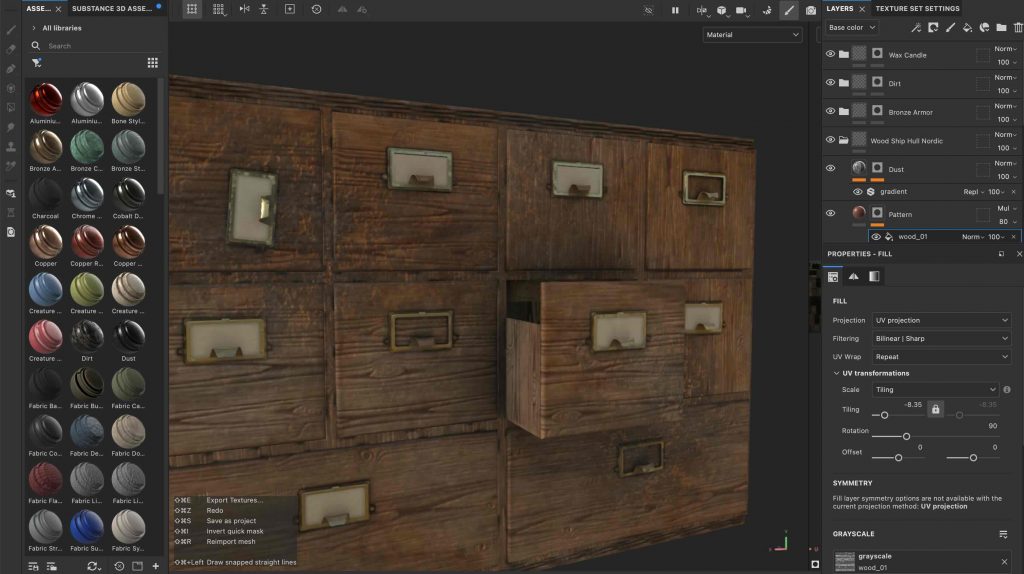
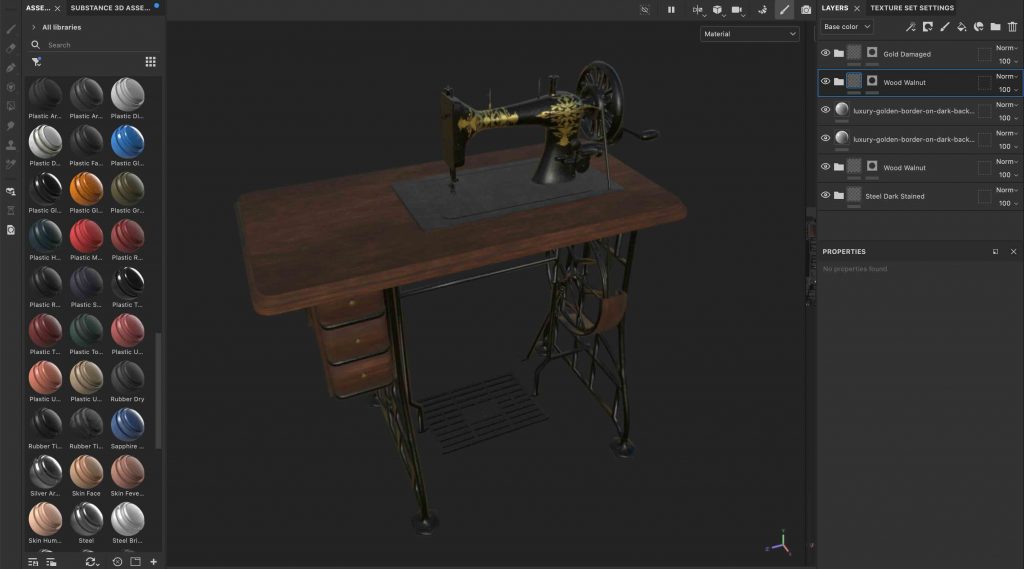
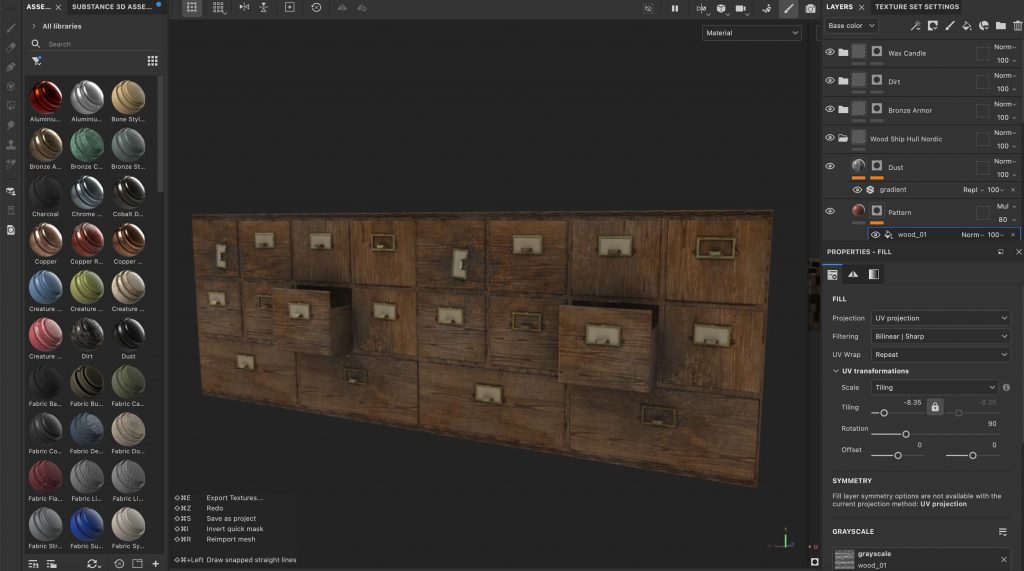
Substance Painter:
I used Adobe Substance 3D Painter for the first time to texture the sewing machine and the other assets, which I ended up enjoying a lot. It was interesting to experiment with different materials, surface details, and weathering to make the objects feel more realistic and suited to the abandoned environment.
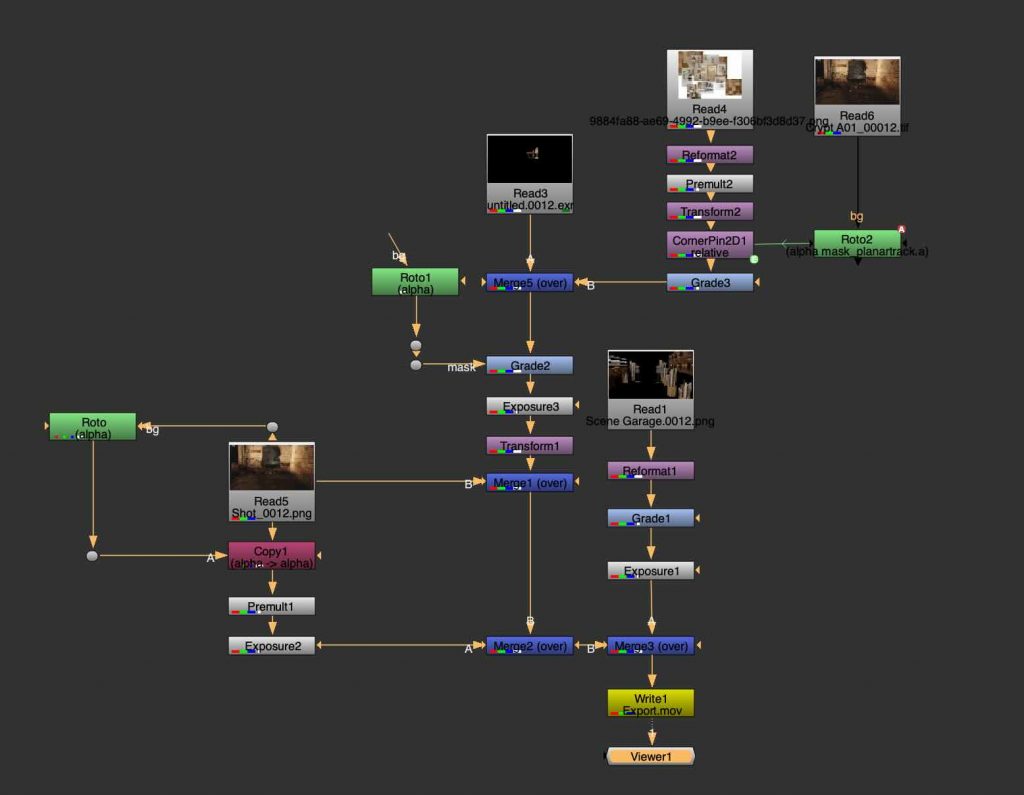
Compositing:
The final stage involved rendering the 3D scene in Autodesk Maya and compositing the rendered elements back into the original footage in Nuke. This project combined tracking, rotoscoping, texturing, 3D integration, and compositing into one workflow, giving a better understanding of how visual effects shots are built from start to finish.
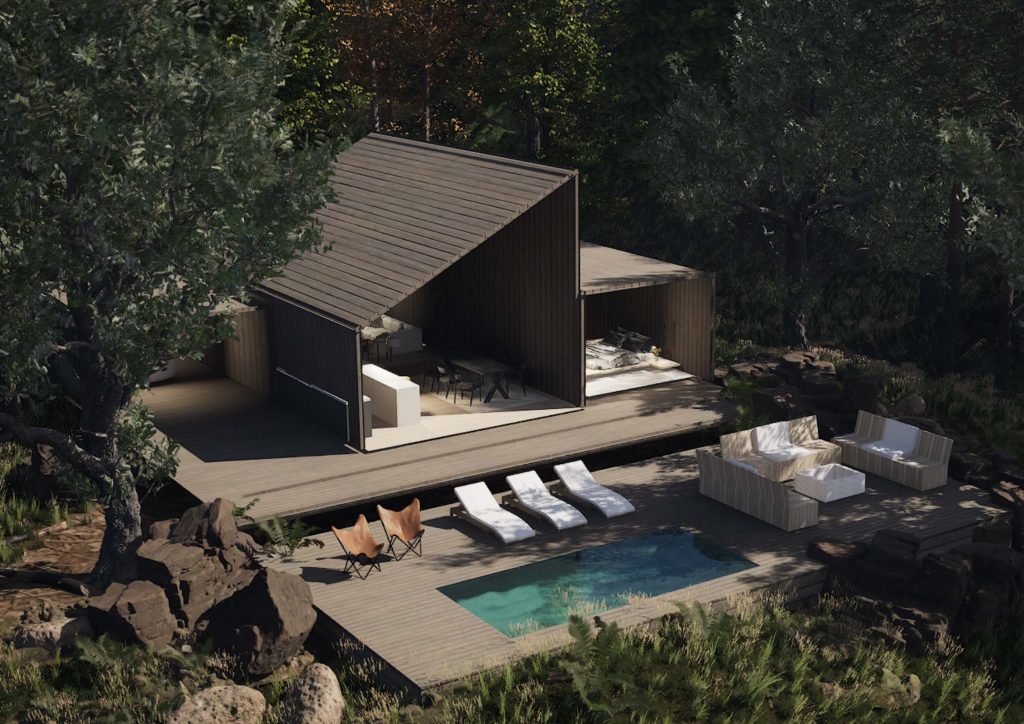
The focus of this project was the creation of a stylised CGI environment that invites immersion and a sense of wonder. Coming from a background in interior design, I had never worked on exterior environments before starting the MA, and this project became my first experience of building an entire world from the outside in. I found this process deeply rewarding and genuinely enjoyable, particularly the freedom of shaping atmosphere through light, colour, and scale. Developing the environment confirmed my interest in world-building as a central part of my creative practice.
The fairy character was introduced as a subtle presence rather than a narrative lead. I had never modelled or rigged a character prior to this project, which made this stage challenging, but also an important learning experience. The story is intentionally not driven by action or character performance; instead, the fairy’s movement simply guides the viewer through the space, allowing the environment itself to remain the emotional core of the piece.
Creative Process:
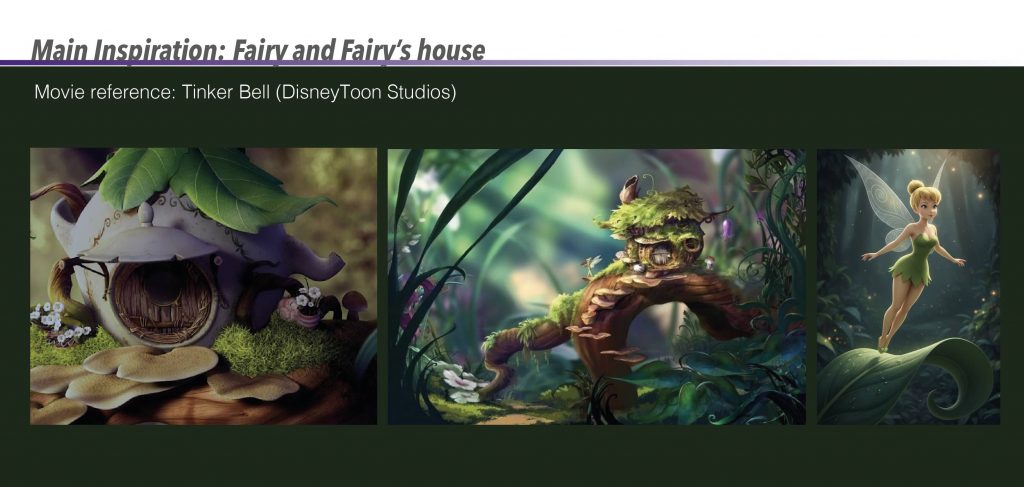
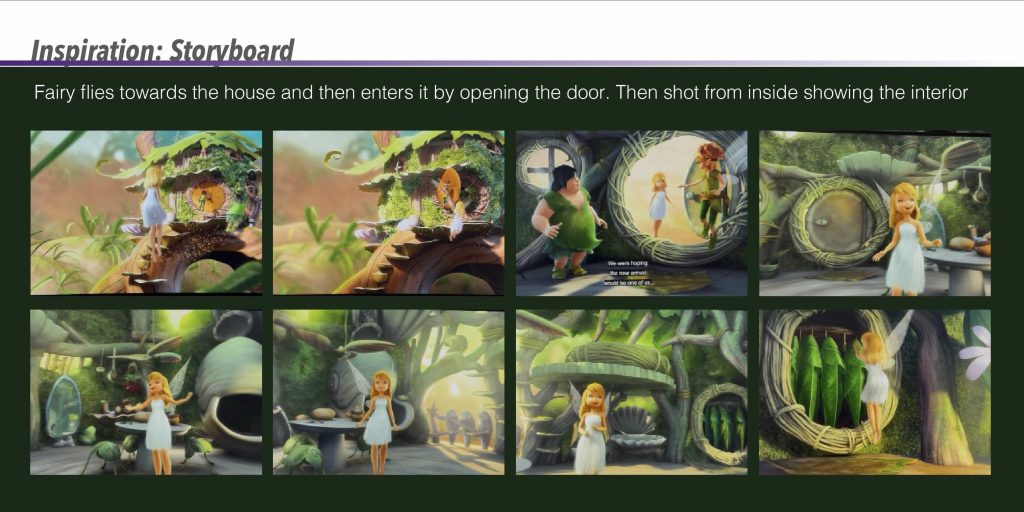
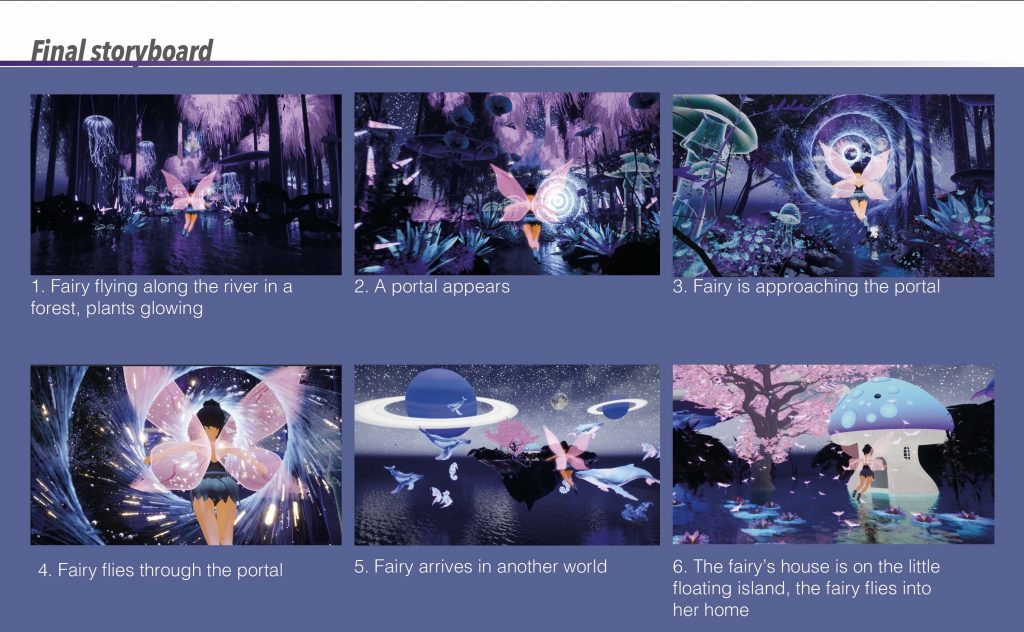
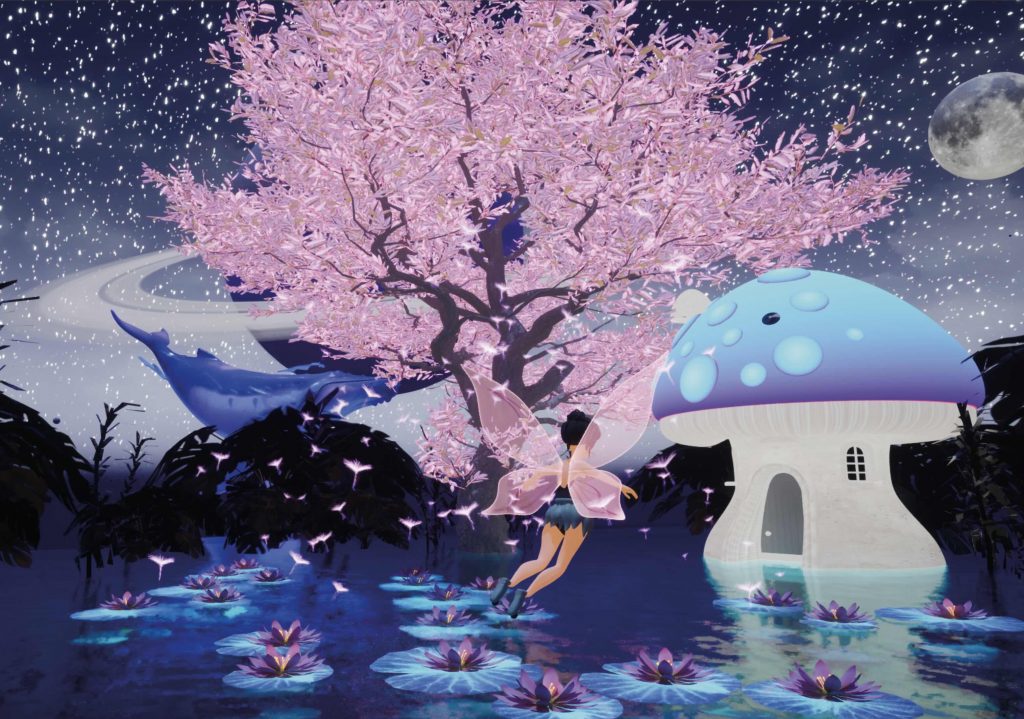
At the beginning of the project, my main source of inspiration came from Tinkerbell by DisneyToon Studios. I was particularly drawn to the whimsical representation of fairy worlds, the organic architecture, and the way small-scale environments are integrated into nature. Elements such as mushroom houses, curved forms, and soft, magical lighting helped shape my initial vision and establish a fairy-tale aesthetic for the project.Using scenes from Tinkerbell as reference, I explored how a simple narrative could be communicated through movement and environment. The storyboard focuses on the fairy flying towards her house, opening the door, and entering the space. These references helped me understand how camera angles, pacing, and spatial transitions could guide the viewer through a short animated sequence.
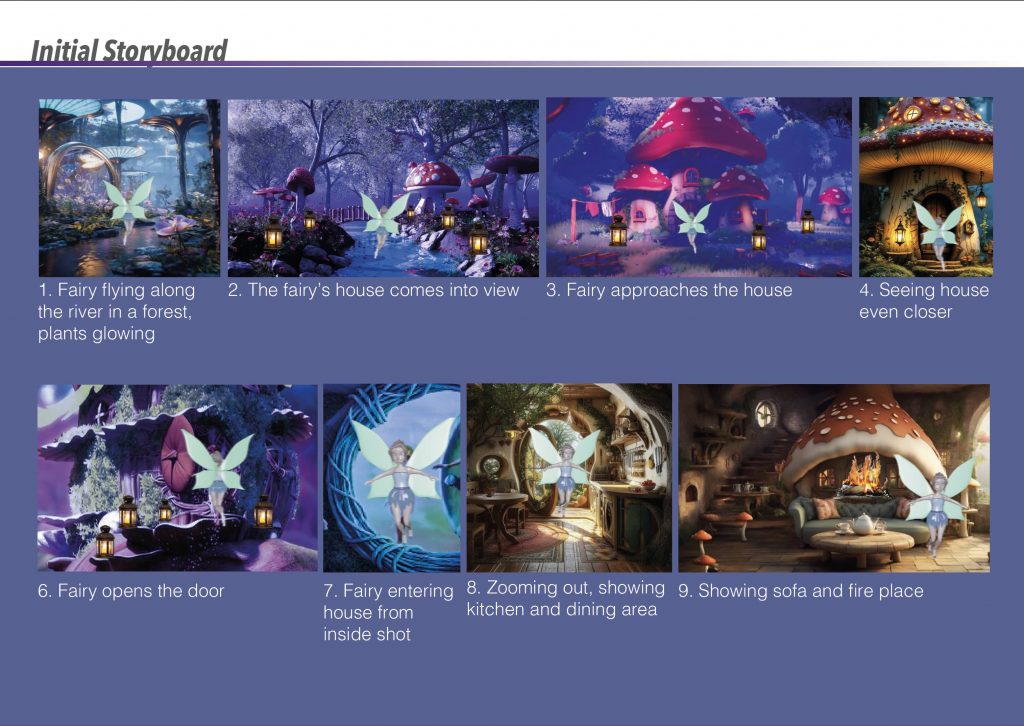
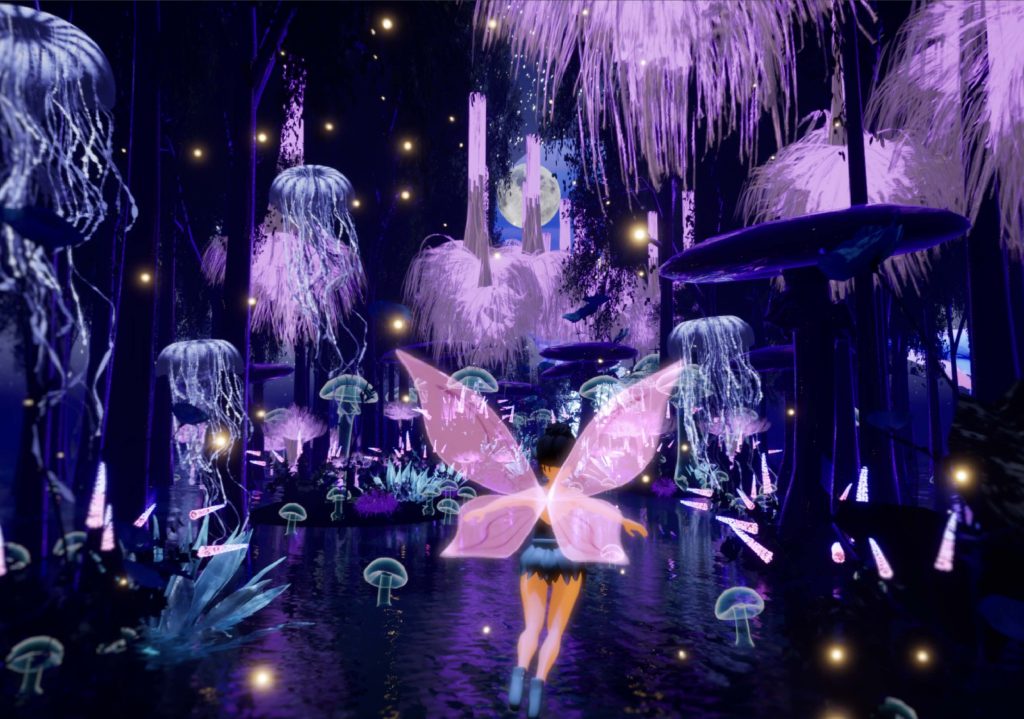
Based on this inspiration, I created my own initial storyboard to visualise how the environment and character would interact. The sequence begins with the fairy flying along a river within a forest, surrounded by glowing plants, before gradually revealing the mushroom house. The storyboard originally included interior shots of the house; however, it mainly served as a planning tool for composition, atmosphere, and the overall flow of the scene.
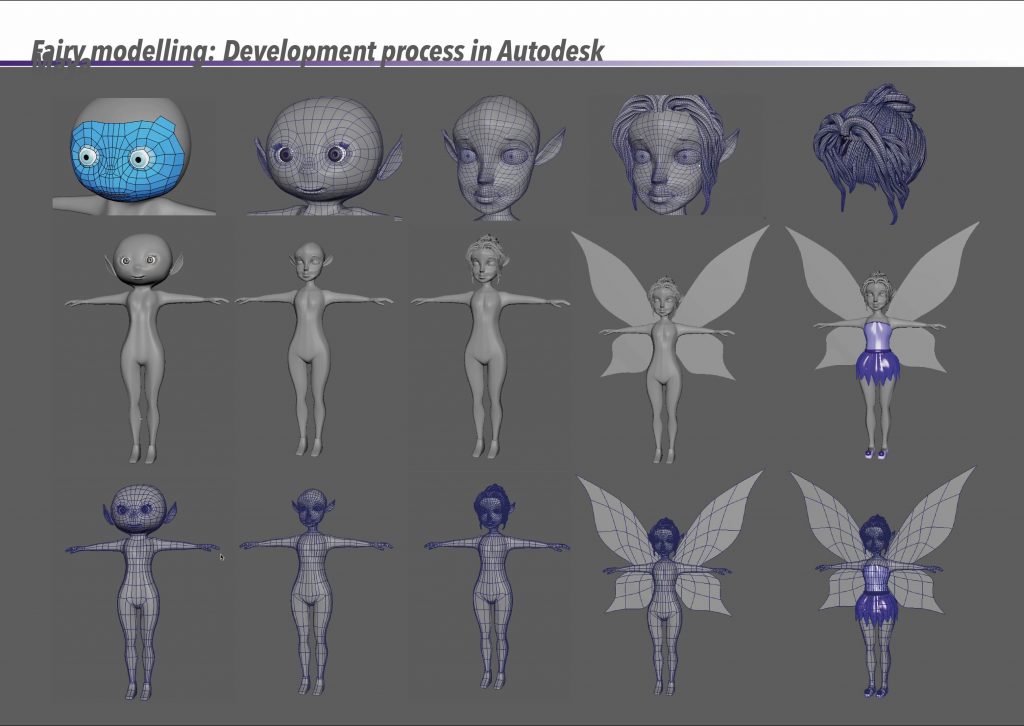
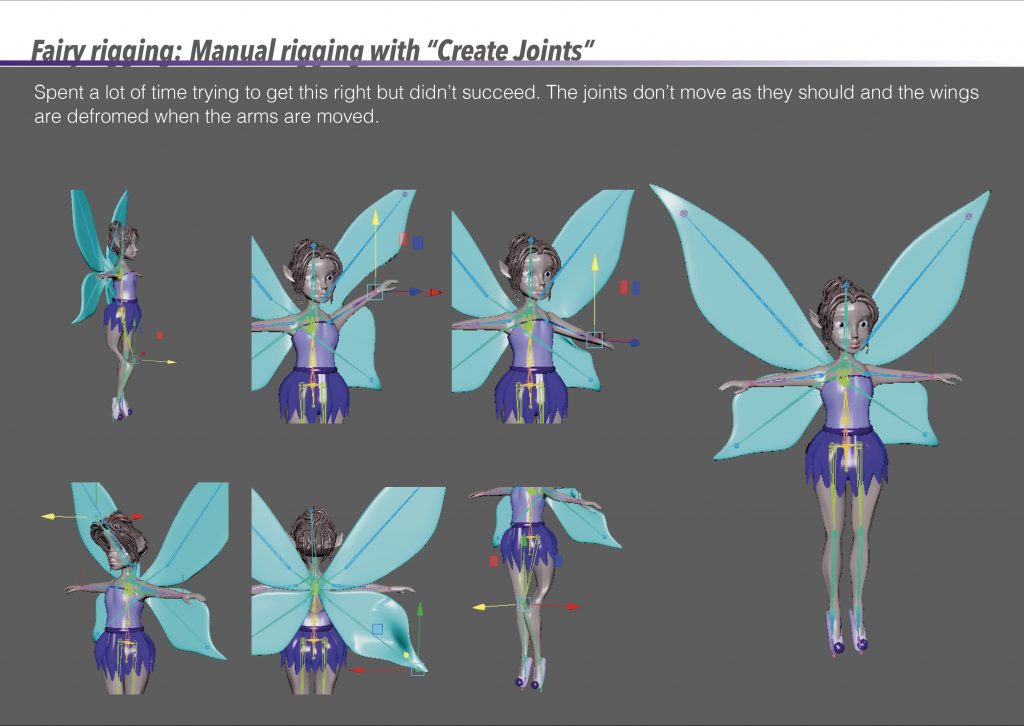
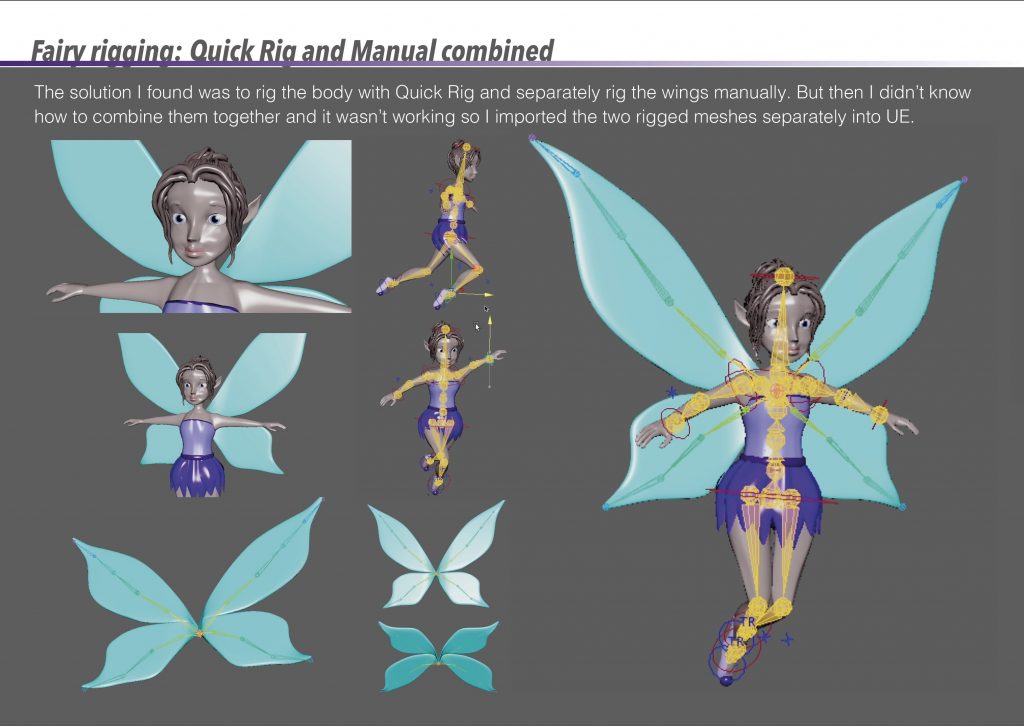
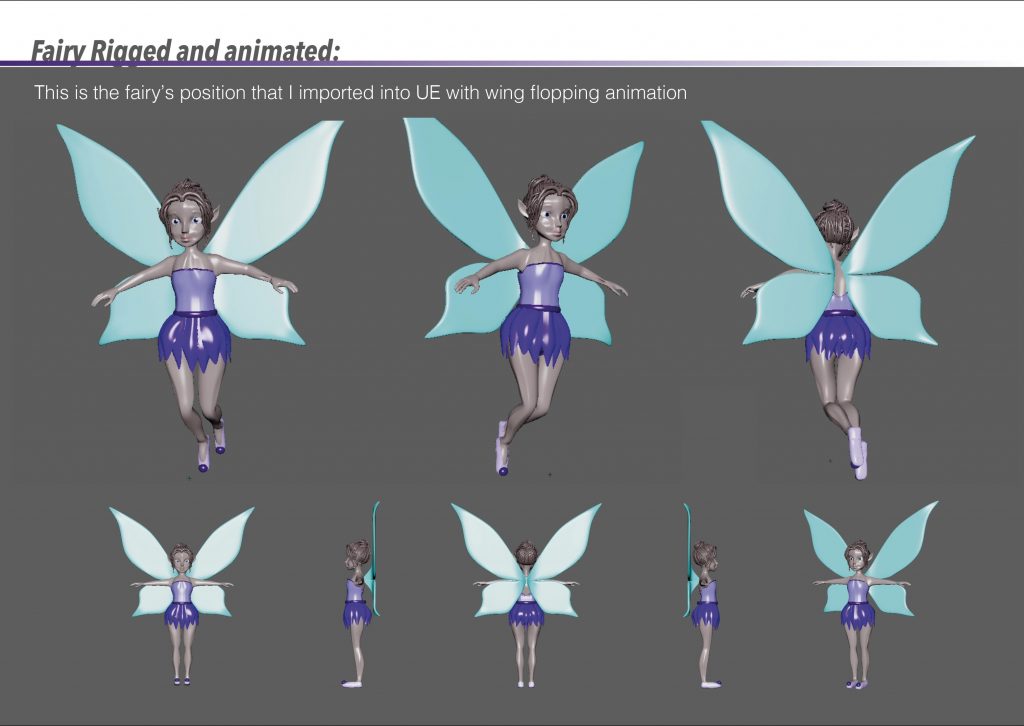
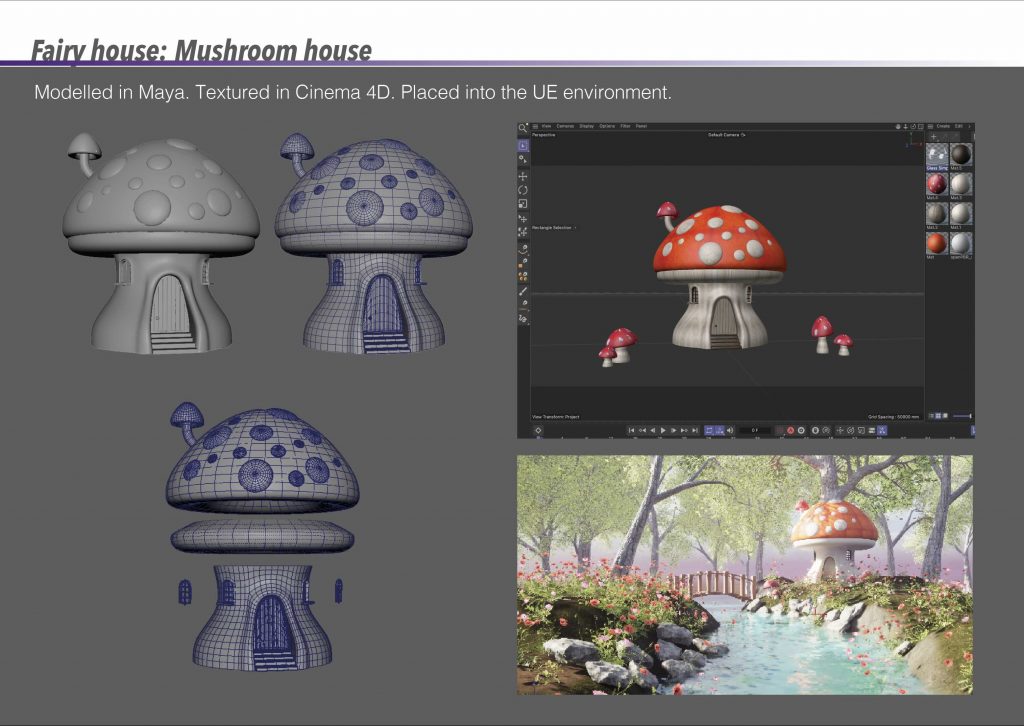
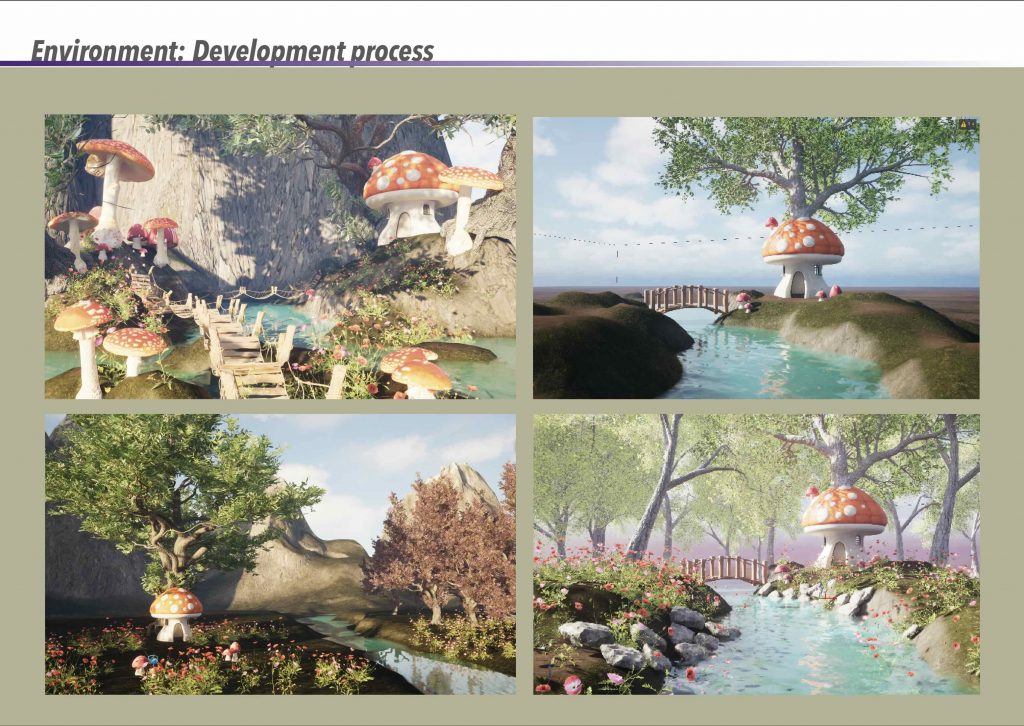
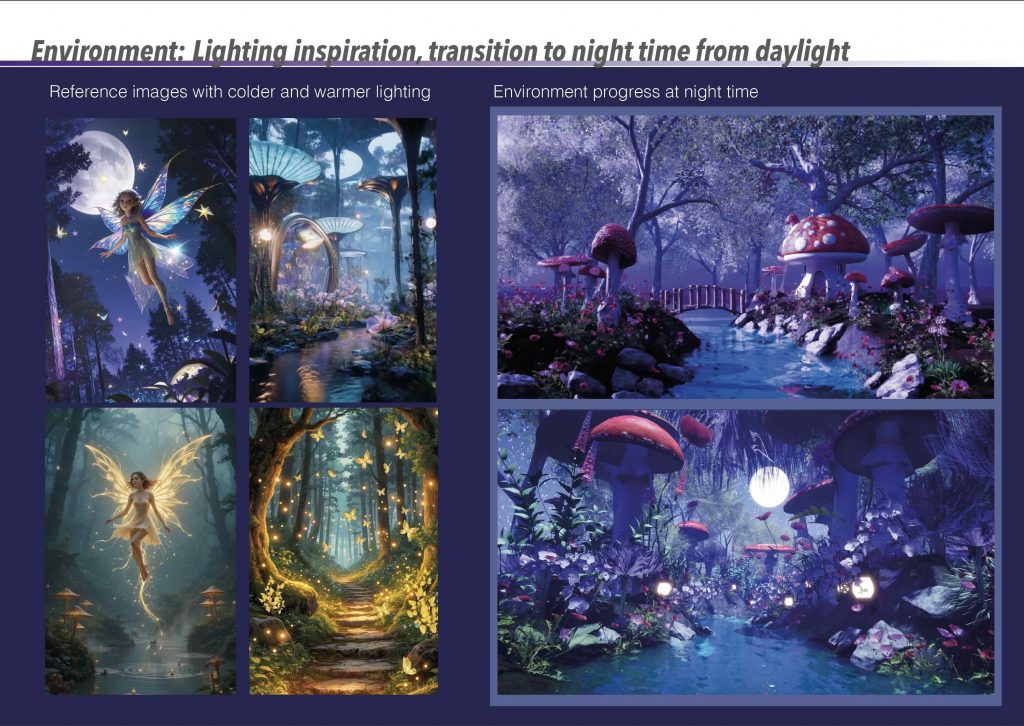
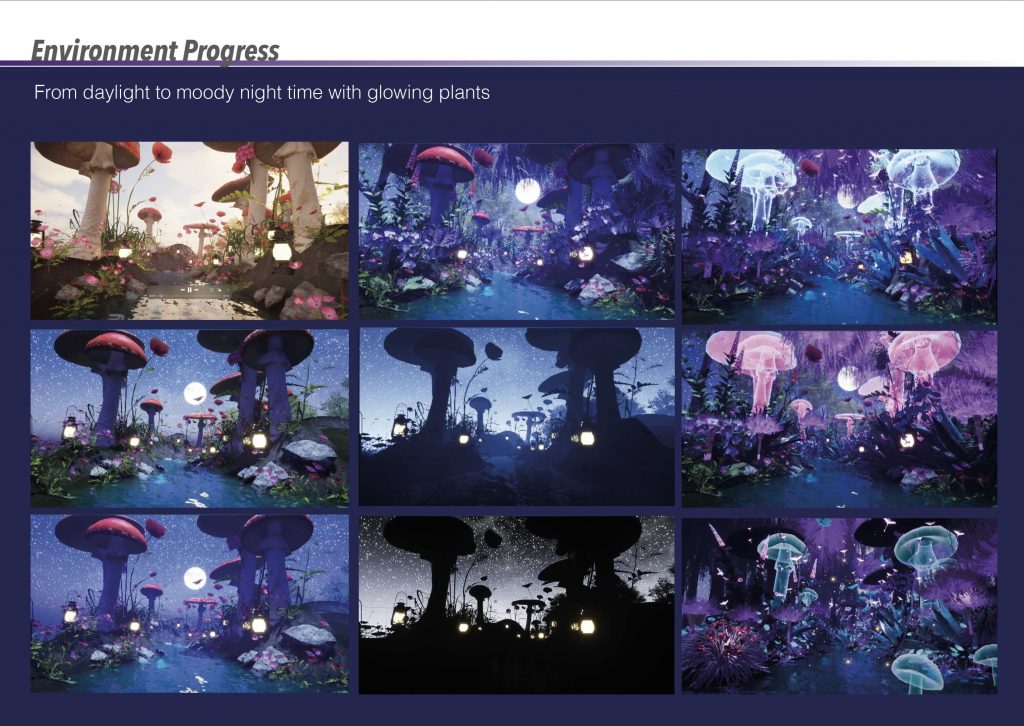
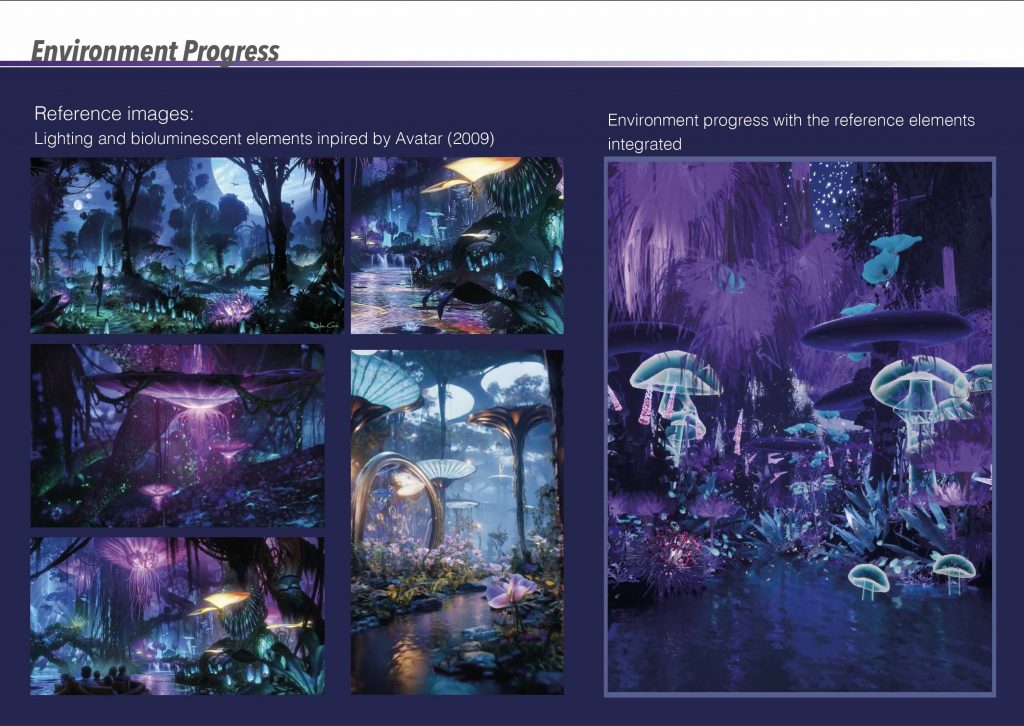
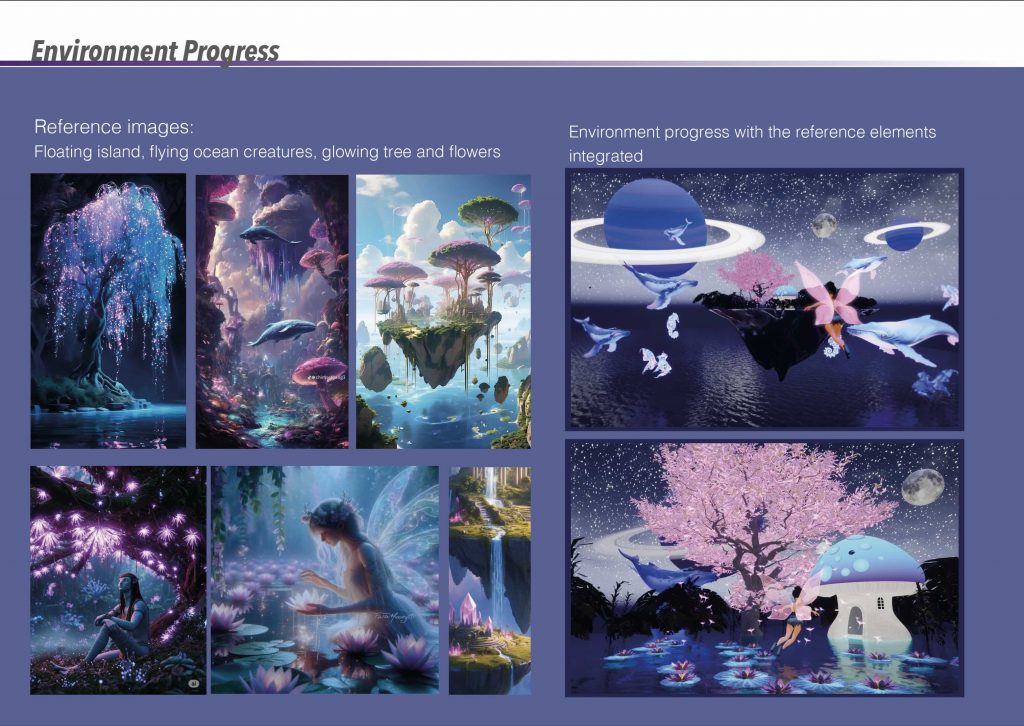
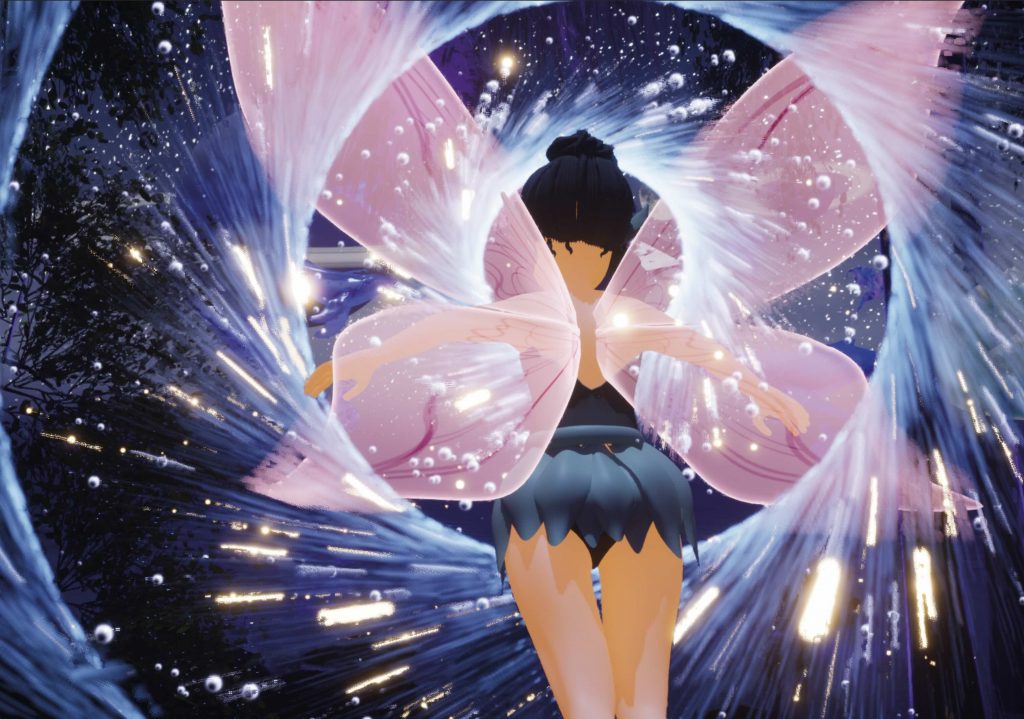
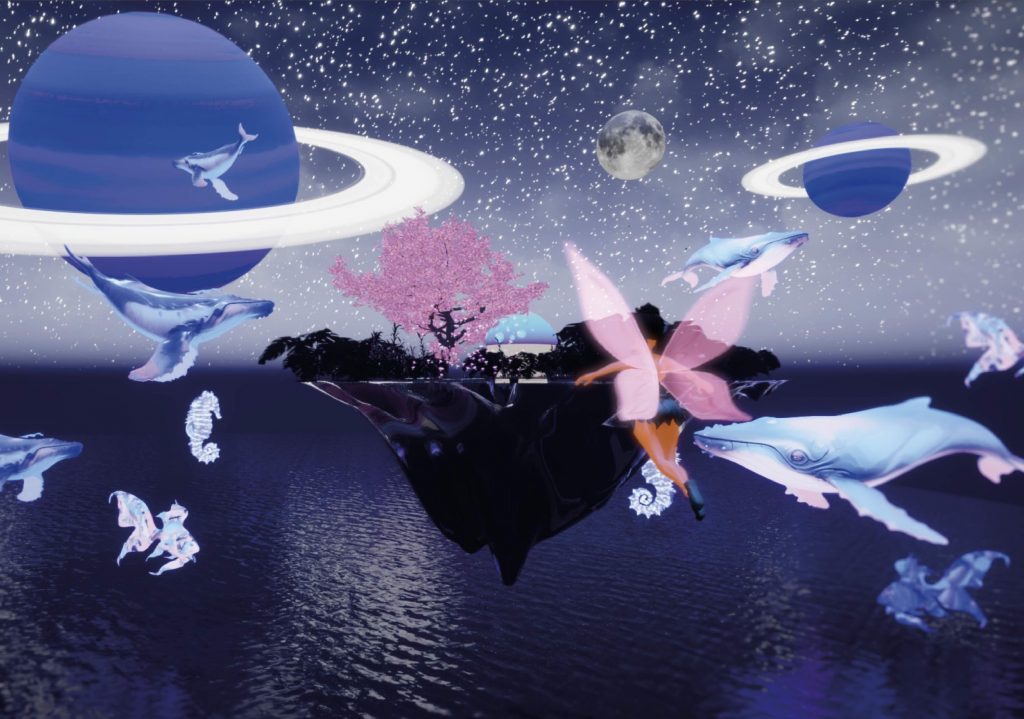
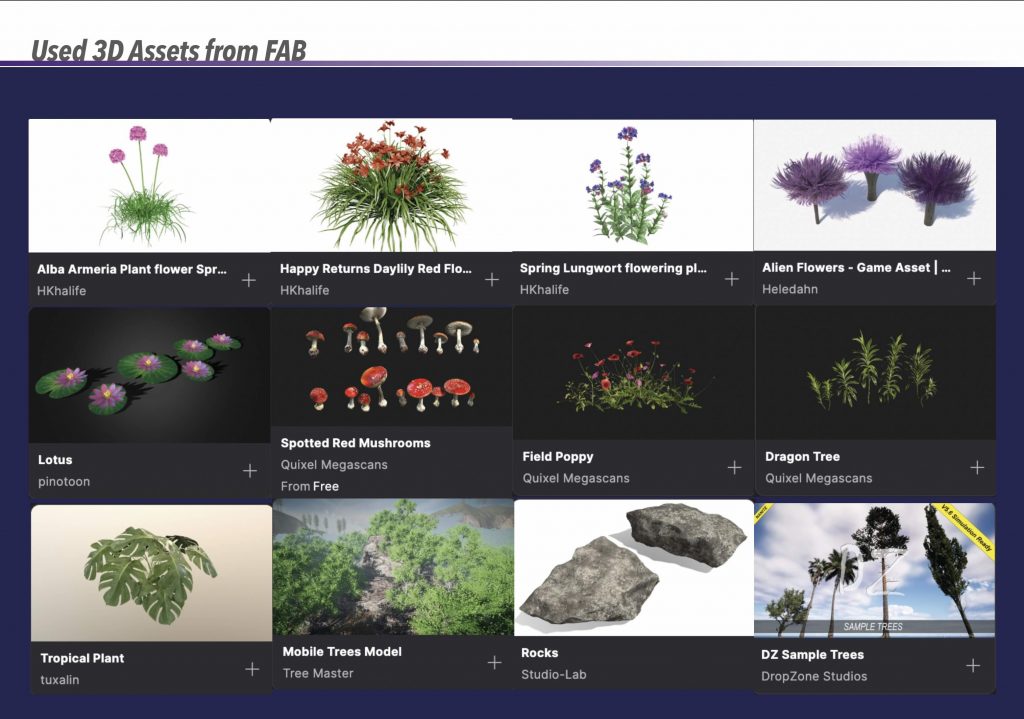
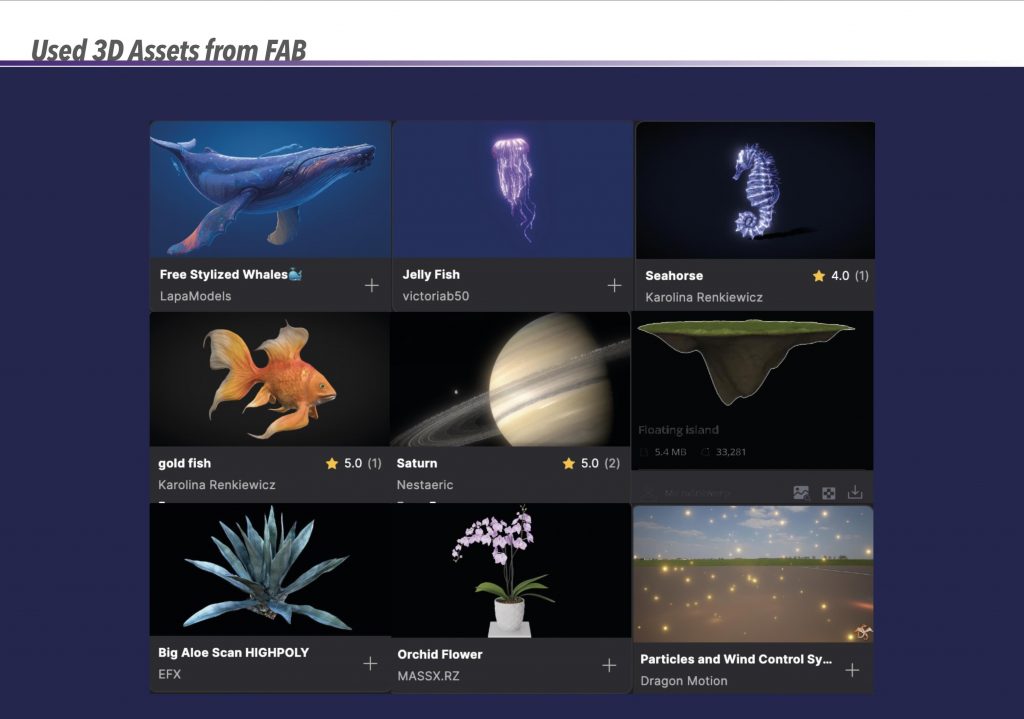
This stage shows the development of the fairy character, starting from a basic mesh and gradually refining the form. Several iterations were required to adjust proportions, facial features, and overall stylisation. Compared to environment assets, character modelling required a higher level of precision, making this one of the more challenging aspects of the project.My first approach to rigging involved manually creating joints for the character. Although I spent a significant amount of time attempting to refine this rig, it did not perform as expected. The joints did not deform correctly during movement, and the wings became distorted when the arms were animated. This made the rig unsuitable for animation and required me to reassess my approach.After the initial rigging attempt failed, I explored an alternative solution by combining two rigging methods. The body was rigged using Quick Rig, while the wings were rigged separately using a manual setup. Although combining these rigs presented technical challenges, this solution allowed me to move forward with animation and highlighted the importance of adapting workflows when initial methods are unsuccessful.Once the rigging was resolved, the fairy was animated into a flying position and imported into Unreal Engine. The animation was intentionally kept minimal, focusing mainly on wing movement to suggest motion. This decision allowed the character to support the scene without drawing attention away from the environment, which remained the main focus of the project.The mushroom house was modelled in Maya and textured in Cinema 4D before being placed into the Unreal Engine environment. Compared to the character work, this process was more straightforward and intuitive. The mushroom house acts as a focal point within the scene and reinforces the fairy-tale theme established at the beginning of the project.The environment was the central focus of this project and the area where I invested the most time. Throughout this stage, I experimented with terrain formation, asset placement, vegetation density, and water elements to create a cohesive and immersive space. Multiple versions of the environment were developed and refined, allowing me to gradually improve composition, depth, and visual balance.Lighting played a key role in shaping the final atmosphere of the environment. Inspired by bioluminescent environments such as those seen in Avatar (2009), I explored the transition from daylight to a moody nighttime scene. This involved experimenting with cooler and warmer light sources, glowing plants, and reflective surfaces. The final lighting setup helped enhance the magical quality of the environment and reinforced the shift in tone from my initial fairy-inspired references.This stage reflects how the environment evolved throughout the project rather than following a fixed plan from the beginning. Although the initial idea was to work with a daylight setting, continuous experimentation with lighting and colour led me to explore darker and more atmospheric alternatives. Over time, the night-time version became more visually engaging, allowing glowing plants, mushrooms, and lanterns to play a central role in shaping the scene’s mood and guiding the viewer’s eye.For the night-time lighting, I used reference images inspired by Avatar (2009), particularly the bioluminescent environments of Pandora. These references informed my approach to glowing vegetation, cooler colour palettes, and subtle light scattering. I focused on balancing fantasy and realism, ensuring that the glowing elements felt integrated into the scene rather than appearing overly artificial.Alongside the forest environment, I developed an additional world that introduces a change in scale and atmosphere. This space features floating elements, glowing floating animals, and surreal details that contrast with the grounded forest setting. Creating a second environment allowed me to broaden the visual scope of the project and suggest a transition between worlds, adding depth to the narrative without overcomplicating the animation.This section presents the environment in a simplified way to clearly explain how the scene is constructed. The environment was created and rendered as a single, complete setup in Unreal Engine, with the breakdown shown only for explanatory purposes and the fairy was the only element rendered separately.
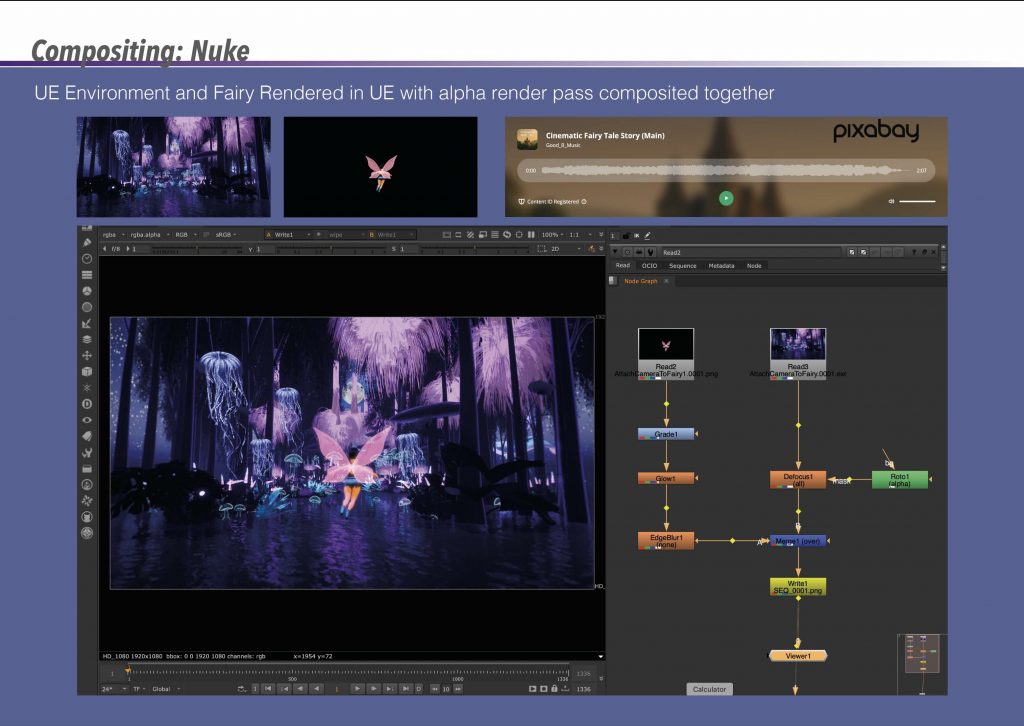
Once the renders were complete, the environment and fairy were composited together in Nuke using an alpha render pass. Basic colour grading, glow adjustments, and depth-based effects were applied to unify the elements visually. This process helped refine the final image and allowed me to enhance the fairy’s presence without overpowering the environment, which remained the primary focus of the project.
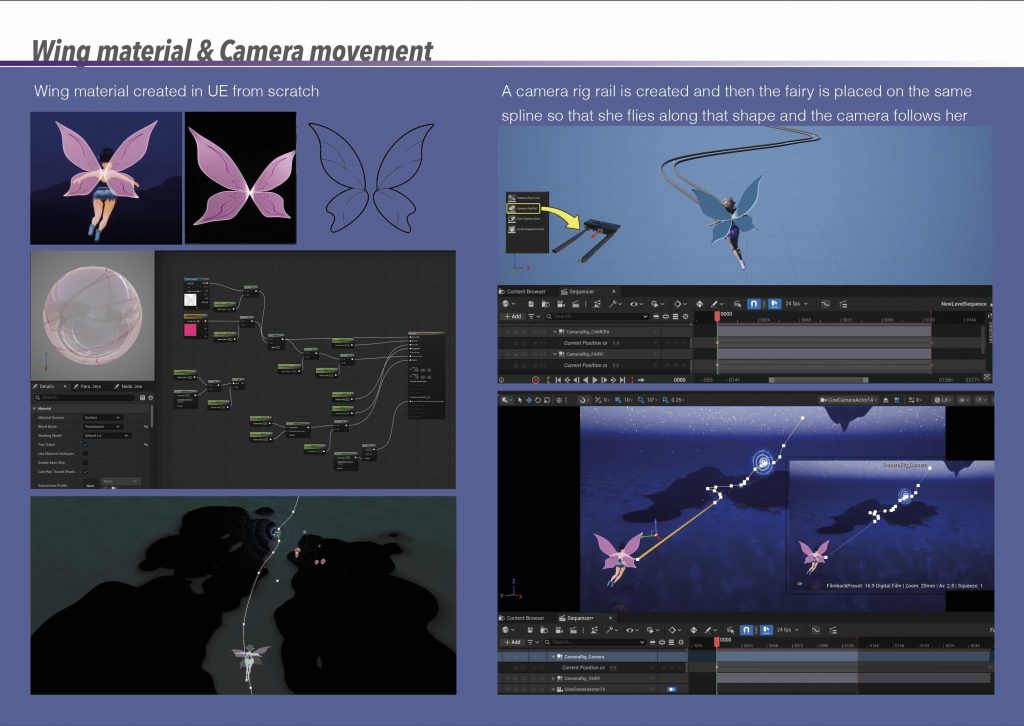
The fairy’s wing material was created from scratch in Unreal Engine using a translucent, glowing shader to complement the surrounding bioluminescent elements. To animate the sequence, a camera rig rail was used, allowing the fairy and camera to follow the same spline. This approach created smooth, controlled movement through the environment and reinforced the sense of flow and direction within the scene.
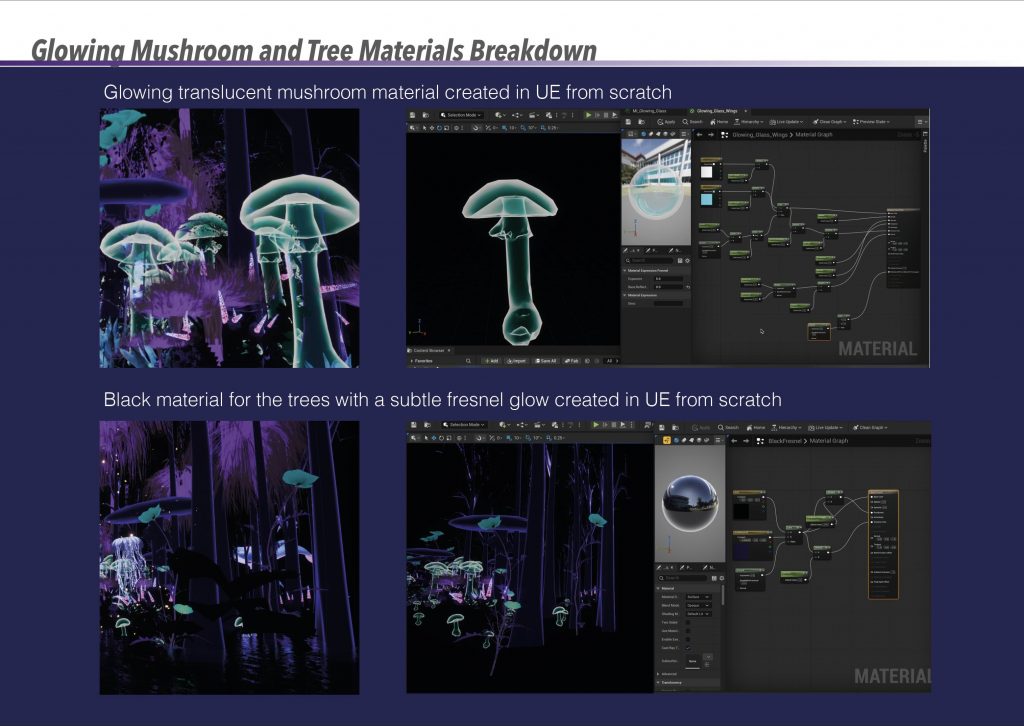
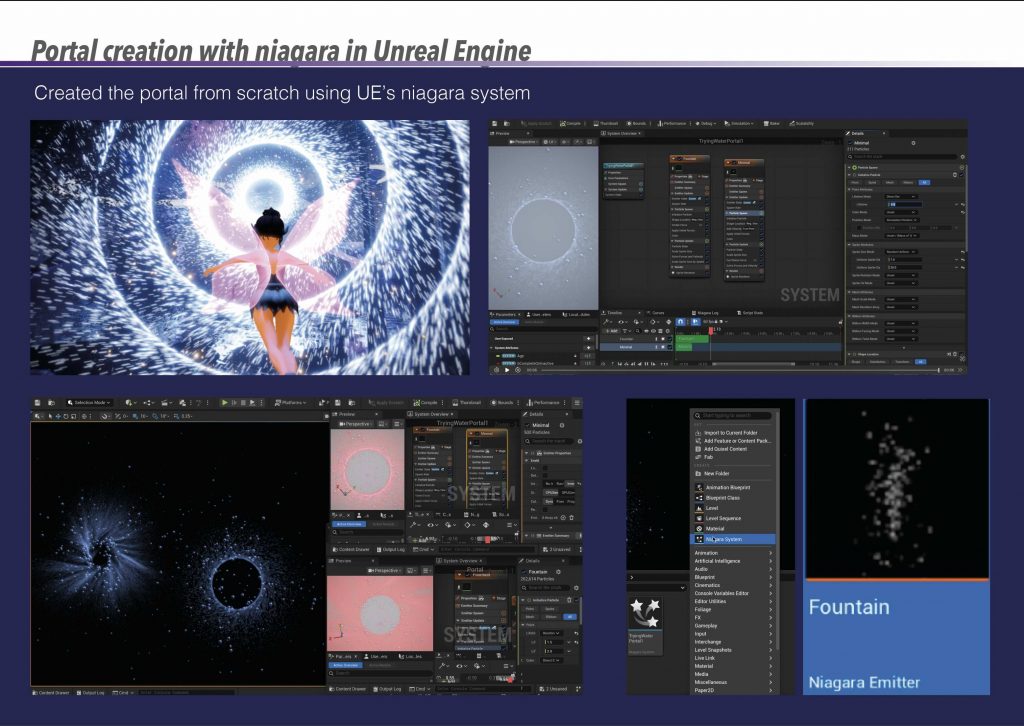
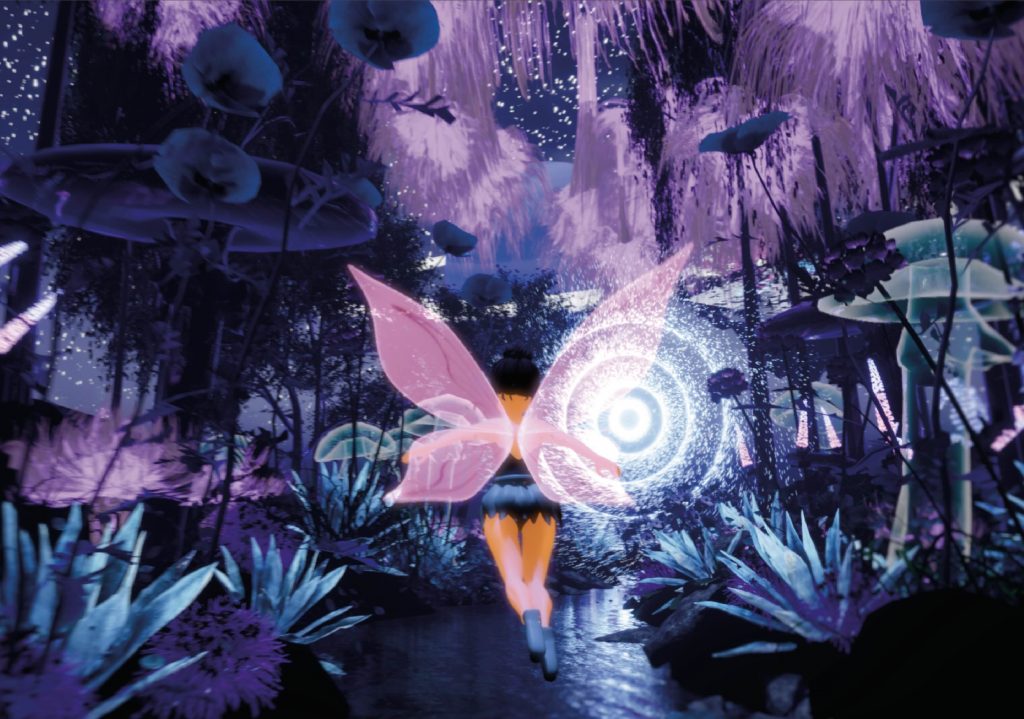
Custom materials were developed for both the glowing mushrooms and the trees. The mushroom material uses translucency and emissive values to create a soft internal glow, while the trees use a dark base material with a subtle Fresnel effect. These materials were essential in shaping the night-time atmosphere and helped establish visual contrast between illuminated and shadowed areas.The portal effect was created from scratch using Unreal Engine’s Niagara system. This involved experimenting with particle behaviour, motion, and light intensity to create a dynamic focal point within the scene. The portal introduces a moment of visual interest and narrative progression, suggesting a transition between worlds without relying on complex character animation.This section illustrates how the storyboard evolved throughout the project. The initial storyboard included a more detailed narrative, with plans to model the interior of the mushroom house and animate the fairy entering and interacting with the space. However, as the project progressed, I made a conscious decision to move away from interior scenes and focus primarily on the exterior environment. Having completed extensive interior-focused work during my BA, I felt it was more valuable at this stage to further develop my skills in environmental world-building, lighting, and atmosphere. As a result, the final storyboard was simplified to reflect an environment-led narrative, where the sense of journey and transition between spaces became more important than detailed interior animation.
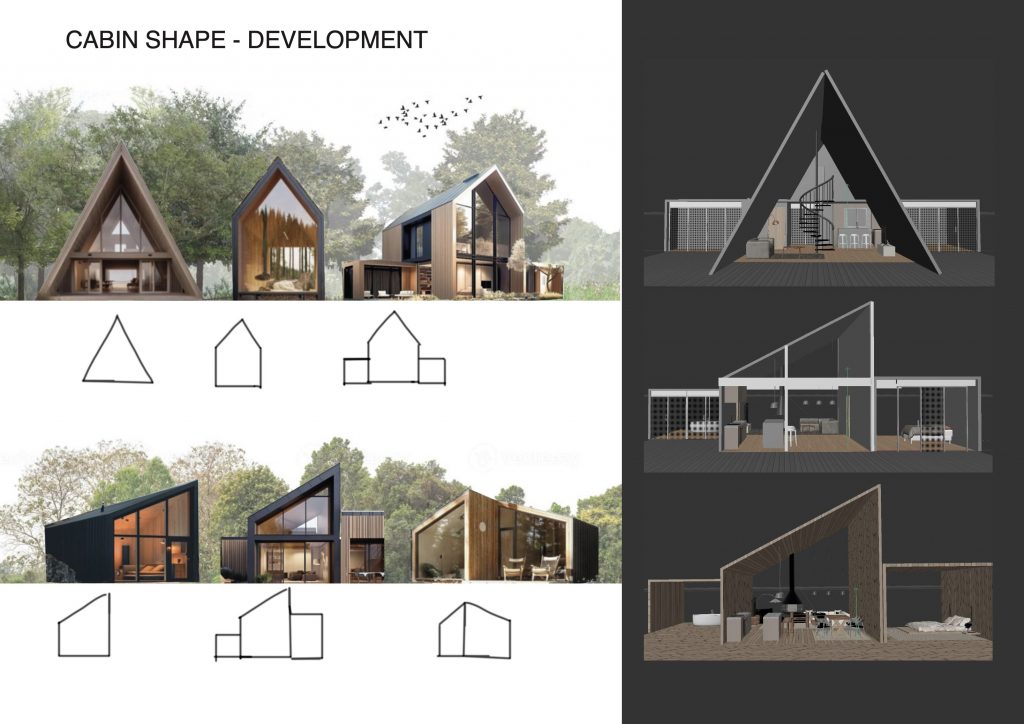
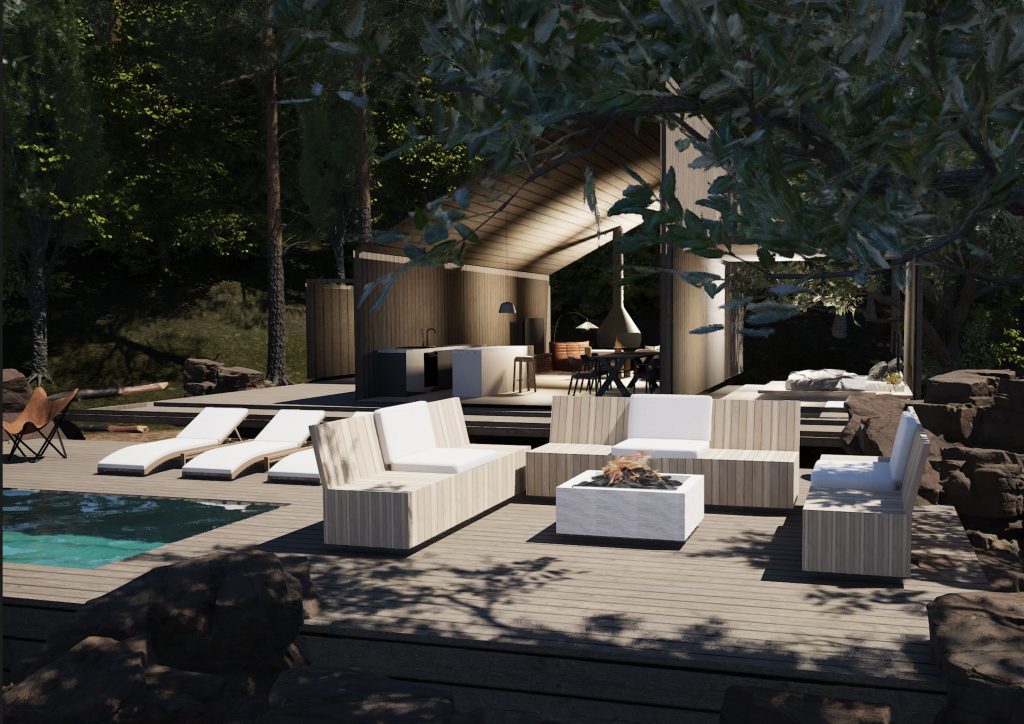
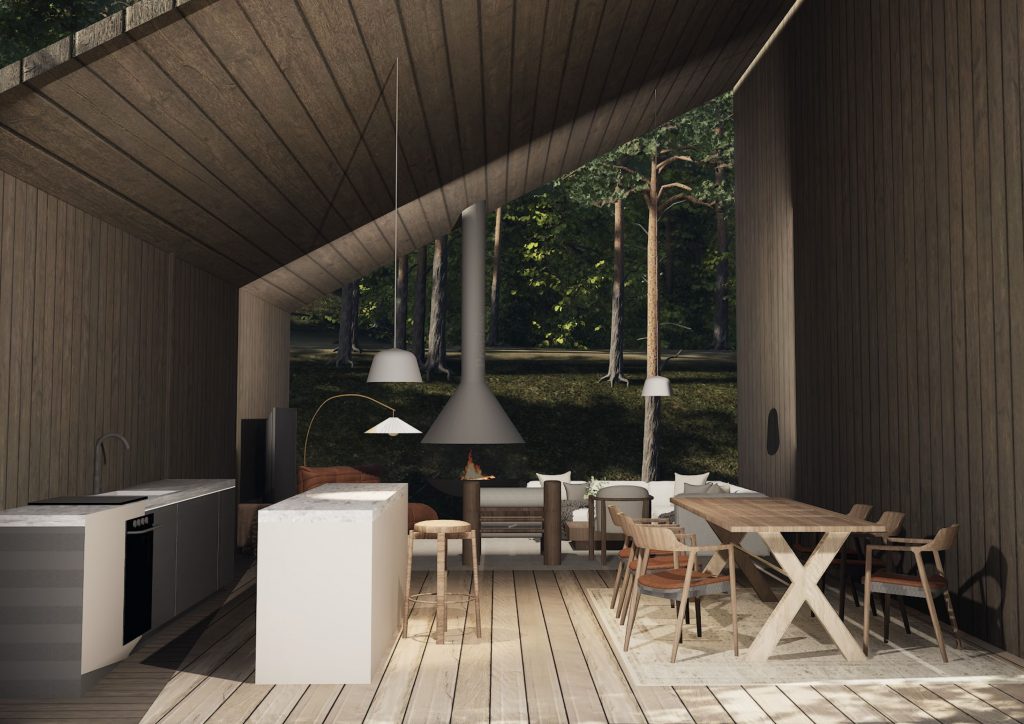
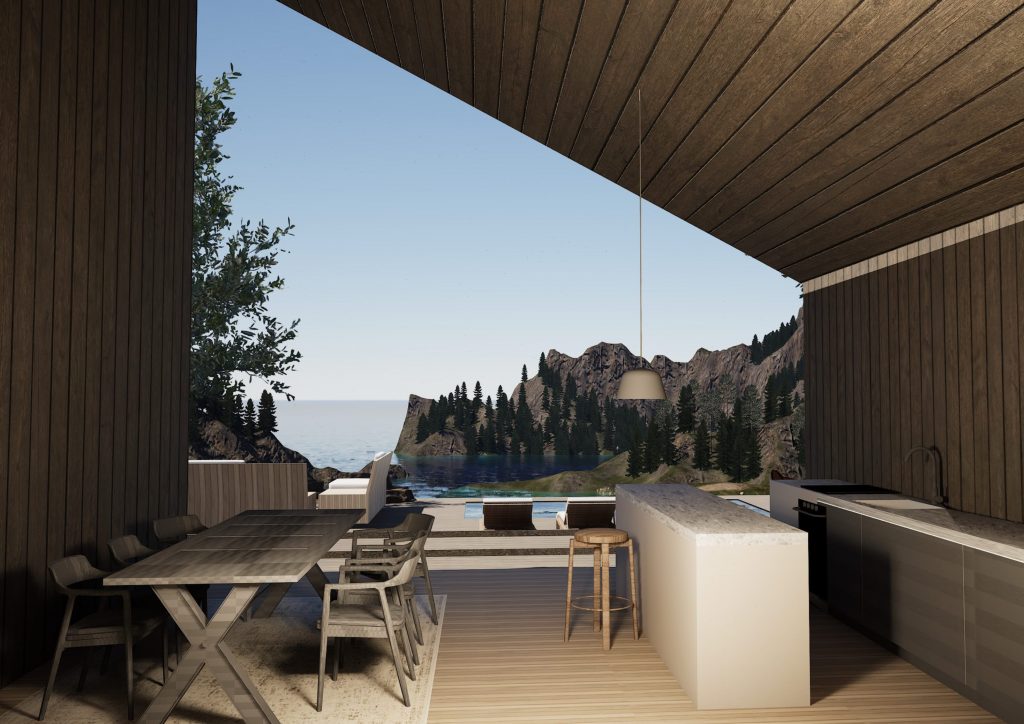
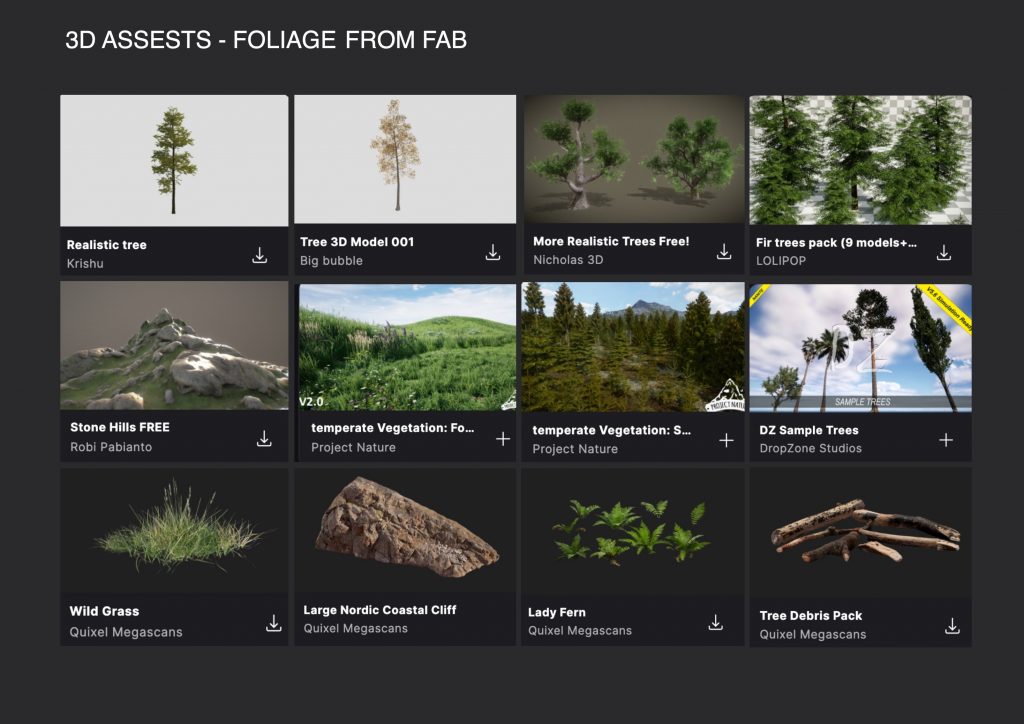
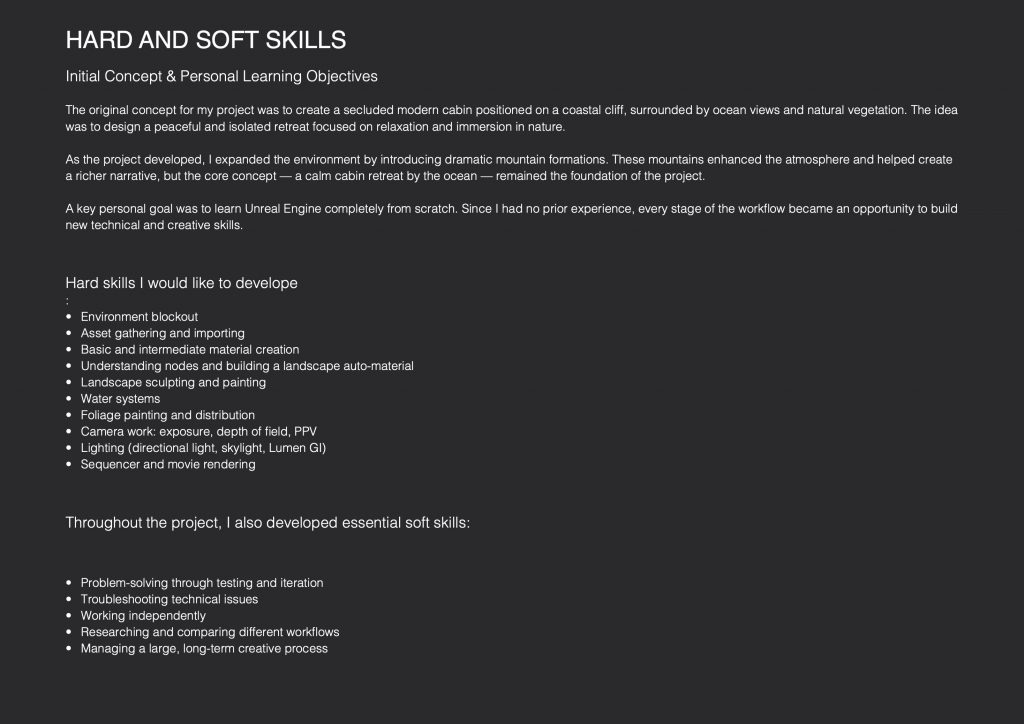
For the Unreal Engine classes, I did not produce detailed weekly documentation, as the sessions were mainly focused on listening, observing workflows, and understanding concepts during class, followed by applying them independently at home in the “Cabin in the woods” project. Despite this, I have a clear overview of the tools and techniques covered throughout the semester, all of which were later applied in practice.
The main topics covered included:
Unreal Engine introduction and general workflow
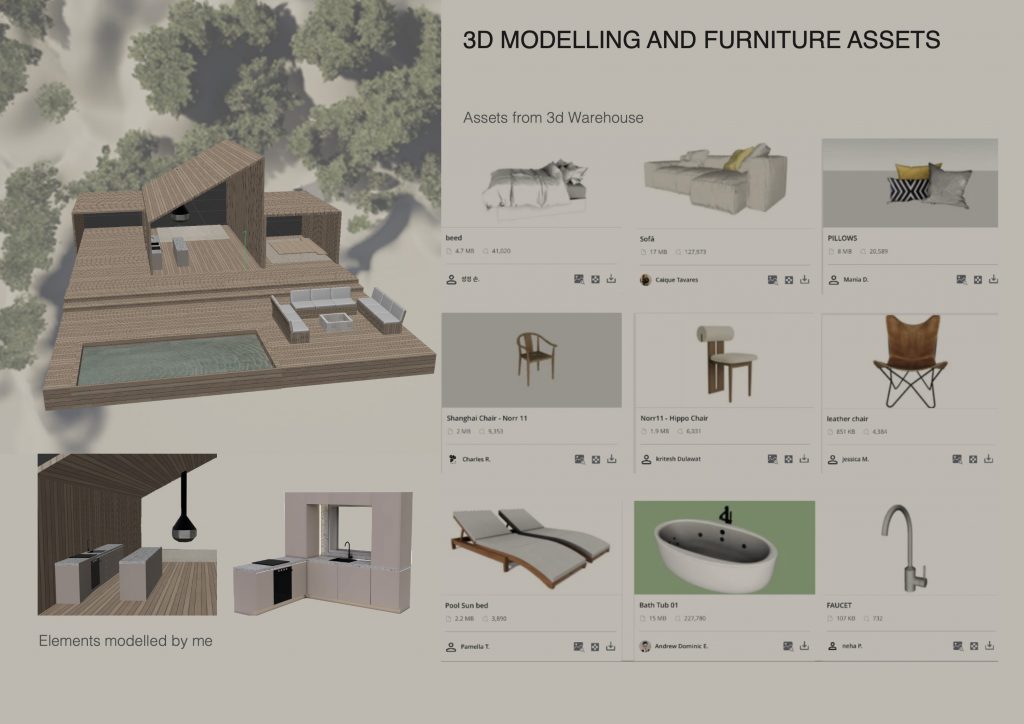
Asset gathering and basic modelling pipelines
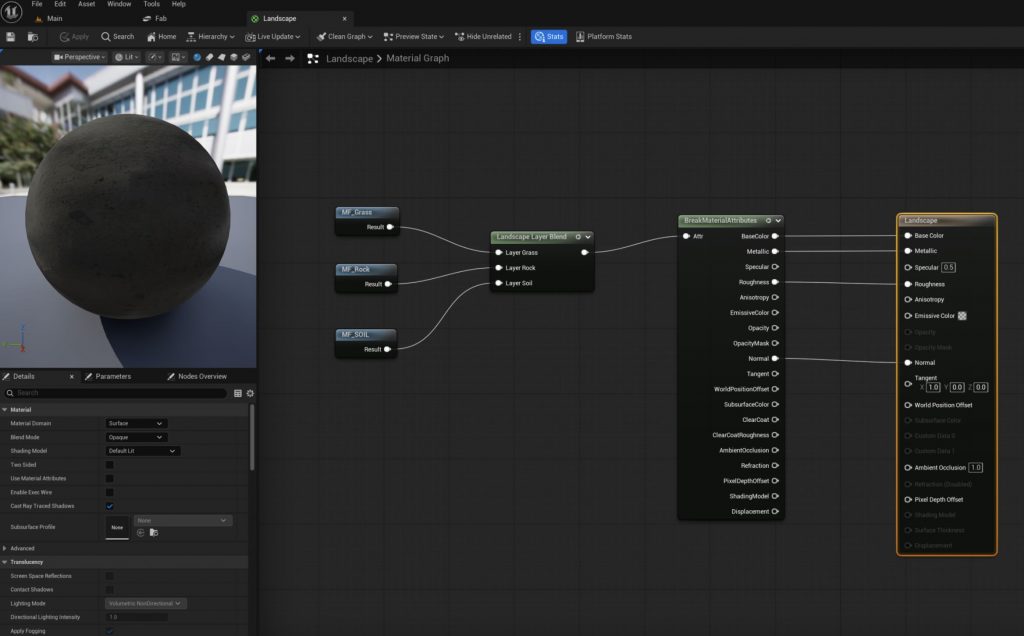
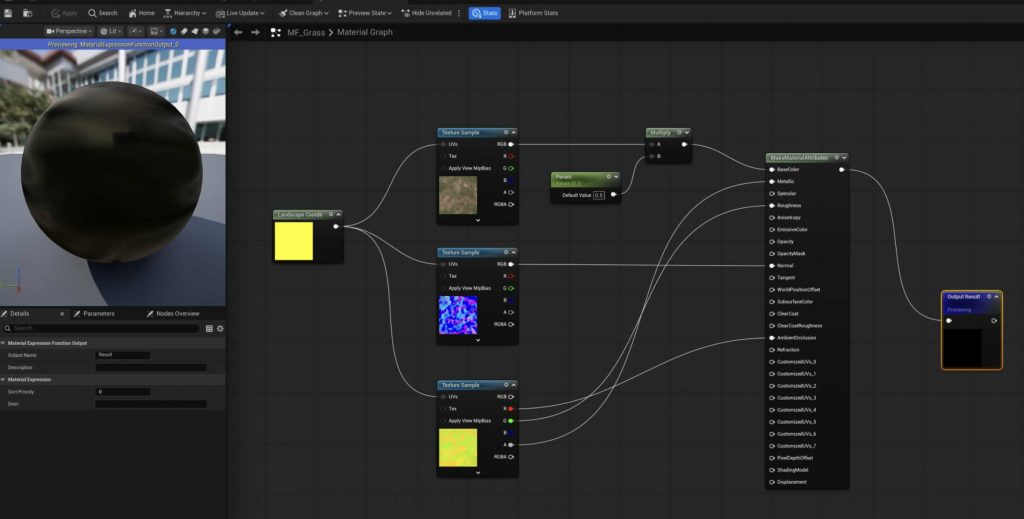
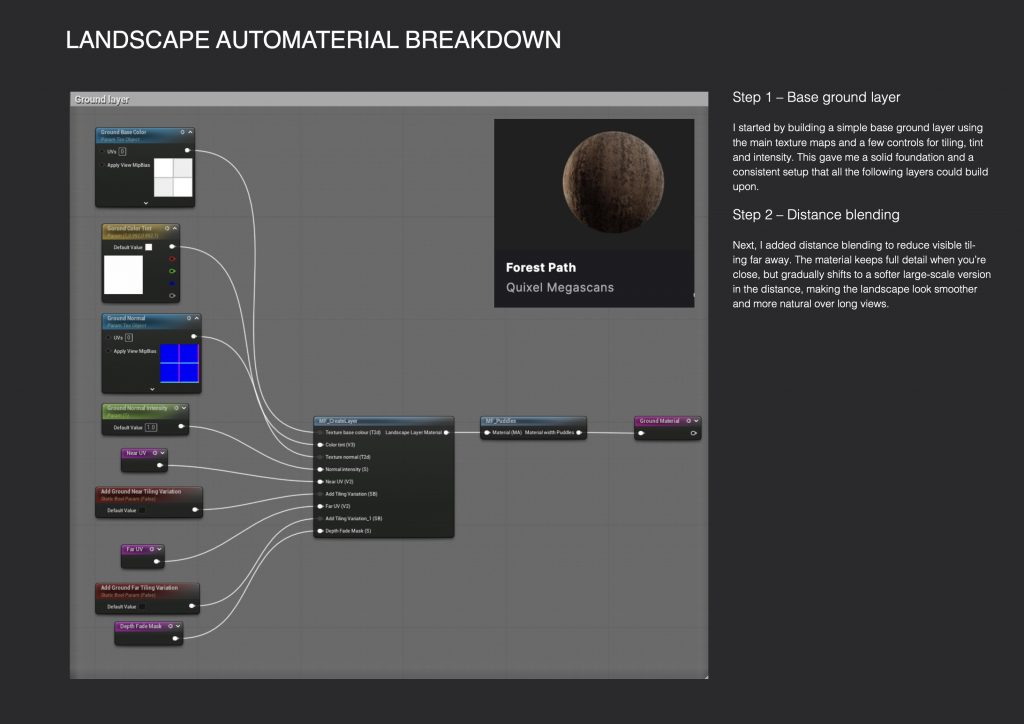
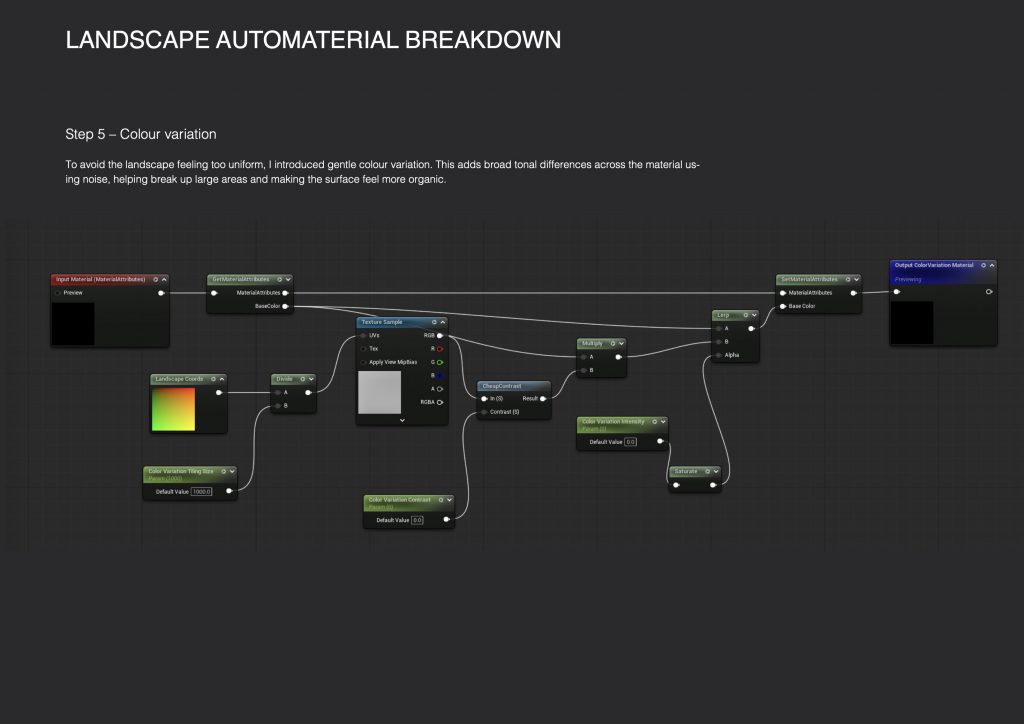
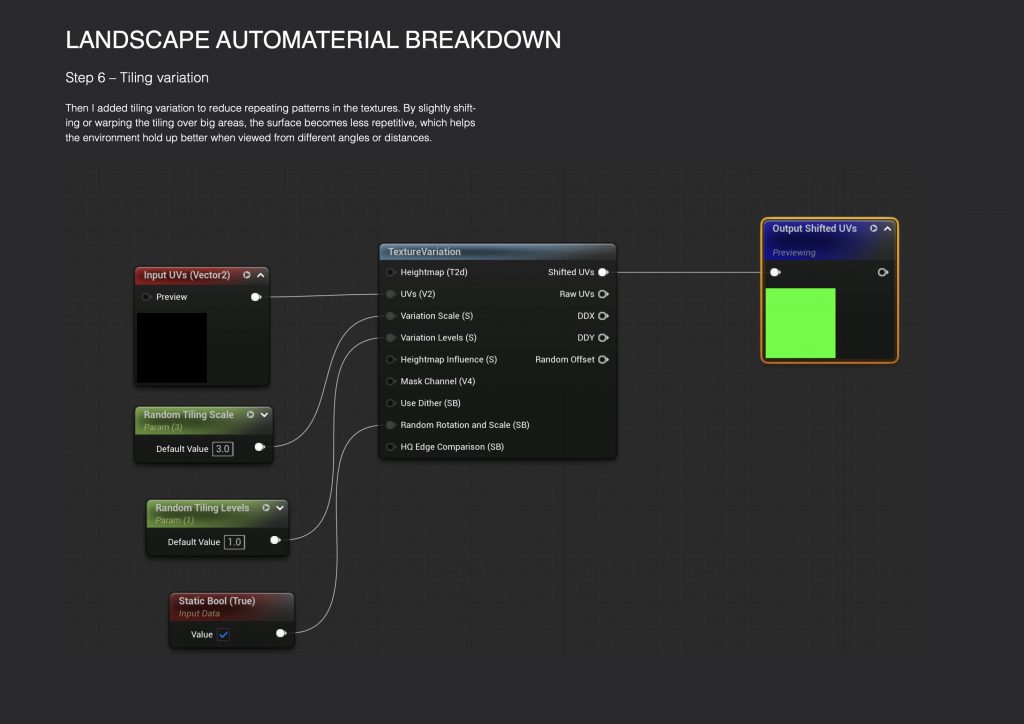
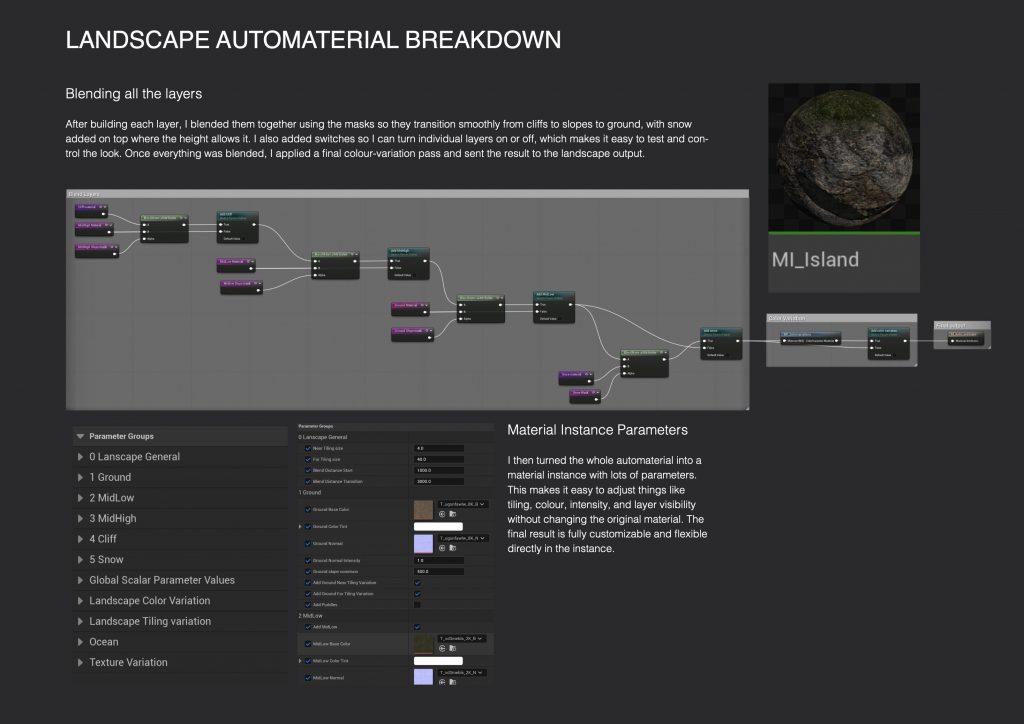
Material creation and material instances
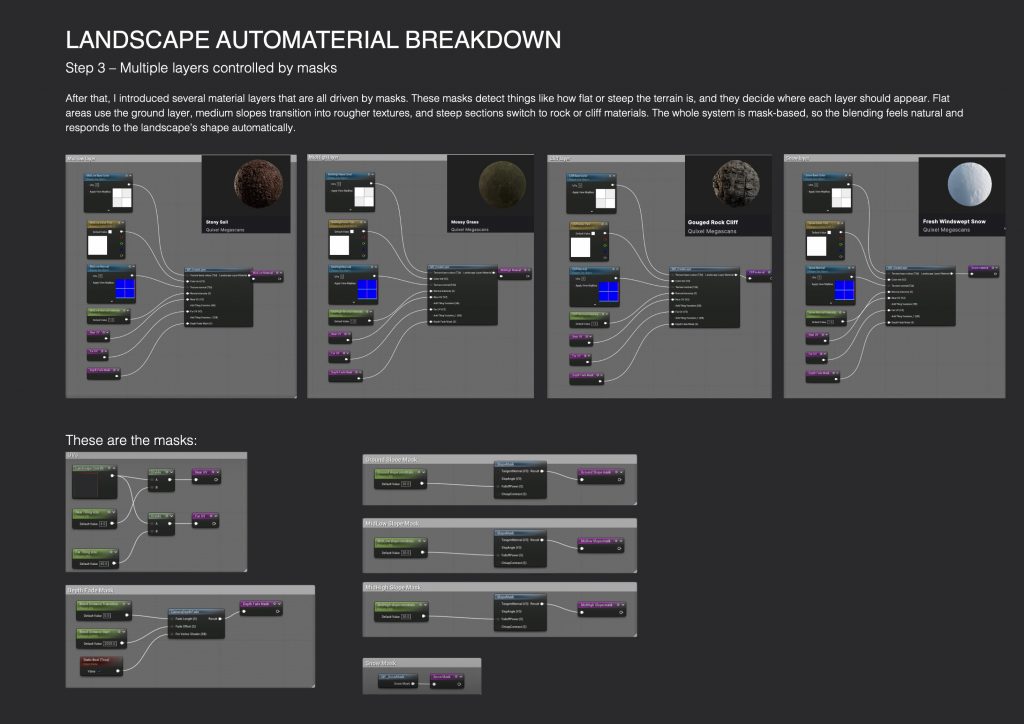
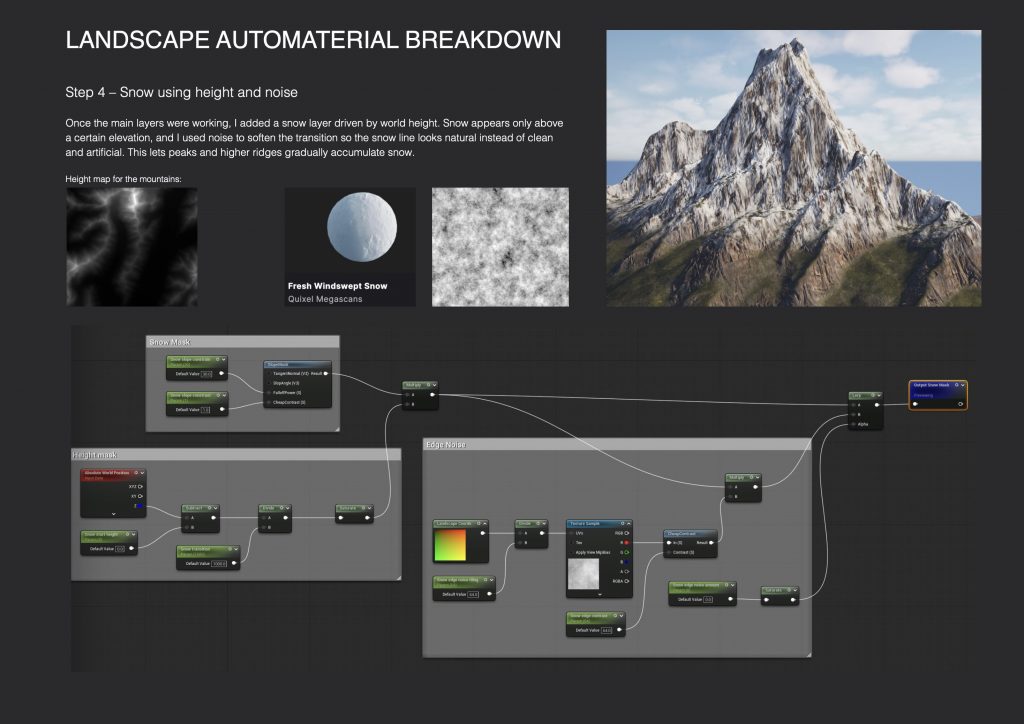
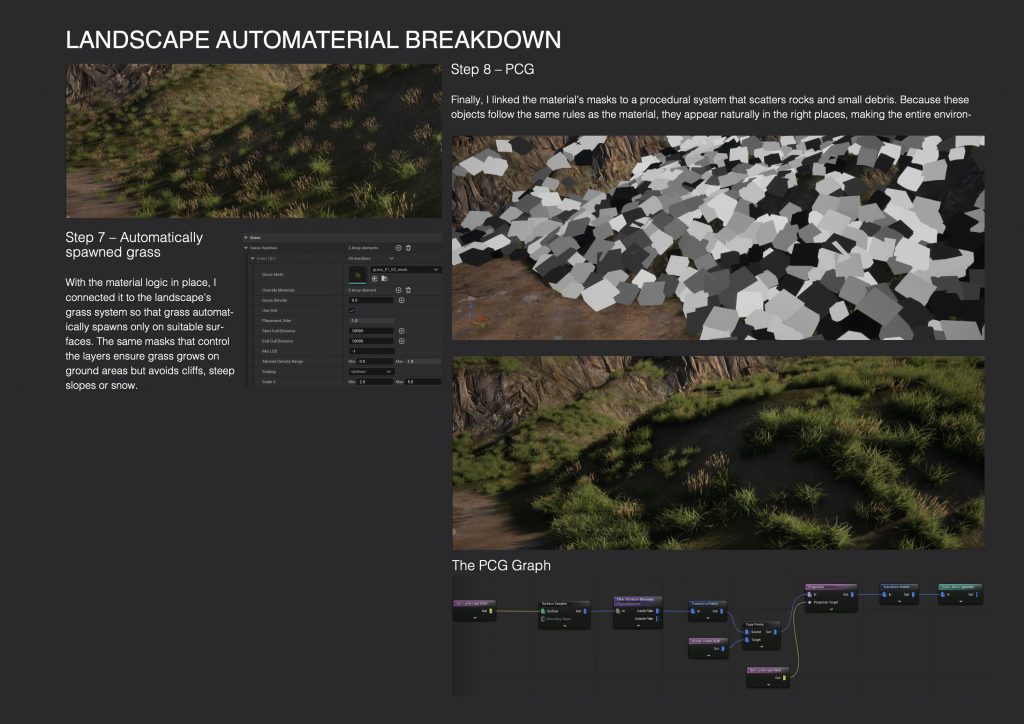
Landscape tools and terrain sculpting
Water systems and foliage placement
Camera setup and Post Process Volumes (PPV)
Lighting workflows and scene optimisation
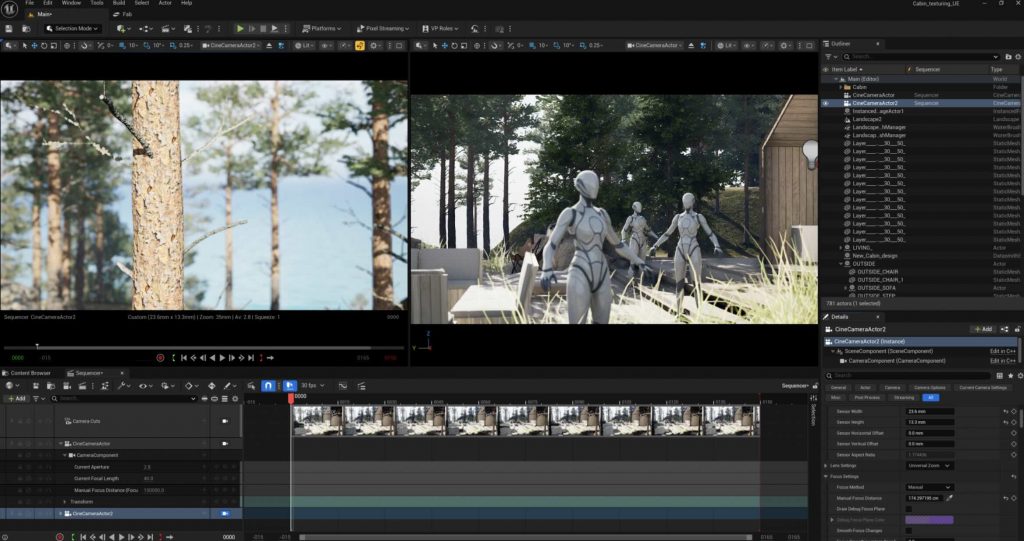
Sequencer for cinematic shots
Rendering using Movie Render Queue (MRQ)
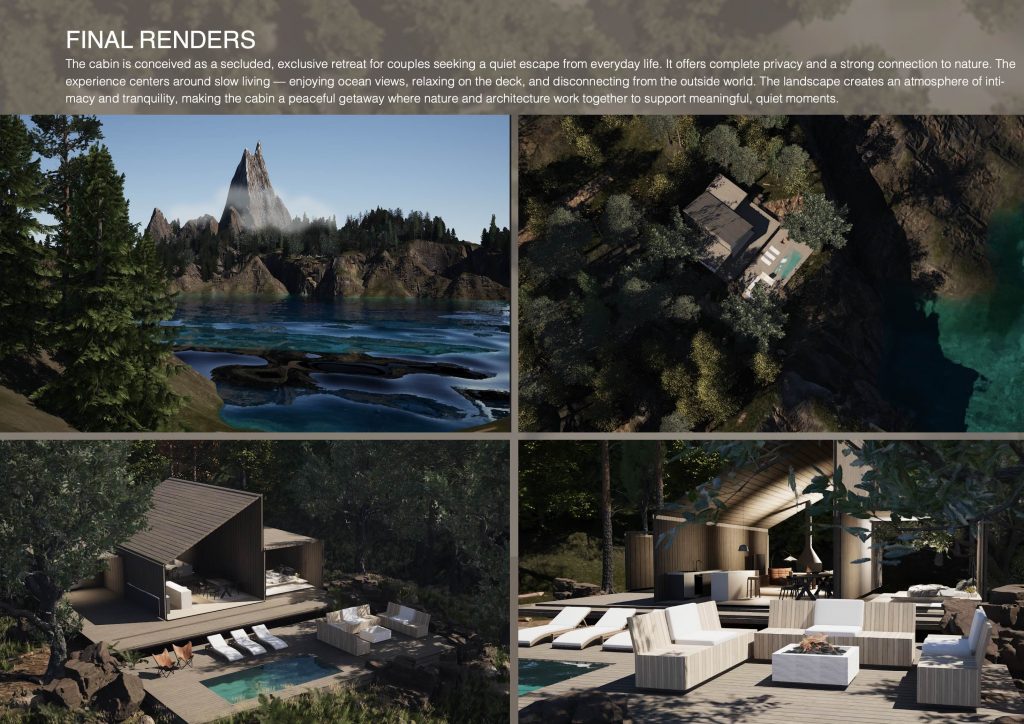
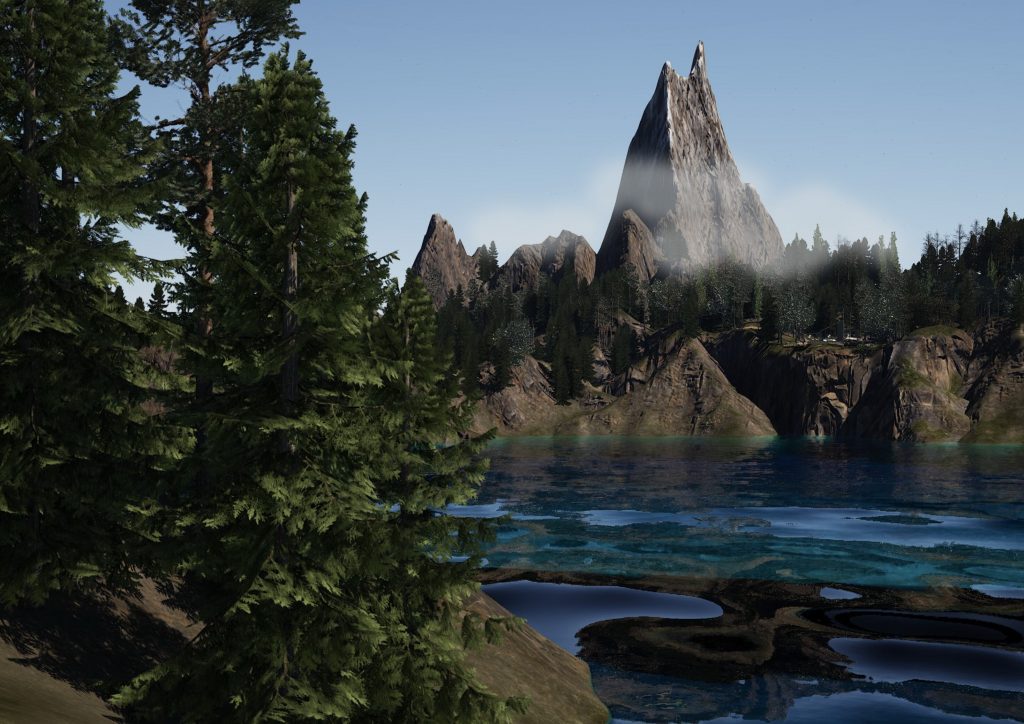
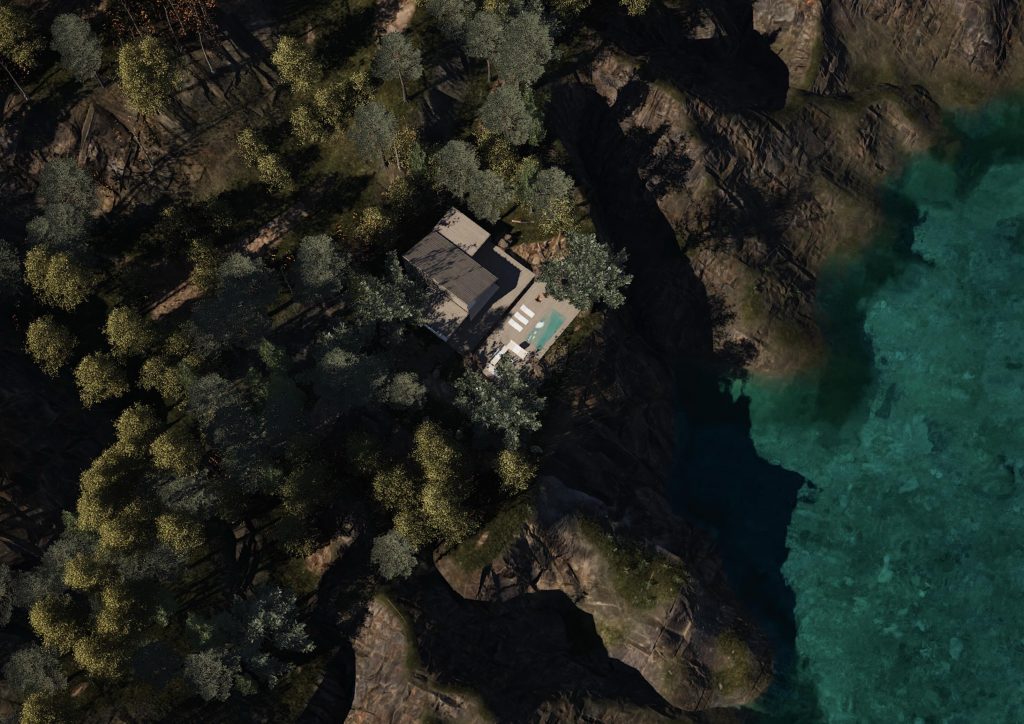
These techniques were first applied during the Cabin in the Woods project and later developed further within my unit assignment. For the final unit project, Unreal Engine became my primary tool, particularly for environment creation, lighting, camera work, and rendering the final sequence.
Below are a small selection of images captured during a few of the classes:
These are some screen captures from class creating basic material nodes:
In this class we learned about cameras and the level sequencer
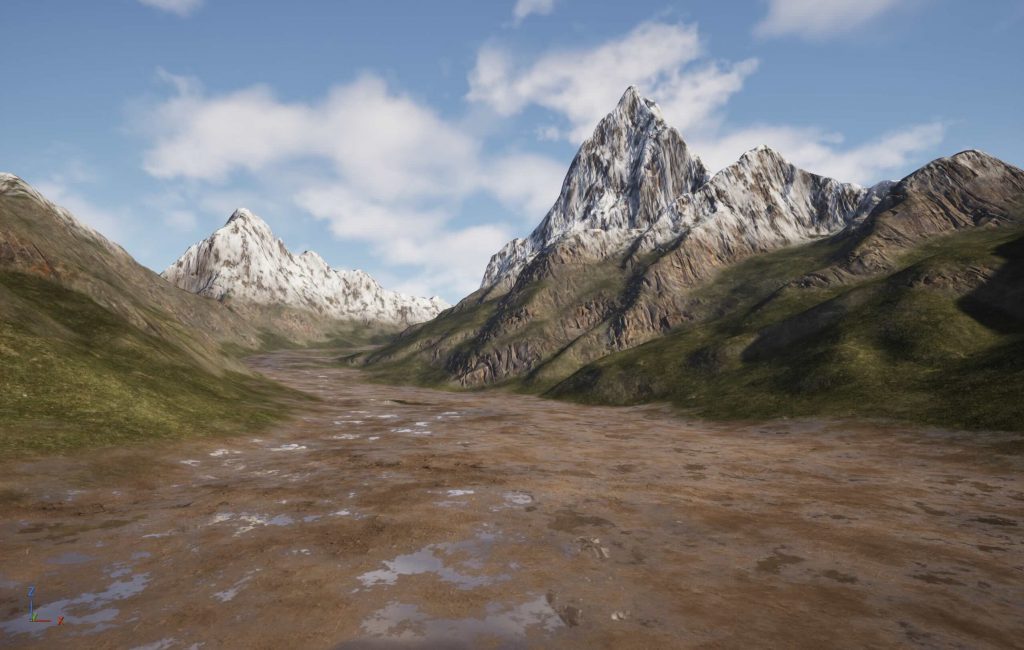
These are some renders I created at home by implementing the workflows we learned in class:
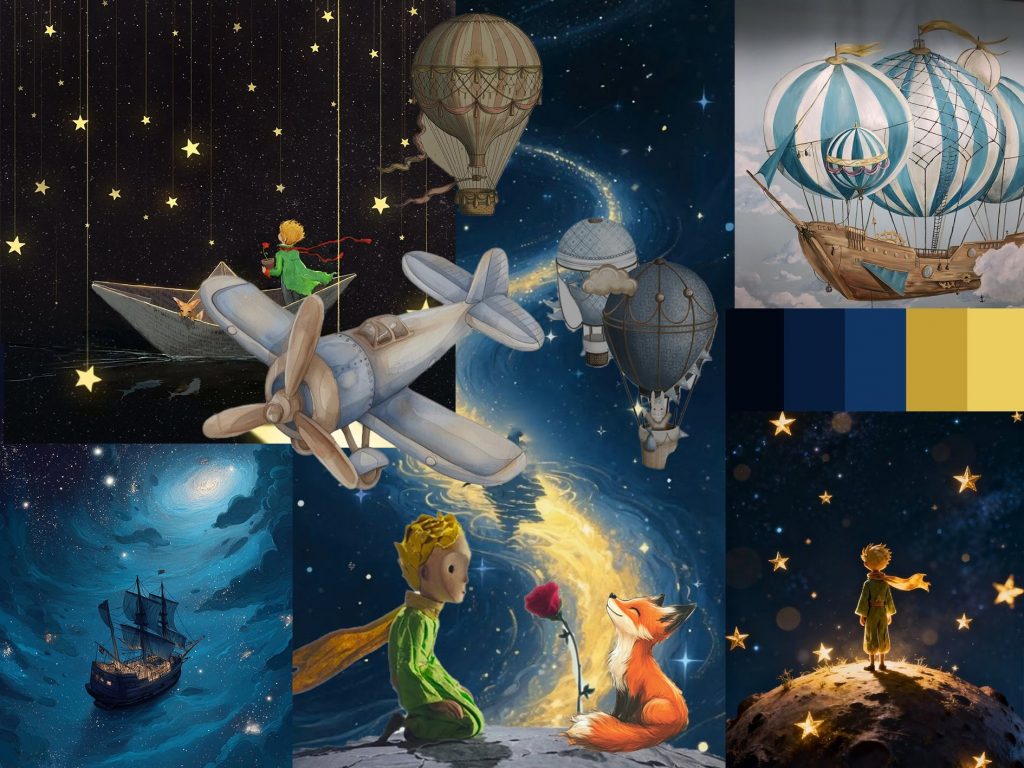
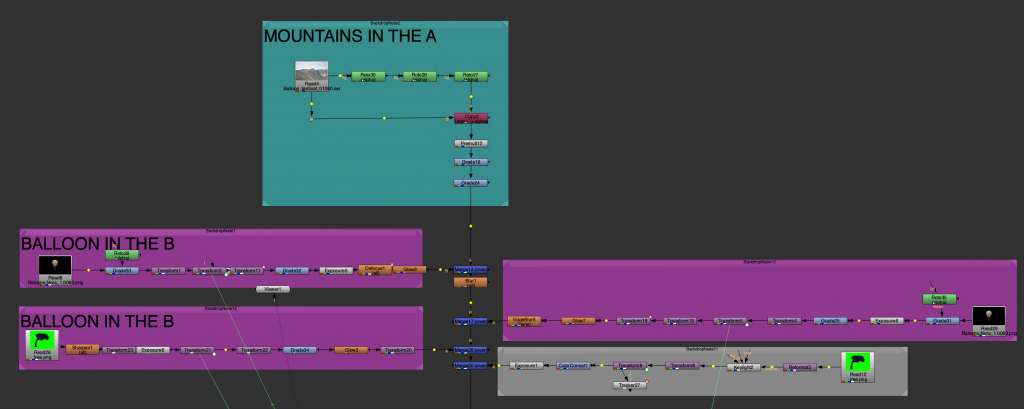
For this project we worked on creating a visual effects scene involving hot air balloons integrated into a real footage landscape environment. The project focused on combining compositing techniques with images of 3D elements in order to create a believable final image that blended naturally with the original footage.
Concept and Moodboard:
Before starting the technical work, we first developed moodboards to establish the visual direction of the project. This helped define the atmosphere, color palette, lighting references, and overall aesthetic we wanted the final scene to have. Gathering references at the beginning made it easier to maintain a consistent visual style throughout the project and gave a clearer idea of how the balloons should look within the environment.
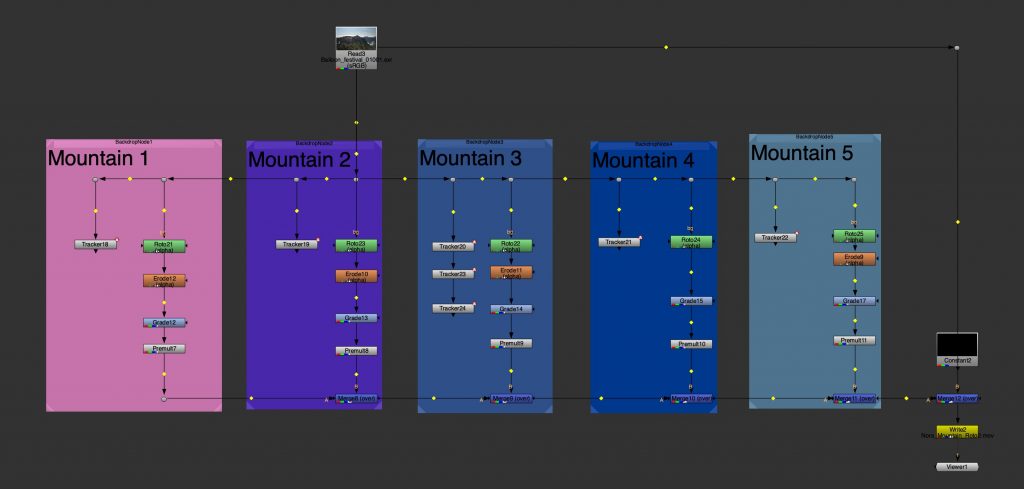
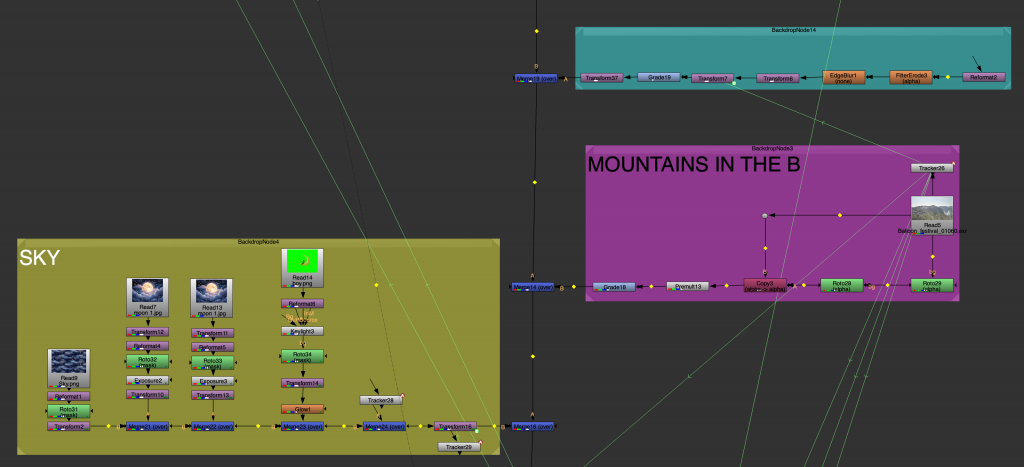
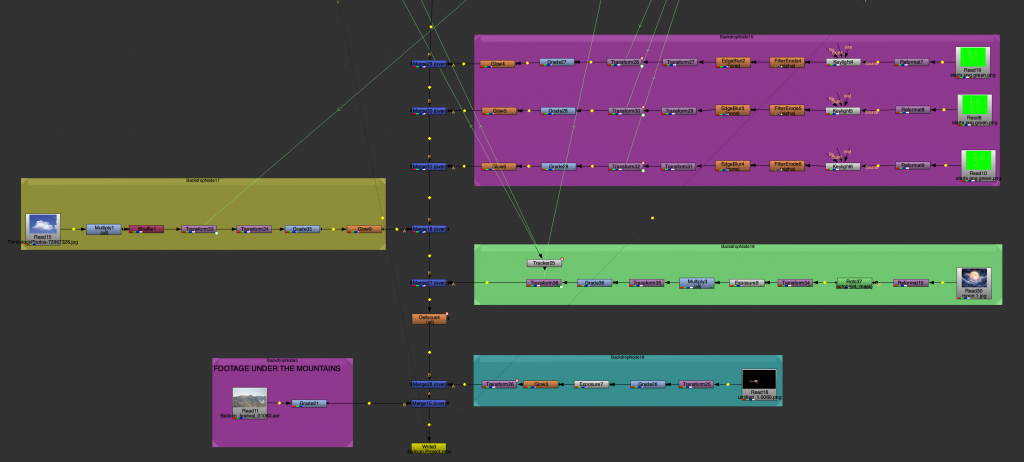
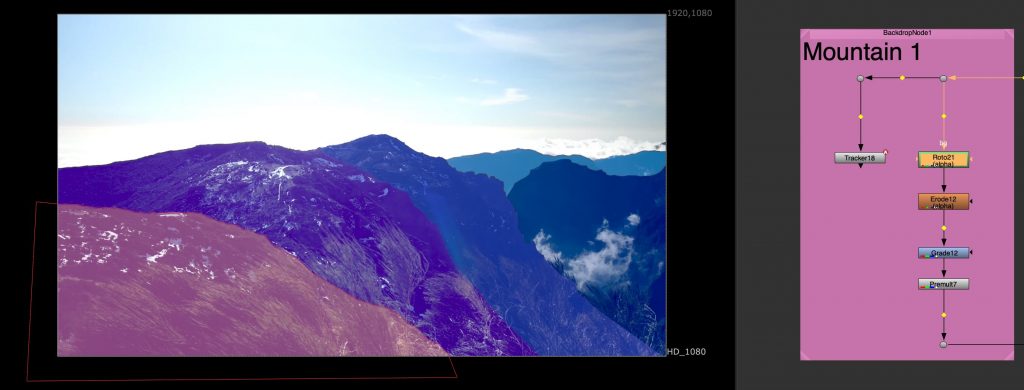
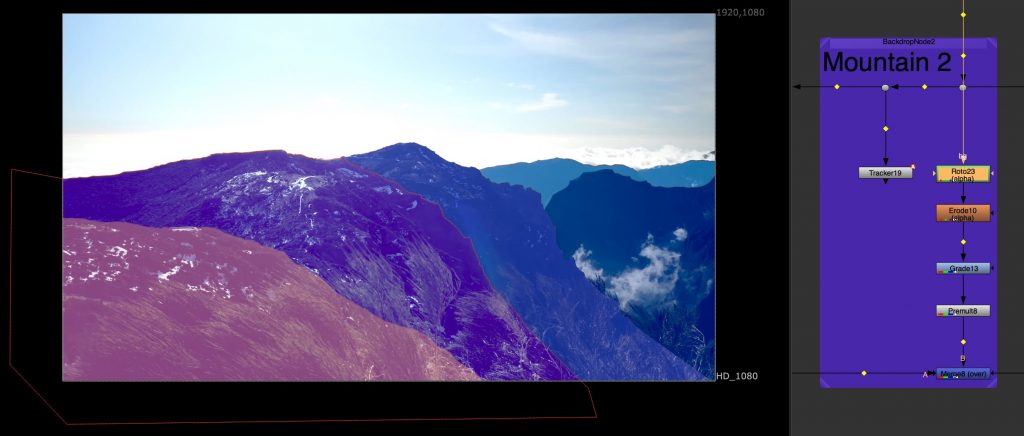
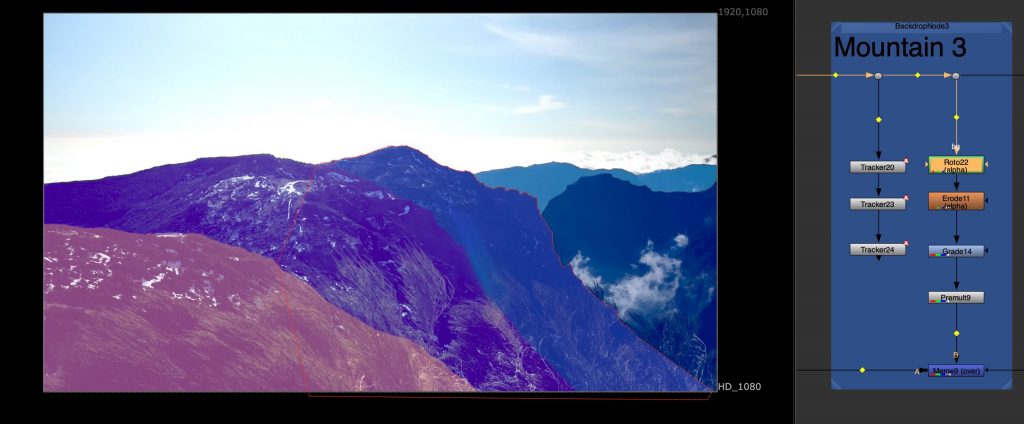
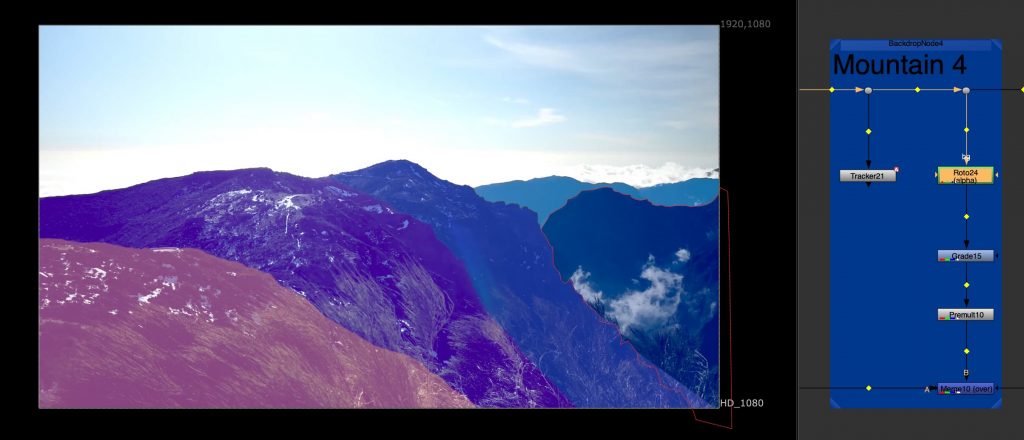
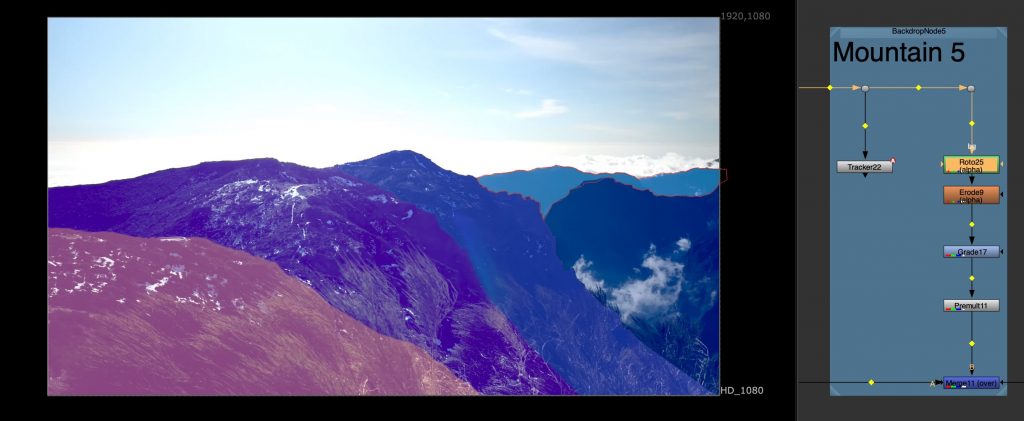
Landscape tracking and rotoscoping:
After planning the visual direction, we moved into the compositing preparation stage. One of the main tasks was rotoscoping the mountains from the footage and separating them into multiple layers. We divided the landscape into approximately four or five different mountain sections in order to create depth and allow the hot air balloons to move more naturally within the environment. By separating the mountains into layers, some balloons could appear behind certain parts of the landscape while others remained in front, helping create a stronger sense of space and perspective.
Modelling in Maya:
Once the environment was prepared, we began creating the hot air balloons in Autodesk Maya. We modelled the balloons and then textured them directly in Maya to give them visual detail and personality. This stage involved experimenting with colors, materials, and surface designs so each balloon would feel visually interesting while still fitting the atmosphere established in the moodboards.
Planning in Photoshop:
After modelling the balloons I created a 2D mock-up scene inPhotoshop using images of the environment and images of the balloon references. This allowed me to plan composition, scale, and placement before moving into Nuke. The mock-up helped visualise how the balloons would occupy the space, where key focal points would be positioned, and how depth and balance could be achieved within the frame. This also helped establish the colour and lighting and atmosphere.
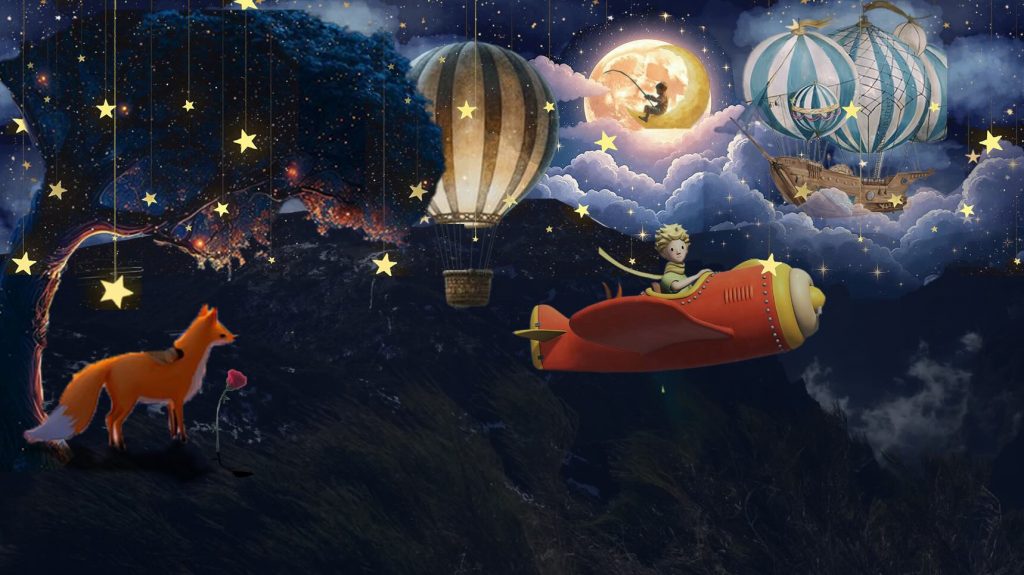
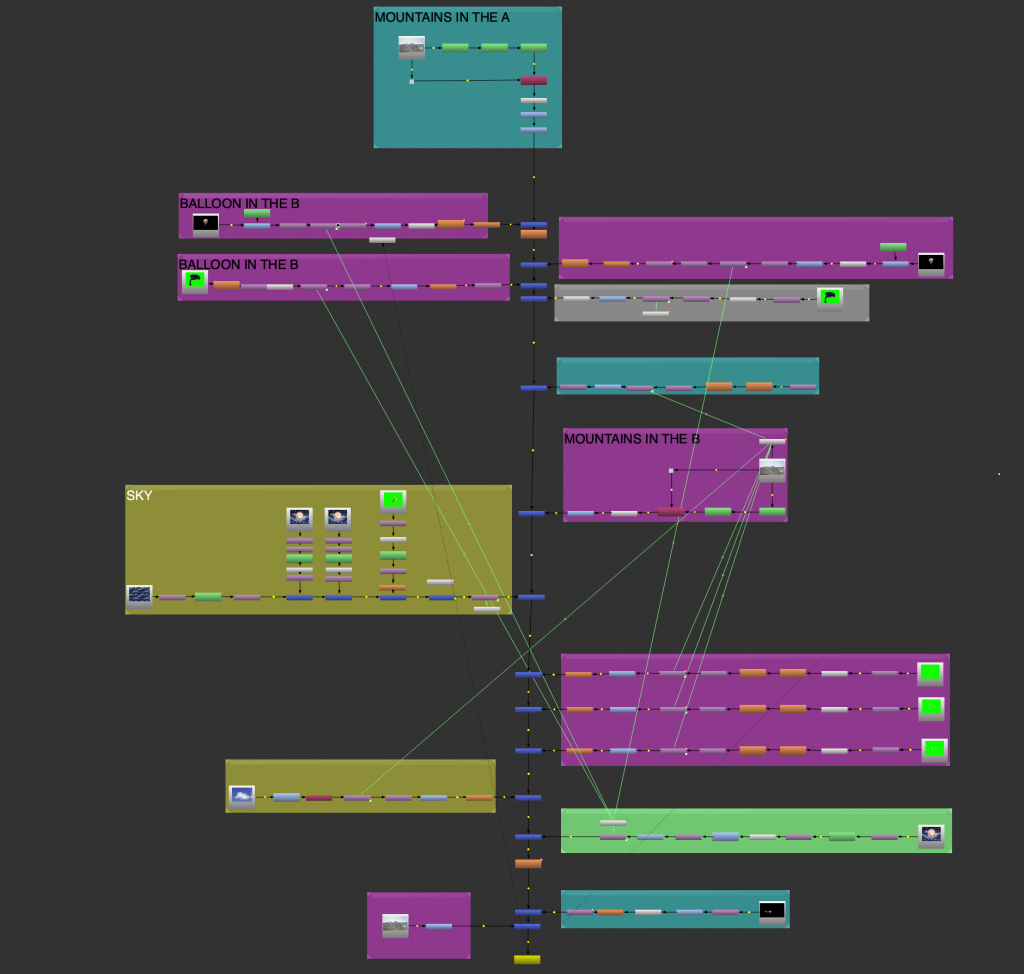
Compositing in Nuke (Final Result):
After completing the models and textures, we rendered the balloons in Maya and composited them into the original footage in Nuke. The compositing process involved carefully integrating the images of the 3D elements into the landscape so they matched the lighting, depth, and movement of the environment. Because the mountains had already been separated into layers, it was possible to place the balloons at different distances within the scene, making the composition feel more immersive and realistic.
This project combined planning, rotoscoping, 3D modeling, texturing, and compositing into a single workflow. It also demonstrated how important layering and depth are in visual effects work when trying to create realistic integration between 3D objects and live-action environments.
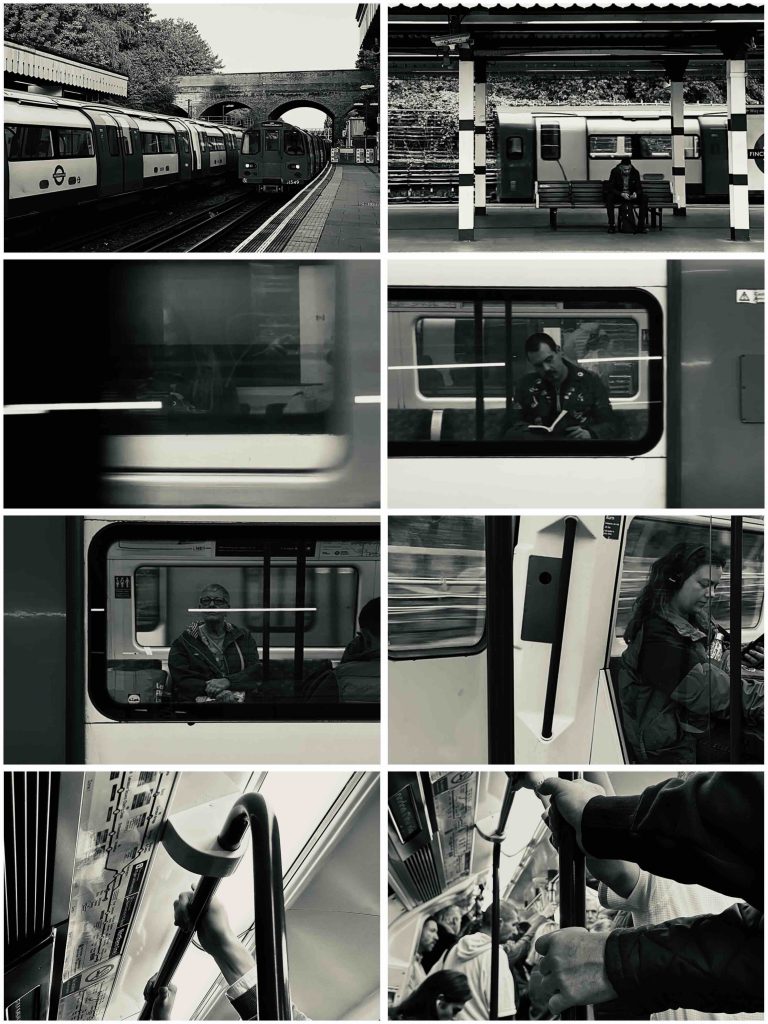
The first task in Nuke focused on creating either a short video or a still sequence that explored the idea of passing time. I chose the tube as my subject because it naturally captures movement, repetition, and moments of pause. The constant flow of trains, people waiting, and brief interactions felt like a quiet observation of everyday rhythm and rush. Working in black and white helped strip the images back and focus more on motion, framing, and atmosphere rather than colour.
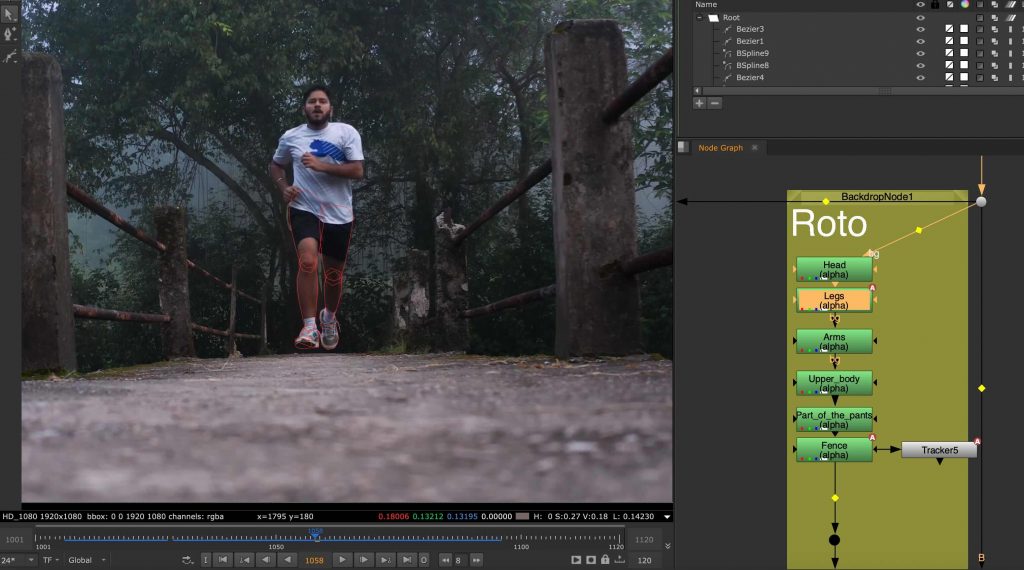
Running man roto:
This was my first time rotoscoping and also my first real experience working in Nuke. The task involved isolating a running man from his background using roto shapes. I found this process extremely time-consuming and mentally demanding, as it required a lot of precision and patience. It took me around two weeks to complete, and even then I felt the result was far from perfect. This exercise made me realise how powerful but also intimidating Nuke can be, especially when approaching it for the first time.
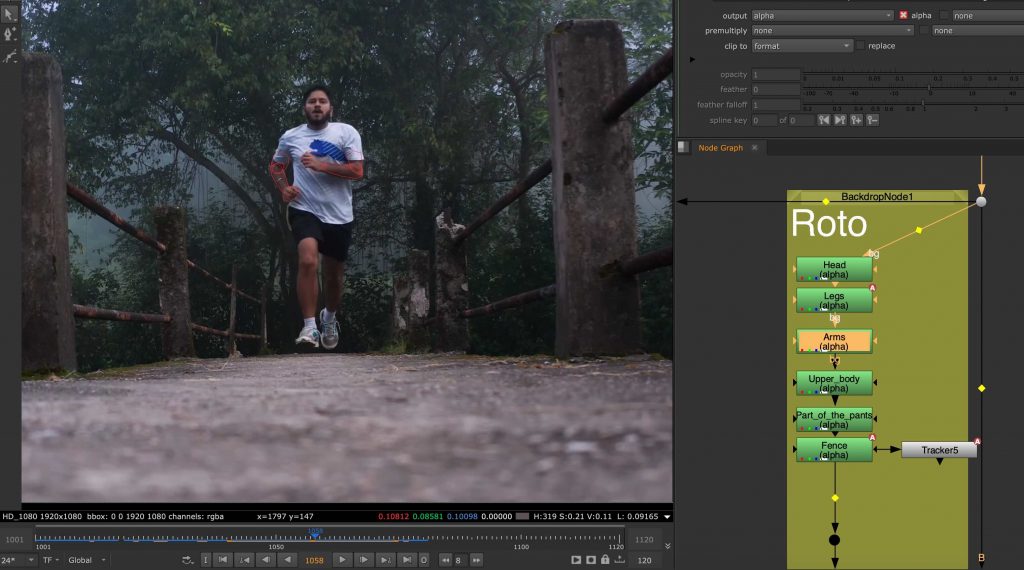
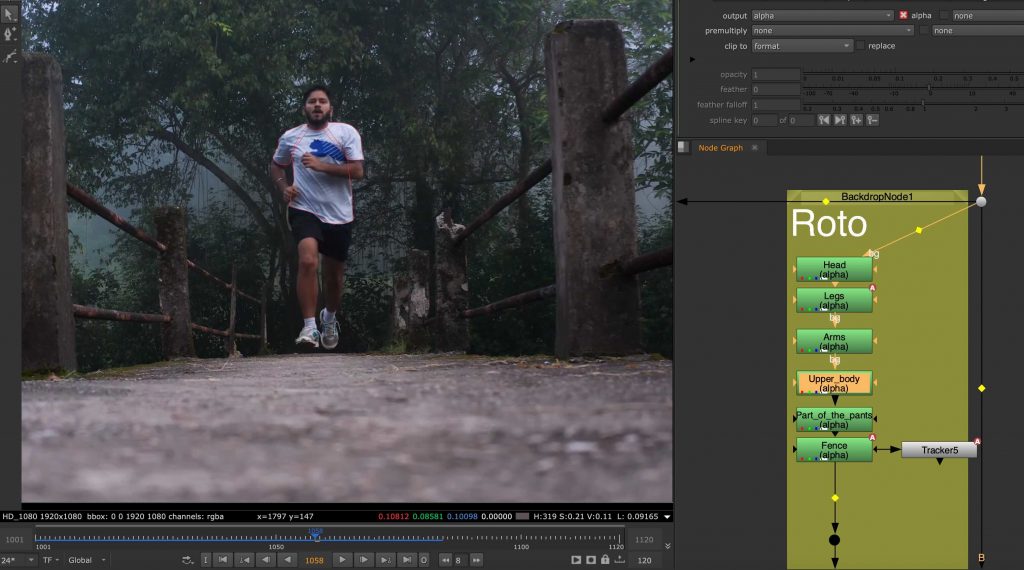
The roto nodes:
I split the roto into different body parts, and in some cases separated them even more. This approach made the task easier to handle and helped improve accuracy across the sequence.
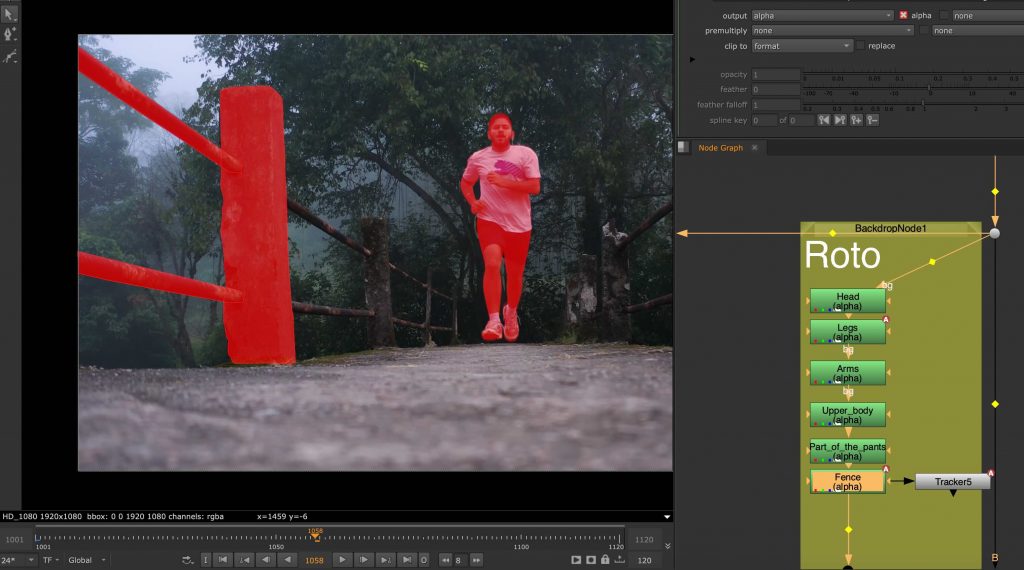
Object Tracking and Integration
Following the roto, we worked on tracking static elements within footage, such as the columns beside the running man. This helped us understand how tracking data could be used to anchor elements into a scene and maintain consistency across frames. It was a useful step towards thinking more carefully about how live-action footage and digital elements can exist together in a believable way.
Landscape tracking:
Another task involved tracking multiple mountain layers from aerial footage. Each mountain plane was treated separately, allowing us to understand depth and parallax within the scene. This exercise was done in preparation for a later balloon festival project and helped introduce a more structured node workflow, as well as a clearer understanding of how environments can be broken down into manageable layers.
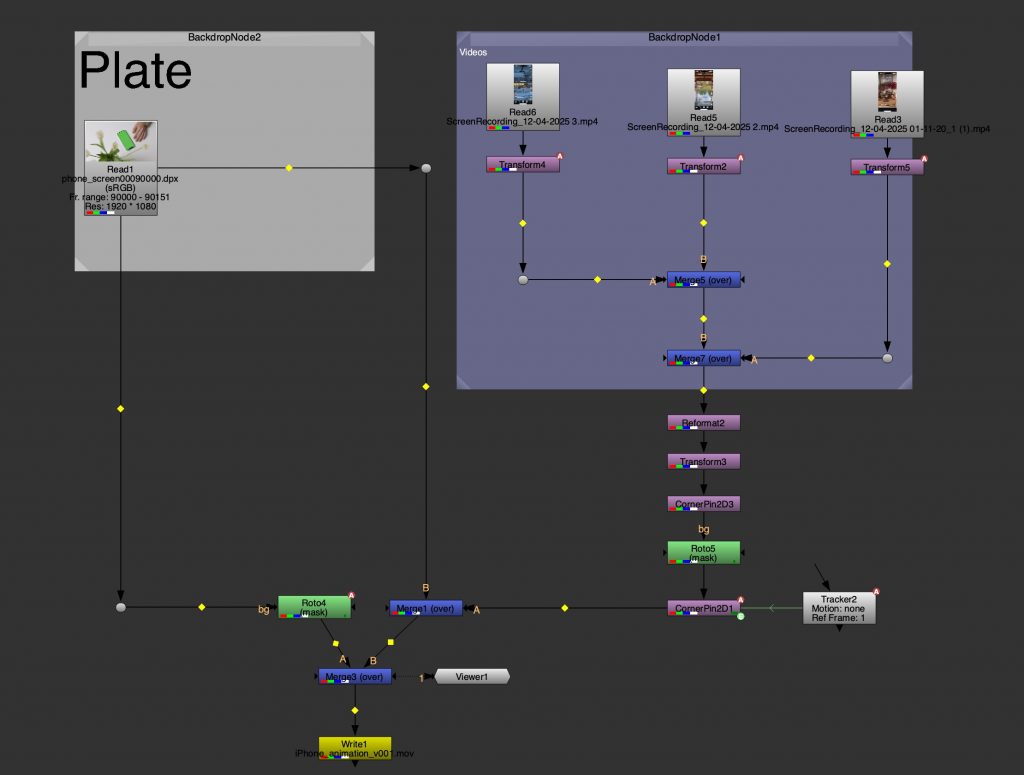
Screen Interaction and Detail Work:
This task focused on combining tracking, animation, and rotoscoping in Nuke through a phone interaction shot. I worked on isolating the hand and fingers while compositing multiple pieces of content onto the phone screen, making them respond to the scrolling movement. The main aim was to ensure that the screen content felt naturally connected to the physical motion of the hand, rather than appearing static or overlaid. This required careful roto work, accurate tracking, and attention to timing so the interaction felt believable. The exercise brought together several techniques learned throughout the unit, including masking, layering, and compositing interactive elements within live-action footage.